Carrier V2203-DI (26--00128) User Manual
Page 57

2--31
62--11362
2.3.4 Crankshaft (Continued)
2.3.4.f Crankshaft Journal to Crankshaft Bearing
#2 Clearance
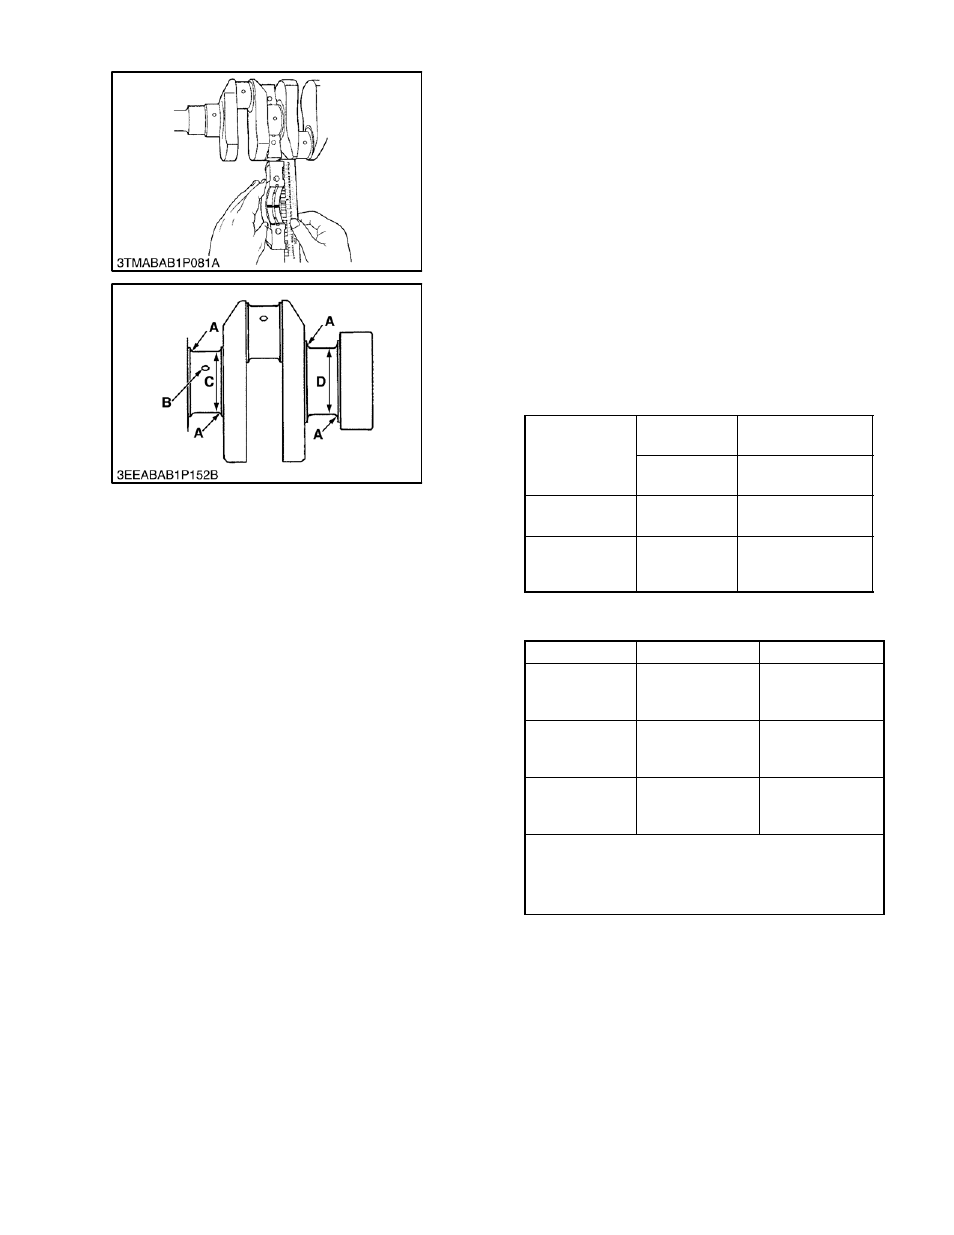
1. Put a strip of plastigage on the center of the crank-
shaft journal.
2. Install the bearing case and tighten the bolts to spe-
cification.
3. Remove the bearing case again.
4. Measure the amount of the flattening with the scale to
get the clearance.
5. If the measurement exceeds the allowable limit re-
place crankshaft bearing #2.
6. If the allowable limit is not attainable with a standard
size bearing, install an undersize bearing by referring
to the table below.
NOTE
Be sure not to move the crankshaft while the
bearing bolts are tightened.
Crankshaft
Journal to #2
Bearing
Clearance
Factory
Specification
0.040 to 0.104 mm
0.00158 to 0.00409 in.
Allowable
Limit
0.2 mm
0.0079 in.
Crankshaft
Journal O.D
.
Factory
Specification
59.921 to 59.940 mm
2.3591 to 2.3598 in.
Crankshaft
Bearing Bearing
I.D.
Factory
Specification
59.980 to 60.025 mm
2.3615 to 2.3631 in.
(Reference)
Undersize dimensions of crankshaft journal.
Oversize
0.2mm / 0.008 in.
0.4mm / 0.016 in.
Dimension A
2.8 to 3.2 mm radius
0.11 to 0.12 in.
radius
2.8 to 3.2 mm radius
0.11 to 0.12 in.
radius
Dimension B
1.0 to 1.5 mm radius
0.040 to 0.059 in.
radius
1.0 to 1.5 mm radius
0.040 to 0.059 in.
radius
Dimension C
59.721 to 59.740
mm
2.3513 to 2.3519 in.
59.521 to 59.540
mm
2.3433 to 2.3440 in.
The crankshaft journal must be fine--finished to higher than
0.4--S.
*Holes to be de--burred and edges rounded with 1.0 to 1.5 mm
(0.040 0.059 in.) relief.
