Carrier V2203-DI (26--00128) User Manual
Page 56

2--30
62--11362
2.3.4 Crankshaft (Continued)
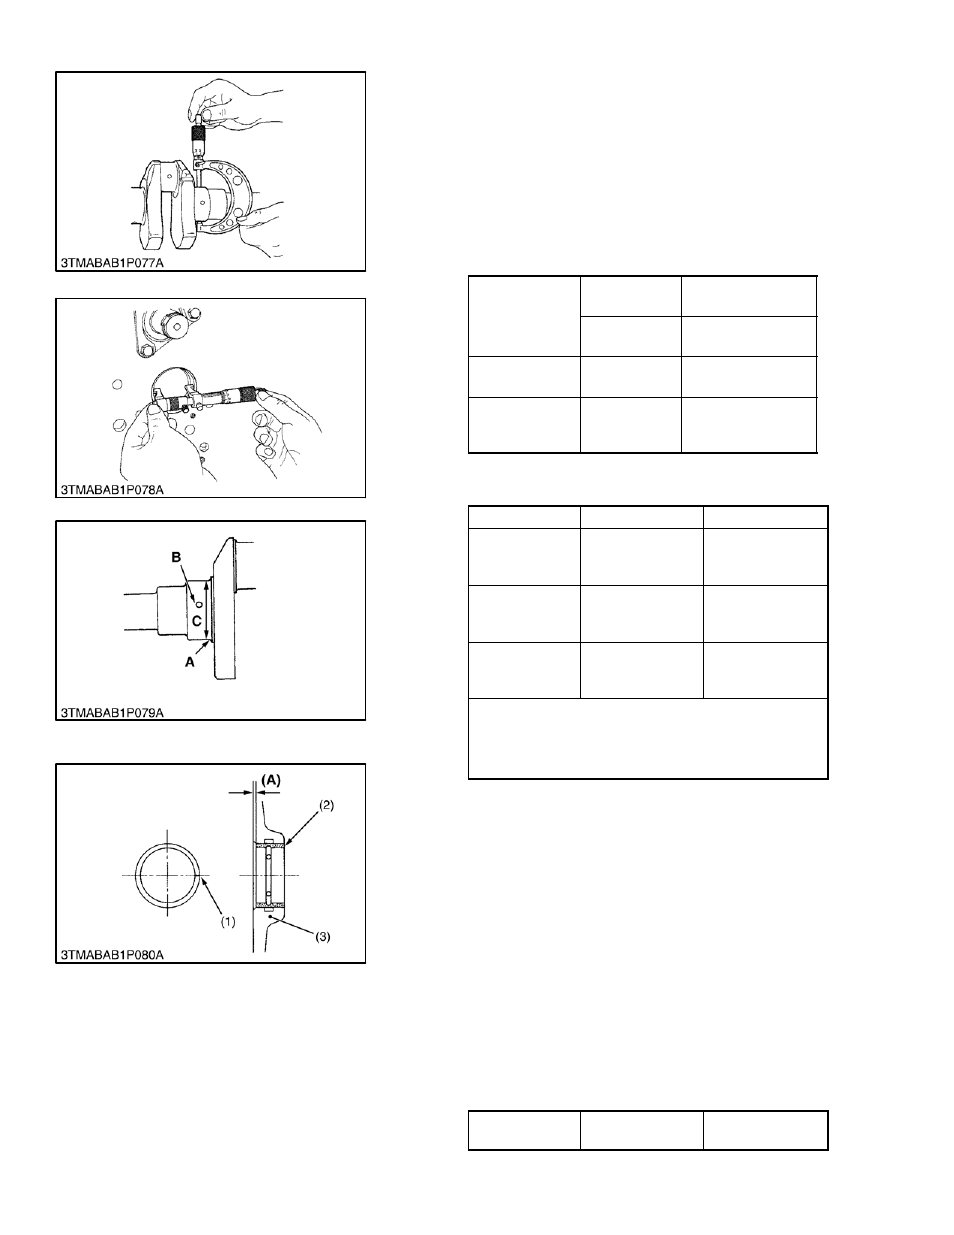
1. Seam
2. Crankshaft Bearing #1
3. Cylinder Block
A Dimension
2.3.4.d Crankshaft Journal to Crankshaft Bearing
#1 Clearance
1. Measure the O.D. of the crankshaft journal with an
outside micrometer.
2. Measure the I.D. of crankshaft bearing #1 with an in-
side micrometer and calculate clearance.
3. If the clearance exceeds the allowable limit, replace
crankshaft bearing #1.
4. If the allowable limit is not attainable with a standard
size bearing, install an undersize bearing by referring
to the table below.
Crankshaft
Journal to #1
Bearing
Clearance
Factory
Specification
0.040 to 0.118 mm
0.00158 to 0.00464 in.
Allowable
Limit
0.2 mm
0.0079 in.
Crankshaft
Journal O.D.
Factory
Specification
59.921 to 59.940 mm
2.3591 to 2.3598 in.
Crankshaft
Bearing Bearing
I.D.
Factory
Specification
59.980 to 60.039 mm
2.3615 to 2.3637 in.
(Reference) Undersize dimensions of crankshaft
journal.
Oversize
0.2mm / 0.0008 in.
0.4mm / 0.0016 in.
Dimension A
2.8 to 3.2 mm radius
0.11 to 0.12 in.
radius
2.8 to 3.2 mm radius
0.11 to 0.12 in.
radius
Dimension B
1.0 to 1.5 mm radius
0.040 to 0.059 in.
radius
1.0 to 1.5 mm radius
0.040 to 0.059 in.
radius
Dimension C
59.721 to 59.740
mm
2.3513 to 2.3519 in.
59.521 to 59.540
mm
2.3434 to 2.3440 in.
The crankshaft journal must be fine--finished to higher than
0.4--S.
*Holes to be de--burred and edges rounded with 1.0 to 1.5 mm
(0.040 0.059 in.) relief.
2.3.4.e Replacing Crankshaft Bearing #1
(A) When Removing
1. Press out the crankshaft bearing #1 (2) using a crank-
shaft bearing (1) replacing tool.
(B) When Installing
1. Clean a new crankshaft bearing #1 (2) and crankshaft
journal bore, and apply engine oil to both.
2. Using the crankshaft bearing (1) replacing tool, press
in the new bearing #1 (2) so that its seam (1) directs
toward the exhaust manifold side.
NOTE
Be sure to align the bushing so that the oil hole
in the bushing aligns with the oil port in the con-
necting rod.
Dimension A
Factory
Specification
4.2 to 4.5 mm
0.166 to 0.177 in.
