Heli-Max HMXE0828 User Manual
Page 9
9
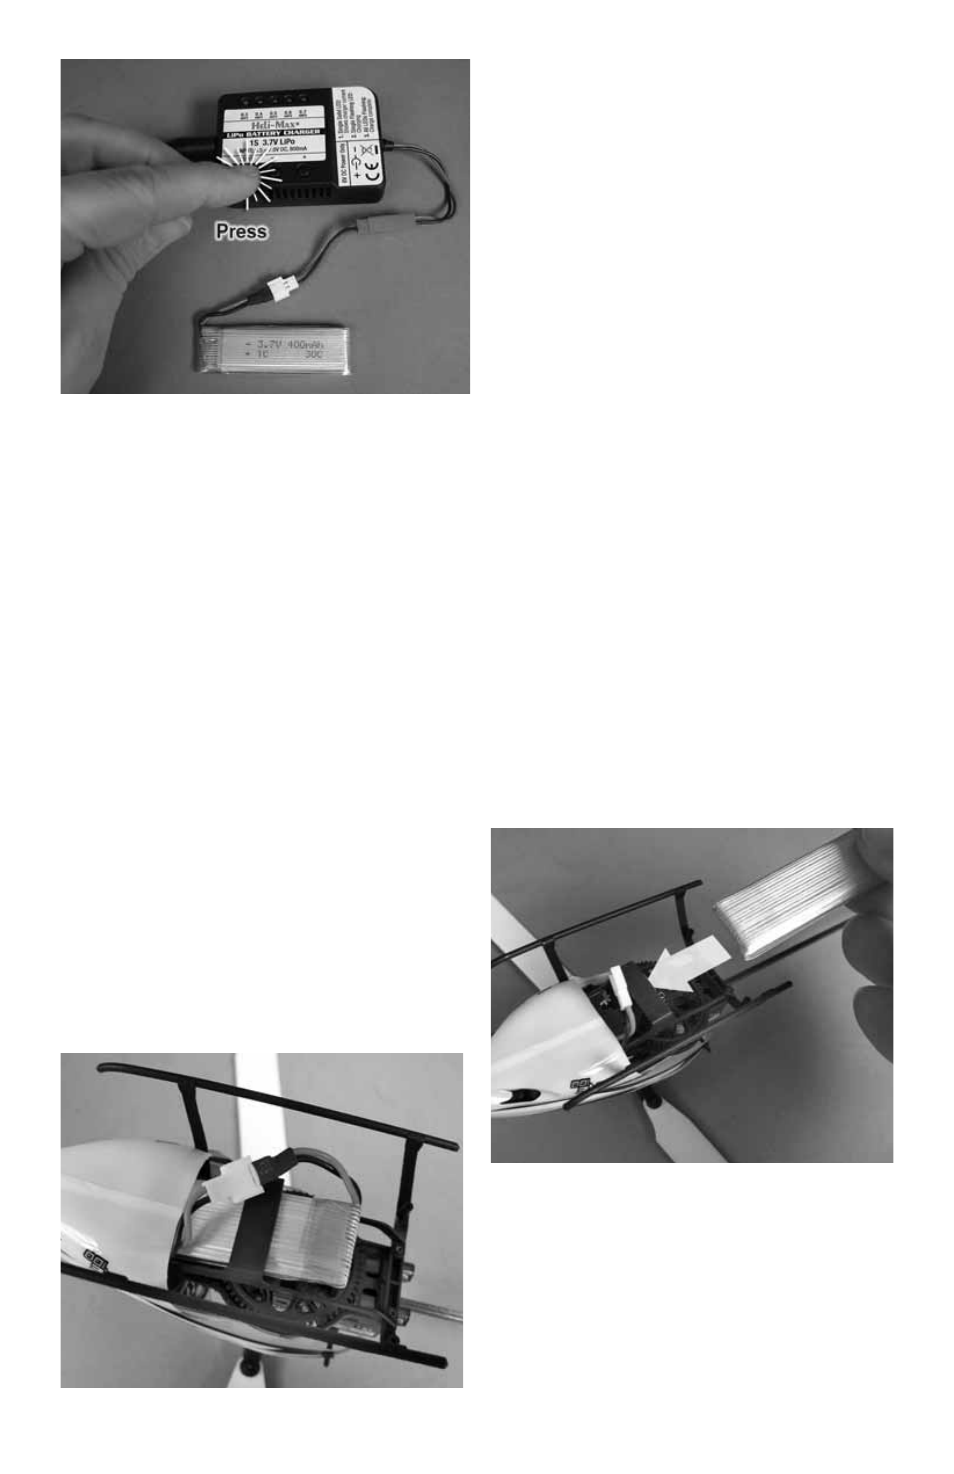
At this point you can select a slower or
faster charge rate by pressing the - or
+ buttons located on the face of the
charger. While the LED is illuminated
you will need to press the charge button.
You will hear 3 beeps and the charge
cycle will begin.
When charging is complete, all the LEDs
will flash and you will hear a steady set
of beeps coming from the unit. Unplug
the flight battery. It is now ready to use.
NOTE: Your battery charger ranges from .3AMPS to .7AMPS in .1 amp increments.
The higher this value, the faster the battery will charge. We recommend charging
on the .5AMP setting (Default).
TURN THE TRANSMITTER ON
Verify that the HOLD/FLAP and UP-1/GEAR functions are off and slide the
power switch up to turn the transmitter on. If the transmitter is turned on with
the HOLD/FLAP, UP-1/GEAR or throttle stick forward, the screen will show “3D”
or “T-H” and a warning will sound. Turn the HOLD/FLAP and UP-1/GEAR
functions off and move the throttle stick to the low position to continue. Now is
a good time to make sure the electronic trim buttons on the transmitter are
centered. We do not need to use them as the Incredible Heli-Max TAGS™ system
controls all flight center trims.
INSTALL THE FLIGHT BATTERY
Slide the battery into the helicopter.
Make sure the battery is slid all the way
to the front of the battery tray.
Make sure the battery wires don’t come
in contact with any of the rotating parts.