Build the stab & elevators, Assemble the stab sheeting build the tail surfaces – Great Planes Giant Extra 330L Kit - GPMA0250 User Manual
Page 9
Right now, while the building board is clear, is a great time
to assemble the stab sheeting.
❏ 1. See the Expert Tip that follows, then edge glue four
sets of two 3/32"x4"x24" balsa sheets together, creating four
stab sheets. Set them aside.
You may separate the stab and elevator drawing from the
plan by cutting along the dashed line. Don’t forget to always
cover the plans with Great Planes Plans Protector so the
glue won’t stick to the plan.
❏ ❏ 1. Tape the left stab plan to the building board, and
cover the stab drawing with Great Planes Plans Protector
(so you won’t glue the stab to the plan!)
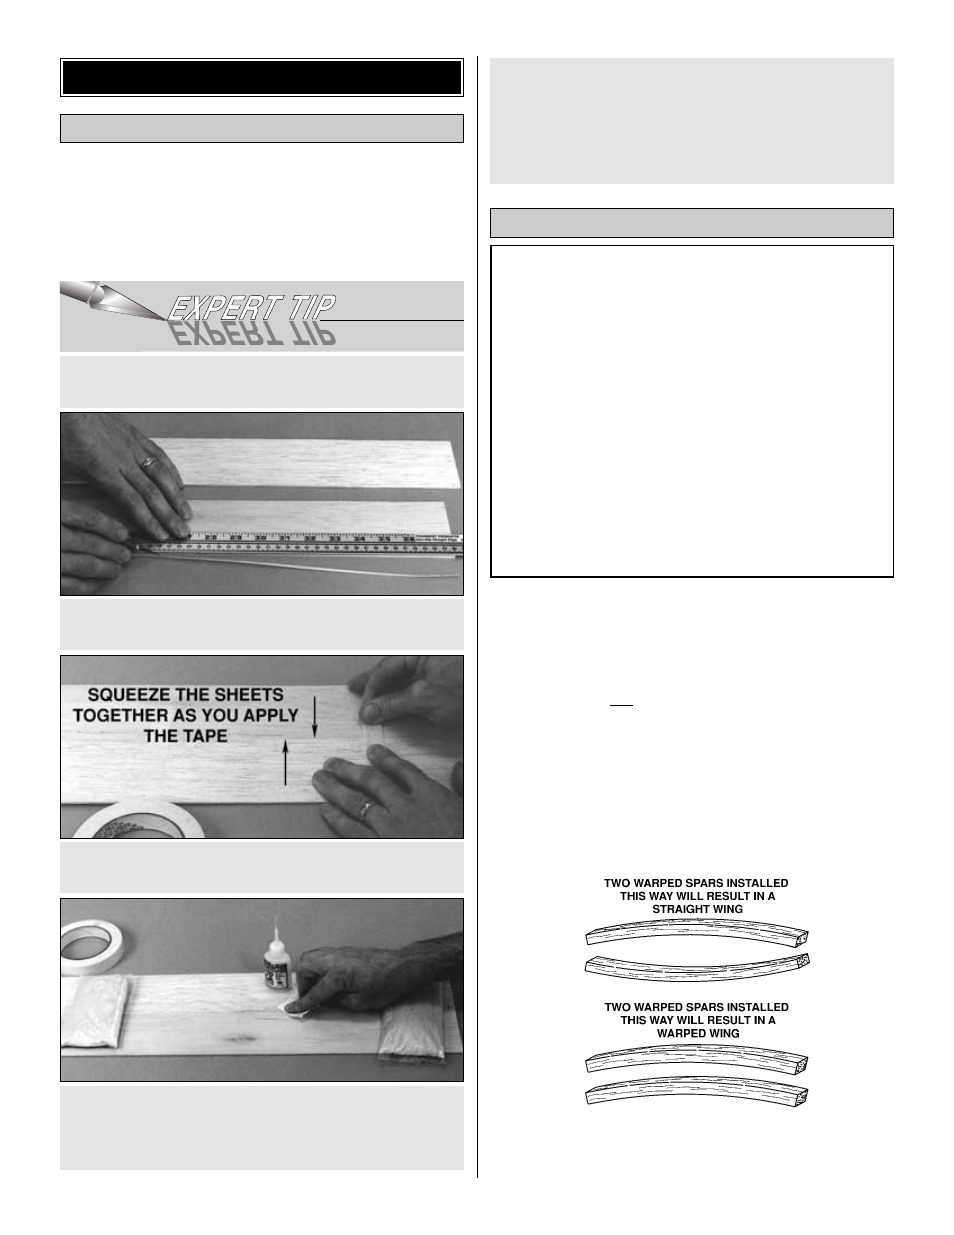
❏ ❏ 2. Before using the 1/8" x 1/4" x 24" basswood spars,
examine them carefully for warps. If the spars are warped
slightly, try to “balance them out” by installing the warped
spars in opposite directions (see sketch).
❏ ❏ 3. Position the spar on top of the plan with excess
overhanging both S1 and S8. Pin it in place inboard of S1
and outboard of S8.
The construction of this stab, fin and wing are all
engineered specifically to provide perfectly straight and
true panels with minimum effort on your part. To do so,
the building sequence and pieces are quite different from
what you may be accustomed to. Be sure to read all steps
carefully and pay particular attention to the instructions of
when and where to apply adhesives. DO NOT GLUE until
instructed to do so.
Occasionally outside forces such as humidity and
dramatic temperature changes can result in slight
inaccuracies in the dimensions of printed plans. One of
the many advantages of a fully interlocking stab such as
this one is that exact alignment over a printed plan is not
necessary to ensure a straight stab. If the ribs do not
align perfectly over the plans, don’t worry! As long as the
spar is aligned as shown, the stab will be right.
Build the Stab & Elevators
D. Turn the sheet over and remove the masking tape,
then apply thin CA to the seam the same way you did for
the other side.
E. Sand the sheet flat and smooth with your bar sander
and 150-grit sandpaper.
C. Turn the sheet over and place weights on top of the
sheet to hold it. Apply thin CA sparingly to the seam
between the two sheets, quickly wiping away excess CA
with a paper towel as you proceed.
B. Use masking tape to tightly tape the two sheets
together, joining the trimmed edges.
A. Use a metal straightedge as a guide to trim one edge
of both sheets.
HOW TO JOIN SHEETING
Assemble the Stab Sheeting
BUILD THE TAIL SURFACES
9