Great Planes Giant Extra 330L Kit - GPMA0250 User Manual
Page 29
vertical trusses. Glue F7 and then F6 in position.
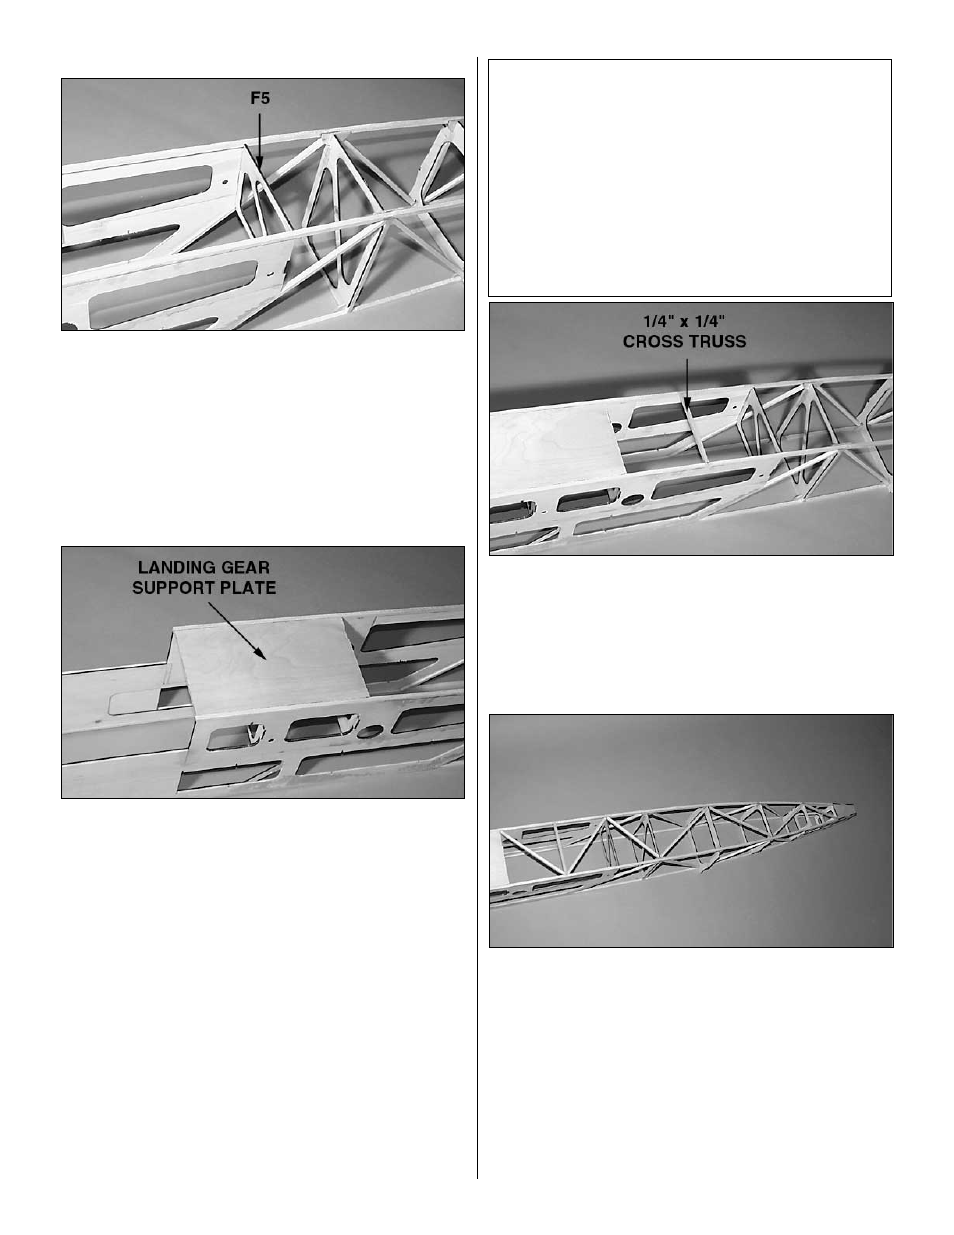
❏ 7. Select the die-cut 1/8" ply former F5. Position it at the
trailing edge of the forward box sides and glue it to the
forward center box sides.
❏ 8. Select the two die-cut 1/8" ply formers F3/4. Position
them in their notches in the forward center box sides and use
thin CA to glue them in place in the F3 and F4 locations.
NOTE: F3 and F4 are the same part; two are provided for you.
❏ 9. Position and glue the 1/8" x 5-1/2" x 9-3/4" birch ply
landing gear support plate to the forward fuse sides
and formers.
❏ 10. Using a 1/4" x 1/4" x 36" balsa stick, cut, fit and glue
one side-to-side cross truss between the bottom longerons
which is centered between formers F4 and F5 as shown on
the plan.
❏ 11. Using the leftover 1/4" x 1/4" balsa stick and an
additional 1/4" x 1/4" x 36" balsa stick, cut, fit and glue the
seven bottom diagonal cross trusses as shown on the plan.
DESIGNER’S NOTE: Steps 10 through 12 are where the
fuselage is locked into its final configuration. Check for
straightness and be sure the fuse is positioned properly
over the plan. It is CRITICAL that it does not have a twist
or banana shape. Be very careful during these steps to
make sure the cross trusses are a perfect fit and do not
bow the fuse longerons.
We would like to again remind you of our earlier caution
– trust the design. It is very strong and light weight. It
performs exceptionally well and is able to stand the most
extreme aerobatic maneuvers in its stock configuration.
29