Great Planes Giant Extra 330L Kit - GPMA0250 User Manual
Page 11
❏ ❏ 16. Use a sanding block to shape the LE web so it aligns
with the tops of the ribs and the shape of the airfoil as shown
in the sketch. Be careful not to gouge the ribs or LE web.
❏ ❏ 17. Coat the ribs, spar, LE web, aft spar and spar/TE
web joint liberally with medium CA. Carefully position one of
the stab sheets you previously built flush against the TE
web and overhanging S1, S8 and the LE web, being sure
the TE web and spar are both pressed down tight against
the plan. Weight it in place and allow the CA to cure.
❏ ❏ 18. Because you have sheeted the top of the stab, you
will need to pull the stab, pins and all, from your work
surface, then unpin the spars from the plan. Trim and sand
the sheeting from the top side of the stab behind the main
web and outboard of S7. Trim and sand the sheeting, spars
and stab tube socket flush with the LE web, ribs S1 and S8.
Hint: Now is a great time to make sure the top sheeting is
firmly glued to all ribs, spars and webs. Touch up with
medium CA as necessary.
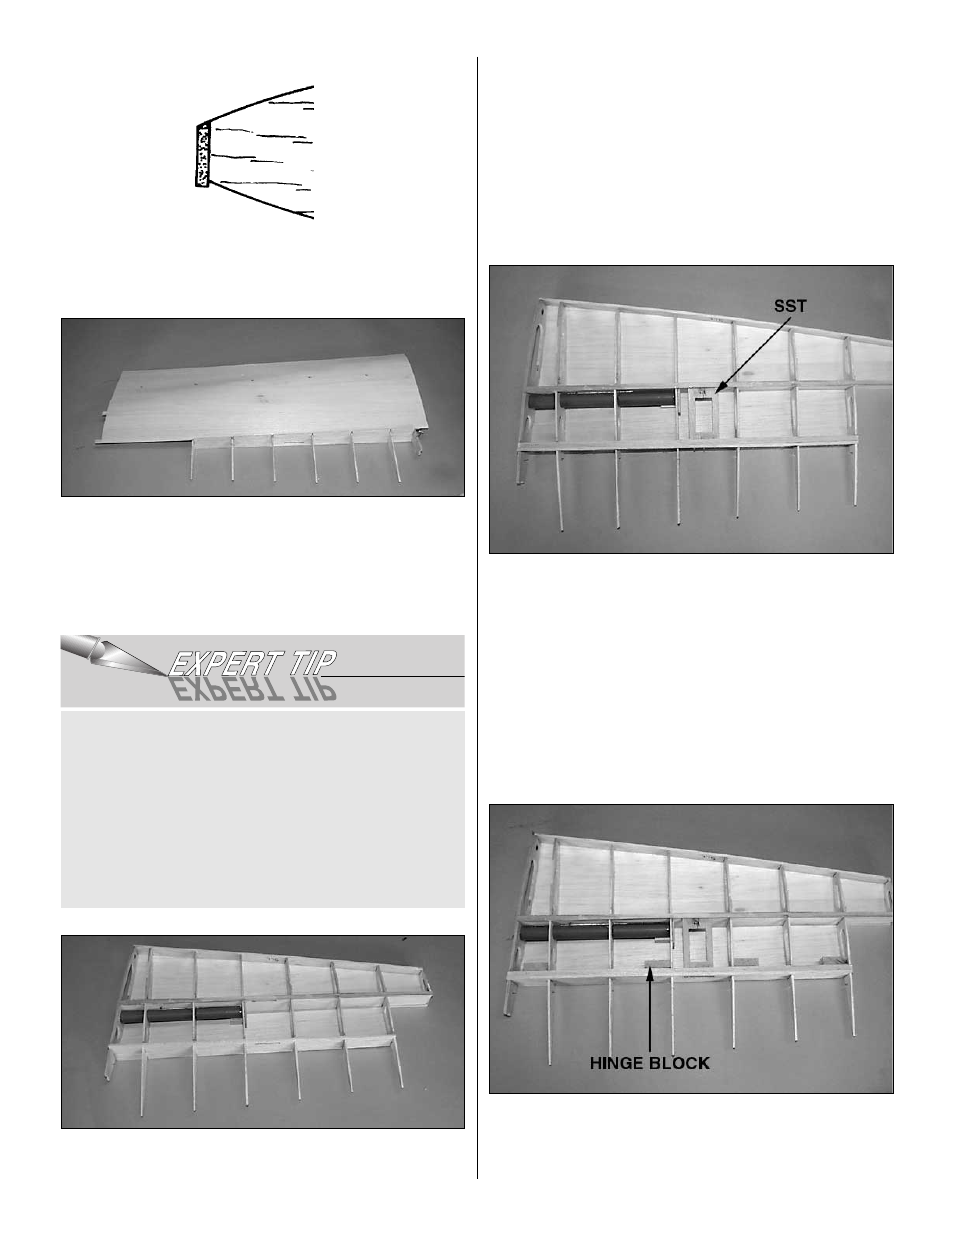
❏ ❏ 19. Fit and glue the die-cut 1/8" ply elevator servo tray
(SST) in the slots in the webs.
❏ ❏ 20. Fit and glue the bottom aft stab spar into the ribs
and against the TE web. Cut the aft stab spar flush with S7
and S1.
❏ ❏ 21. From a 3/8" x 5/8" x 24" balsa stick, cut twelve 3/8"
x 5/8" x 1-1/4" hinge blocks. Position and glue the 8 hinge
blocks within this stab half, against the webs and ribs as
shown on the plan.
You can coat the stab parts with CA, then lightly spray the
underside of the sheeting with CA Accelerator, then roll
the sheeting carefully from the trailing edge web, over the
ribs and over the LE. This guarantees an immediate set
with no need to weight the sheeting, and with no chance
of movement of the sheeting.
CAUTION: This technique is “not for the faint of heart” and
requires a steady, confident hand, as the accelerator
WILL cure the CA immediately and any errors made in
placement will be VERY difficult to fix.
11