Great Planes Giant Extra 330L Kit - GPMA0250 User Manual
Page 43
From leftover 1/4" x 1/4" basswood, cut two 2" long cockpit
bolt supports. Reach in through the fuselage and glue the
bolt supports to the aft end of the bottom of the cockpit floor,
flush against, but not glued to, the insides of the upper outer
shell stringers.
❏ 15. Centered vertically on the upper outer shell stringer
and centered horizontally on the cockpit bolt support you
just installed, drill a 1/16" hole through the sheeting, the
stringer and the bolt support. Repeat on the other side of
the fuselage.
❏ 16. Turn the aircraft right-side-up and remove the cockpit.
Enlarge the hole to 1/8" through the balsa upper outer shell
stringers ONLY, being careful not to enlarge the holes in the
bolt supports.
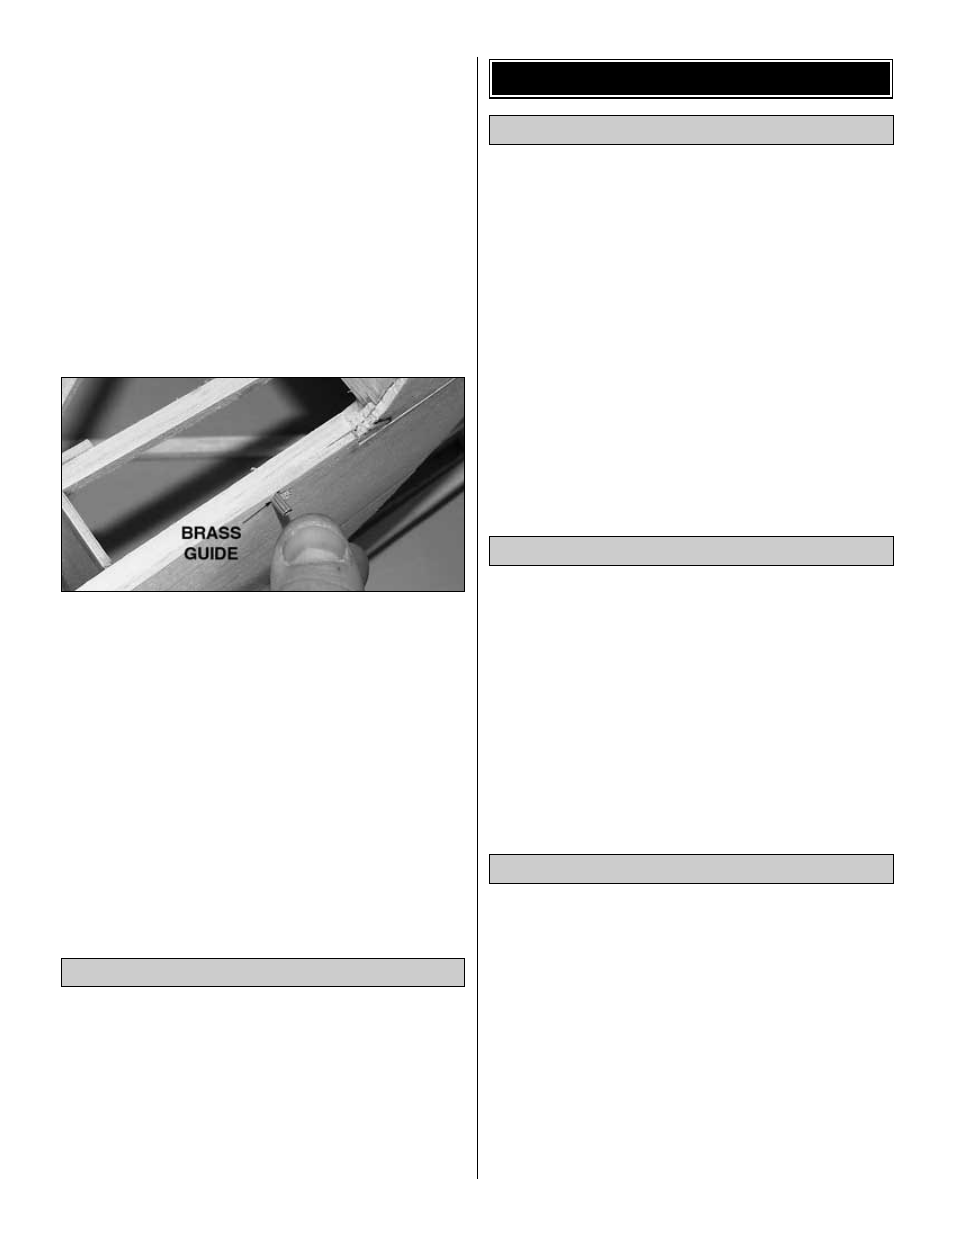
❏ 17. Insert the provided 1/8" x 3/8" brass cockpit bolt
guides in the 1/8" holes you just drilled so that the guide is
flush with the inboard edge of the upper outer shell
stringers. Sand the brass flush with the balsa sheeting.
❏ 18. Position the cockpit on the aircraft. Insert the provided
2-56" x 1" screws through the brass guides, screwed through
the bass supports and install blind nuts on the back side of the
bass supports. Secure the blind nuts to the bass with thin CA.
NOTE: You may need to grind a little off one edge of the blind
nut to get the blind nut to fit against the cockpit floor. This will
not affect the functionality of the blind nut at all.
❏ 19. Remove the cockpit and turn it upside down. Harden
the balsa cockpit floor around the bass cockpit supports
with thin CA.
❏ There are a variety of ways to mount wheel pants. On the
prototype we selected DuBro
™
3/16" long axles. We glued a
1/8" x 1-1/2" x 1-1/2" square of leftover ply to the inside of
each wheel pant. We then drilled a hole through the wheel
pant and ply large enough to accept the head of the axle.
We fit the wheel pant over the axle and aligned it. We drilled
a 5/32" hole through the wheel pant, using the hole in the
landing gear as a guide and mounted the wheel pant with a
6-32x1/2" allen bolt and blind nut.
Do not confuse this procedure with “checking the C.G.”,
which will be discussed later in the manual.
A model which is not laterally balanced properly may exhibit
a variety of unpleasant tendencies, ranging from
uncharacteristic tip stalls to problems with spin entries. This
aircraft, when balanced properly, has NO such bad
tendencies. Be sure to check the lateral balance carefully as
described to help ensure that the model exhibits the same
exceptional handling qualities of our prototypes.
❏ 1. With the wing level and attached to the model and the
canopy off (and the engine and muffler installed), have one
person lift the model by the prop shaft and the other lift it by
the top of the rudder.
❏ 2. Lay a level across the fuselage where the cockpit sets
and add weight to the high tip until the model hangs
perfectly level.
❏ 1. Remove all the hinges, servos, and control horns from
the ailerons, elevators, and rudder. Remove the engine and
any other hardware you may have installed.
❏ 2. Most of the model should be rough-sanded by now,
with all the tabs and rough edges sanded even. Fill all
dents, seams, low spots, and notches with Hobby Lite Balsa
Colored Filler.
❏ 3. After the filler has dried, use progressively finer grades
of sandpaper to even all the edges and seams and smooth
all surfaces. Remove all balsa dust from the model with
compressed air or a vacuum with a brush and a tack cloth.
Cover the model with Top Flite MonoKote Film. Here are a
few recommendations to help you cover your giant Extra.
Before you cover the fuselage, first apply 1/4" wide strips of
MonoKote film in the corners of the fin and the fuse joint, then
proceed to cover the fin with pre-cut pieces that meet in the
corners and overlap the 1/4" strips. Never cut the covering
on the fin after it has been applied except around the
leading and trailing edges and at the tips. Modelers who
cut covering on top of the wood structure may cut through the
covering and into the stab or fin. This will weaken the structure
to a point where it may fail during flight. Since the tips of the
wings, ailerons, fin, rudder, elevators and stab are squared
off, it is easiest to cover the tips before you cover the tops
and bottoms.
Cover with MonoKote Film
Prepare the Model for Covering
Balance the Model Laterally
FINISH THE MODEL
Mount the Wheels & Wheel Pants
43