Great Planes Giant Extra 330L Kit - GPMA0250 User Manual
Page 44
After the model is covered, you must fuel-proof all exposed
wood. You may do so with fuel-proof model paint, 30-minute
epoxy thinned with alcohol, or finishing resin.
Top Flite LustreKote
®
fuel-proof paint is recommended for
painting all the parts. (The wheel pants should be removed
from the landing gear prior to painting.) Apply one coat of
LustreKote primer to fill all the small scratches left from
sanding as well as small pin holes in any filler and in the
fiberglass. Wet sand between coats with 400-grit sandpaper
and apply additional coats of primer if necessary. If the parts
are primed properly, a few light coats of color will quickly
provide you with a beautiful match to the MonoKote.
❏ 1. Reinstall the wing and stab anti-rotation dowels, being
sure to center them in the fuse. Glue in place with medium
CA. Note: These dowels take a lot of the load of the plane.
Make sure these are securely glued in place.
❏ 2. Permanently attach the control surfaces. Start with the
elevators and stab. Cut the covering from the hinge slots. Install
your hinges per the manufacturer’s instructions. If you are using
Robart’s Giant Scale Pin Hinges as we did on the prototypes,
we recommend coating the pivot point of the hinge with
petroleum jelly prior to epoxying the hinges in place.
❏ 3. Attach the rudder and ailerons as you did the elevators.
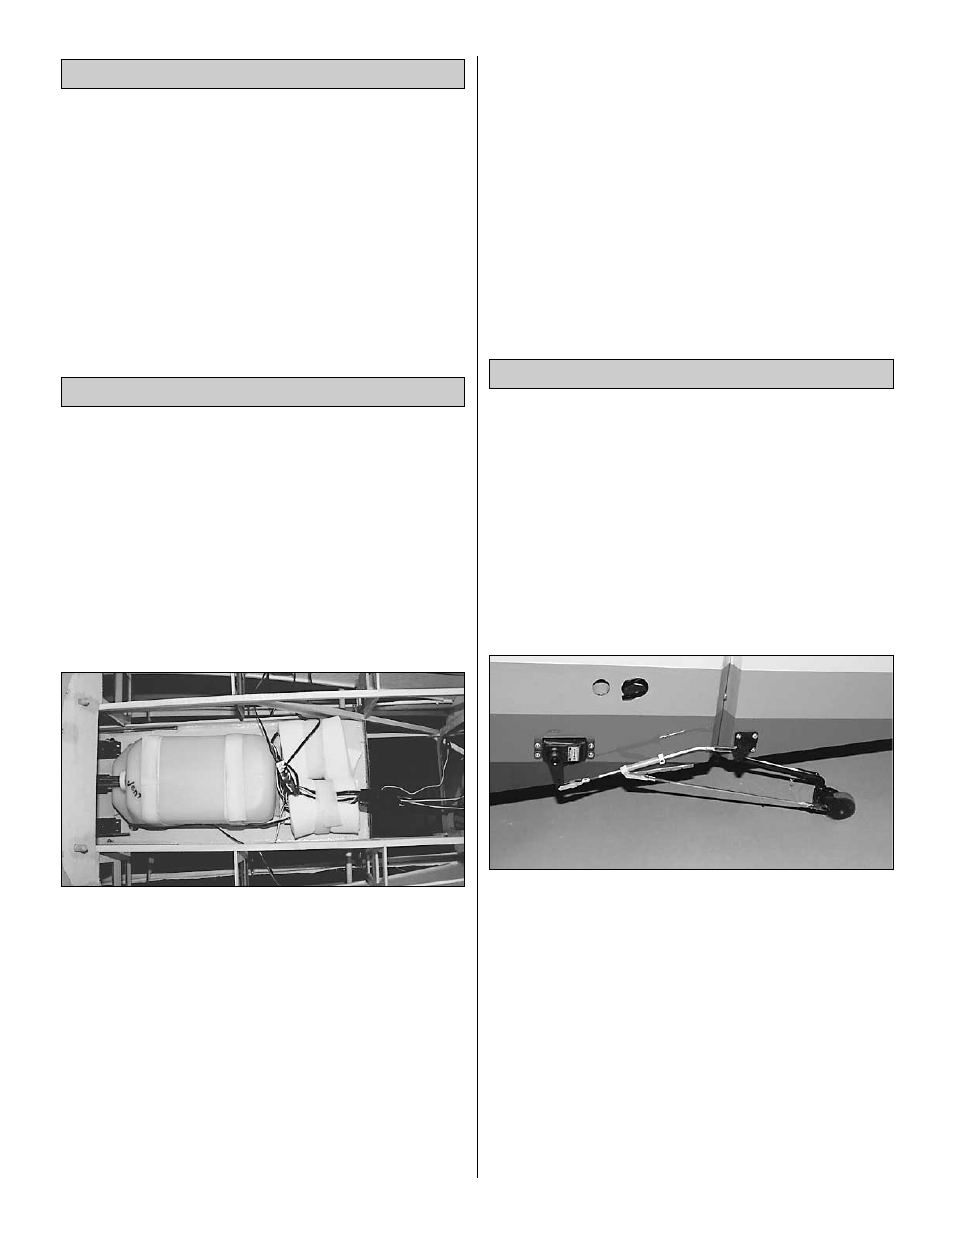
❏ 4. Assemble and install your tank, being sure to use the
appropriate type of tank, fuel fittings, etc for your fuel type.
(Note that the recommended Great Planes 24 oz. tank and
its included hardware are compatible with both gas and
glow fuels.) Glue a 2" long piece of leftover 1/4" x 1/4" balsa
at the leading and trailing edges of the tank. Secure the tank
to the tank/servo tray with Velcro
™
straps to allow easy
removal and service. NOTE: This location is ideal as it
mounts the tank over the CG and eliminates any CG
changes as fuel burns off. Most gasoline engines have
pumped carbs and will have no problem drawing fuel from
here. However, if your engine is not pumped or you are
unsure of its ability to draw this far, you will want to mount
your tank up against the firewall. You will need to build a tray
for it and secure it in that location.
❏ 5. Install any fuel filling equipment you choose to use. We
recommend mounting it into the fuse side just behind the
cowl. Note that it may be necessary to support the sheeting
with a piece of leftover ply.
❏ 6. Reinstall the engine to the mount and the muffler to the
engine. Connect the fuel lines to the carb and exhaust.
Follow your engine manufacturer’s recommendations for
installing any ignition or other equipment required for your
particular engine.
❏ 7. Reinstall the main gear, tail gear, wheels, wheel pants
and tail wheel. HINT: Even after the servo tray gets glued in
place you can still access the main gear nuts by reaching in
through the wing opening.
❏ 1. Reattach all control horns.
❏ 2. Mount all servos in the aircraft and fuselage servo tray,
being sure to secure all servo lead/extension joints with
heatshrink, tape or other protective covering to avoid an
accidental disconnect. Note that the servo lead/extension
connection at the wing/fuse joints and stab/fuse joints do
not get permanently secured in this manner. The servo tray
will not get glued in until all radio gear has been installed for
easy handling and set up. HINT: With removable flying
surfaces such as the Extra’s wings and stab, it is easiest to
do pushrod set up with the surfaces off the aircraft and the
receiver and receiver battery outside the aircraft.
❏ 3. Build your pushrods and hook up the servos to the
control surfaces, being sure to properly center the servos
and check direction on all controls. On the prototype we
used Dubro
®
giant scale control horns, steel clevises and
4-40 rod threaded on one end and soldered on the other for
all except the throttle and kill switches.
IMPORTANT NOTE: NEVER use threaded clevises on both
ends of any pushrod, as vibration may unscrew the pushrod
from both clevises!
NOTE: We strongly recommend using non-metal flexible
pushrods (GPMQ3710) and nylon clevises (GPMQ3800) for
all pushrods going to any gasoline engine or servo operated
kill switch as a precaution against “noise” traveling back to
the radio equipment and causing radio inconsistencies
or interference.
Final Servo & Receiver Installation
Install the Hardware
Paint the Model
44