Mounting the landing gears install the firewall – Great Planes Giant Extra 330L Kit - GPMA0250 User Manual
Page 30
❏ 12. Turn the fuselage right-side-up. Using 1/4" x 1/4"x 36"
balsa sticks, fit and glue the 3 upper diagonal cross trusses.
Note: The upper cross trusses run opposite to the lower
cross trusses as shown on the plan.
❏ 1. Select the two pre-cut 1/4" x 5-1/2" x 6-7/32" ply
firewalls. Laminate them together with 6-minute epoxy. This
assembly is now known as the firewall or F1.
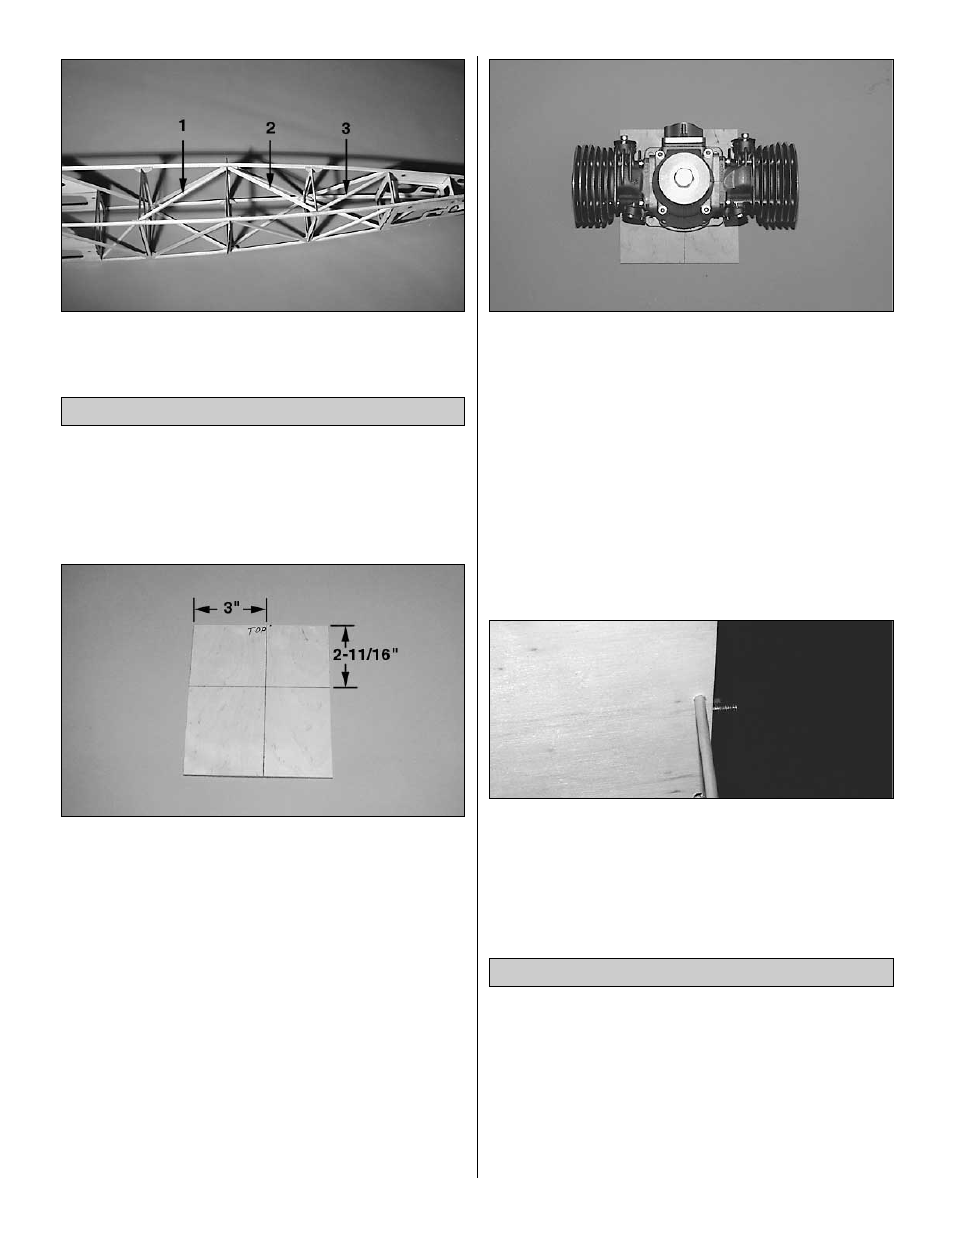
❏ 2. Mark a top front on your firewall. Make a vertical line 3"
from the left edge and a horizontal line 2-11/16" from the
top. (Note that this location is offset for the thrust angles
built into the model and will result in your crankshaft exiting
centered on the thrust line and on the cowl.)
❏ 3. Temporarily mount your engine to the firewall, centered
on the marks you just made. This is the technique we used
to mount the MacMinarelli engines: mark the four holes for
the mounting bolts onto the firewall. Drill 15/64" holes
through the firewall. Tap four 10-32 blind nuts (not included,
GPMQ3330) into the back of the firewall with a hammer.
Use thin CA around the blind nuts to help secure them,
being careful not to get CA in the threads. Use four 2" long
10-32 Allen bolts and #10 lock washers (not included) to
mount your engine to the firewall. Remove the engine and
set it and its hardware aside.
❏ 4. Aligning the forward edge of the firewall with the
forward edge of the forward box sides, glue the firewall to
the box sides with 30-minute epoxy. NOTE: Be sure to
clamp it in position and leave it to cure completely.
❏ 5. Drill three 1/8" holes one inch deep through each of the
forward fuse sides into the firewall. Space the holes evenly
down each side of the firewall. From the 1/8" dowel, cut 1"
long pieces. Glue the dowels into the firewall/box side with
6-minute epoxy and allow to cure completely.
Mounting the Landing Gears
Install the Firewall
30