Build the wing panels – Great Planes Giant Extra 330L Kit - GPMA0250 User Manual
Page 19
❏ 2. From a 1/4" x 1/4" x 6" balsa stick, cut eight 1/2" long
blocks and glue four of them onto one side of each jig,
aligning with one edge as shown in the sketch.
❏ 3. Select the two 25" phenolic wing tube sockets. Cut 6"
segments off each socket, setting aside one 6" socket for
going through the fuselage. The second 6" segment
is leftover.
❏ ❏ 1. Select the die-cut 1/8" balsa WLEWA, WLEWB,
WMWA, WMWB, WTEWA and WTEWB web pieces. Glue
WLEWA to WLEWB, WMWA to WMWB, and WTEWA to
WTEWB, using a straightedge to be sure the webs remain
straight. These 3 webs are now known as the leading edge,
main, and trailing edge webs.
❏ ❏ 2. Edge glue three 3/32" x 4" x 48" balsa sheets
together. Cut the sheets as shown above, cutting diagonally
so that you create two LE sheets.
❏ ❏ 3. Tape the right wing plan to the building board, and
cover it with Great Planes Plan Protector (so you won’t glue
the wing to the plan!) We are building the right wing right-
side-up over the right wing top view.
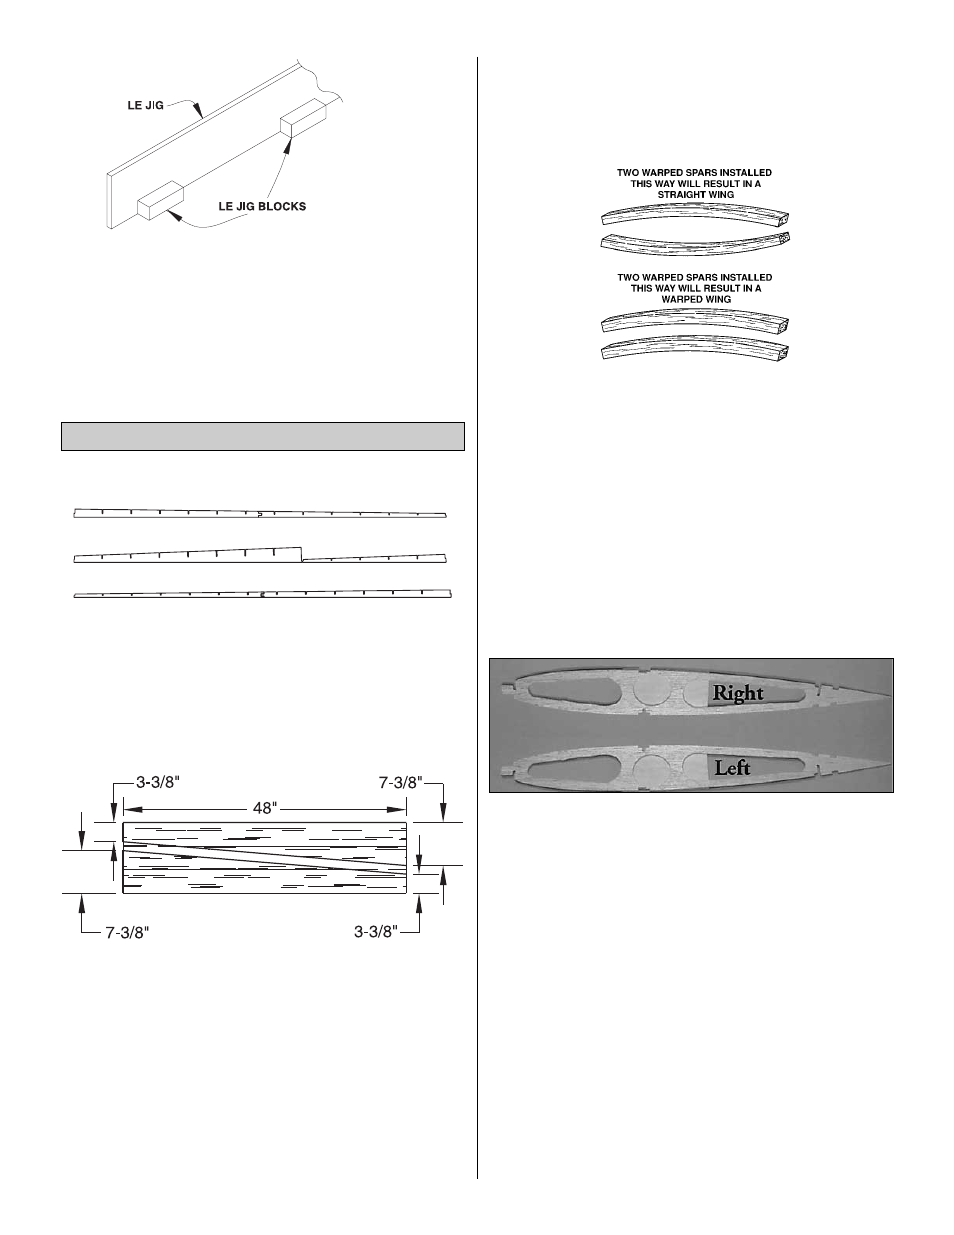
❏ ❏ 4. Before using the 1/8" x 1/2" x 48" basswood spars,
examine them carefully for possible imperfections. Look for
knots, soft spots, diagonal grain and any other
imperfections. If possible, position each spar so the
imperfections (if any) are on the outer half of the wing panel
(toward the tip), where they will be least affected by high
stress. If the spars are warped slightly, try to “balance them
out” by installing the warped spars in opposite directions
(see sketch).
❏ ❏ 5. Position the spar on top of the plan, allowing excess
to extend past both the inboard and outboard ribs. Pin in
position in three places; each end and in the center.
HINT: Instead of attempting to pin through the basswood,
capture the spar between two vertical pins at the middle of
the spar and cross-pin the spar on each end.
❏ ❏ 6. Carefully punch out one laser-cut 1/8" ply rib (R1)
and 5 laser-cut 3/32" balsa wing ribs (R2-R6). Slip the 1-
1/2" x 36" aluminum wing tube into the wing tube socket
and test fit the tube socket into the holes in the six laser-cut
ribs. Gently sand if necessary (as was done when building
the stab) so that the ribs easily slide onto the tube socket
but are not sloppy.
❏ ❏ 7. Glue the die-cut 1/8" ply wing tube end cap (WTEC)
to the outboard end of R6, being sure that the notches in the
rib and end cap are properly aligned. Similarly glue the die-
cut 1/8" ply dowel doubler (DD) to the outboard end of R1,
aligning the dowel holes. Note: Be SURE to double-check
that you have secured the end cap to the outboard end of
R6 with the wing tube holes toward the top of the wing. See
the photo to confirm your R6 and end cap are properly
assembled prior to gluing.
❏ ❏ 8. Carefully punch out eight die-cut 3/32" balsa wing
ribs (R7-R14). Sand the edges slightly to remove any die-
cutting irregularities. Be careful not to alter the shapes or
angles of any of the pieces.
NOTE: DO NOT GLUE until instructed to do so.
❏ ❏ 9. Position the main web you assembled previously on
top of the spar with the notched side up. Slide R1 into its
slots in the main web. Align the main web, centering it on
the spar.
WLEWB
WMWB
WTEWB
WLEWA
WMWA
WTEWA
Build the Wing Panels
19