Great Planes Giant Extra 330L Kit - GPMA0250 User Manual
Page 13
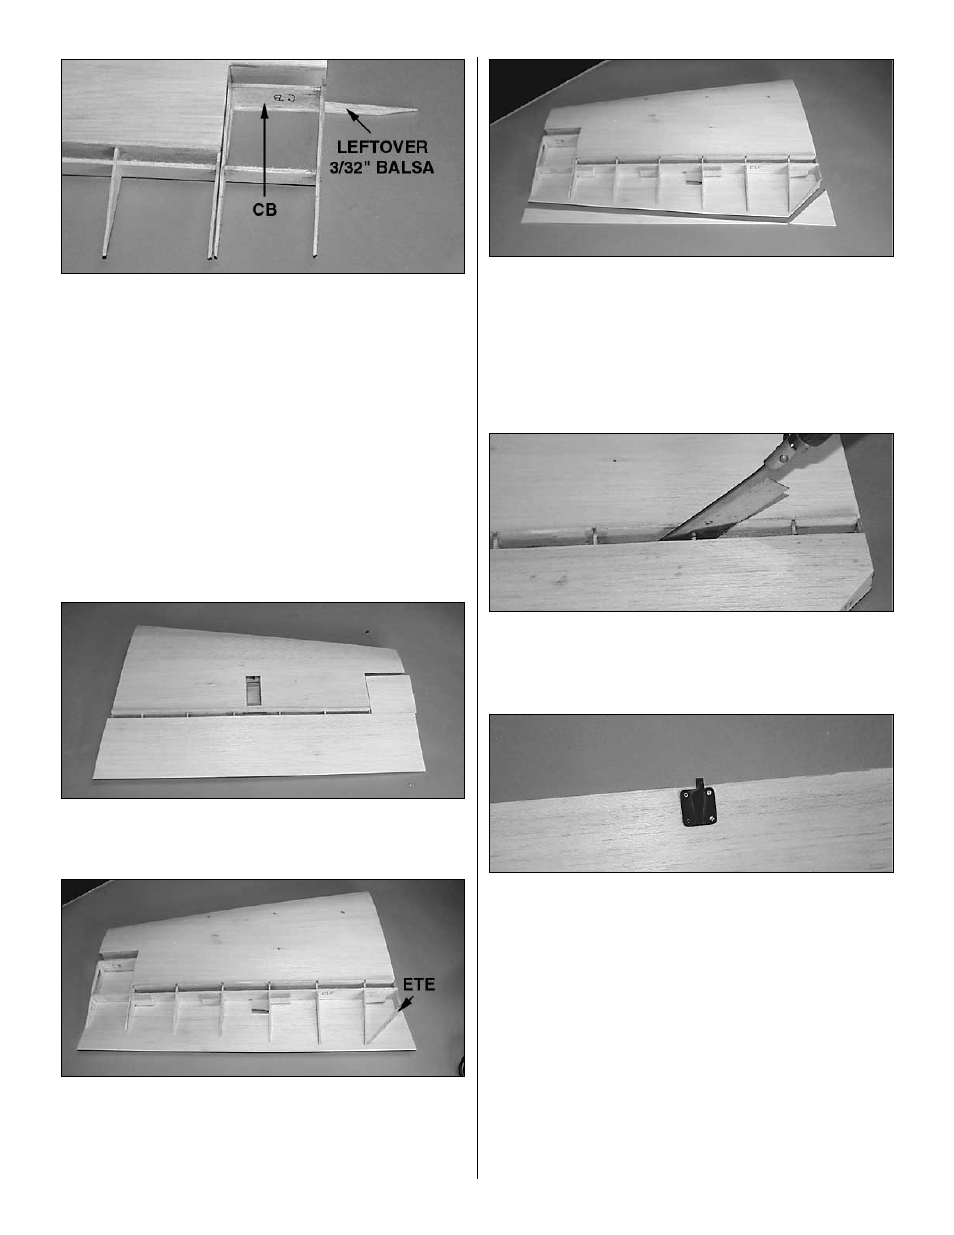
❏ ❏ 5. Place the S10 rib onto the elevator LE web. Place the
die-cut 1/8" balsa counterbalance web (CB) into the
notches in the front of S9 and S10. Tack glue CB to the S9
and S10 ribs. Glue S10 to CB and elevator LE web. Note:
Be careful not to glue anything to the spacer or to the stab.
❏ ❏ 6. From a 3/32" x 4" x 24" sheet, cut a 3" long
counterbalance sheet and the 21" long elevator sheet.
Trim the counterbalance piece to 3/32" x 3" x 3" and
set aside.
❏ ❏ 7. Place a bead of medium CA along the portion of
each rib aft of the elevator LE web and the elevator LE web.
Being careful not to press hard enough to rotate the
counterbalance or twist the ribs, hold the sheeting in place
until the CA dries.
❏ ❏ 8. With the grain running the same direction as the
main elevator sheeting, position and glue the
counterbalance sheeting in place.
❏ ❏ 9. Flip the stab/elevator right-side-up. Position and glue
the remaining 4 hinge blocks in place in the elevator.
Position and glue the 1/8" die-cut ply elevator trailing edge
rib (ETE) in place on the bottom elevator sheeting and into
the notch in S1.
❏ ❏ 10. Measure 5/16" aft of the TE of S2 and S10, and draw
a line between the 2 points. Cut the sheeting along this line
and flush with S1, S10 and the elevator trailing edge. Sand
the sheet flush with S1, S10 and the elevator trailing edge.
Sand the TE of the sheeting to the contour of the ribs.
❏ ❏ 11. Sheet the top of the elevator and counterbalance as
you did the bottom. Trim and sand the sheeting.
❏ ❏ 12. Using a razor saw, cut the elevator from the stab by
cutting ribs S1 through S7 between the stab TE web and the
elevator LE web. Be VERY careful not to cut into S9. Sand
the leading edges.
❏ ❏ 13. Position the elevator control horn (not included) on
the elevator as shown on the plan. Drill four 1/16" holes,
then mount the control horn to the elevator with four #2 x
3/8" sheet metal screws.
❏ ❏ 14. Draw a line around the control horn, remove it, and
poke approximately a dozen pin holes in the top sheeting
within the rectangle you drew, then apply a generous
amount of thin CA. Allow the CA to cure, hardening the
balsa, then sand the sheeting smooth. NOTE: Use enough
CA to have some enter the screw holes; however, do not
use so much that you fill the holes with CA.
❏ ❏ 15. Select the 3/8" x 1-1/4" x 24" elevator leading
edge. Glue it, centered on the leading edge of the elevator
and flush with S9.
13