Great Planes Corsair 40 Kit - GPMA0177 User Manual
Page 9
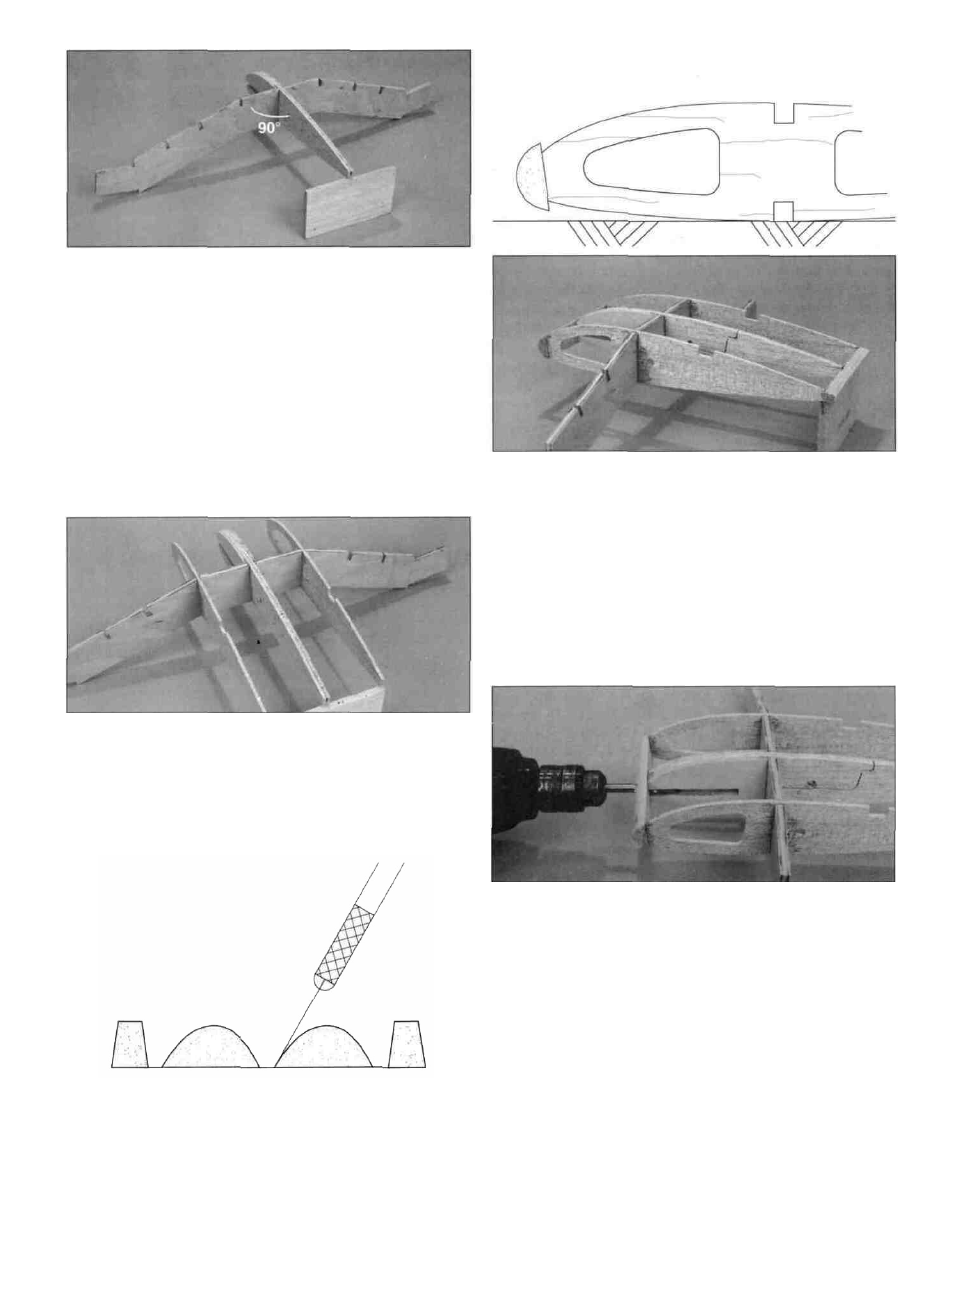
D 4. Pin the wing center spar over the plans perpendicular
to the building board. Fit the R-1 rib assembly in the
center spar. Place the center jig (W10) under the TE of
the rib assembly. Glue the rib assembly perpendicular to
the center spar using thin CA.
D 5. Fit the 1/8" die-cut rib R-2 (W07) on the center spar.
Locate the 1/8" die-cut ply dihedral gauge (F01). One
edge of the gauge is angled to set the dihedral of the wing,
the other edge is 90° to the bottom of the gauge. Use the
90° edge to align the ribs R-2 perpendicular to the center
spar. Pin the TE of the ribs on the center Jig. Glue ribs R-2
perpendicular to the center spar using thin CA.
D 6. The shaped and notched wing leading edges (W12)
and sub-trailing edges (W12) are fastened together by
thin strips of balsa. Separate them by cutting with a hobby
knife, as shown in the sketch above.
D 7. Cut a 4-3/8" long piece of LE and sub TE. Fit the LE,
then the sub TE to the ribs. The LE must be centered
vertically on each rib. The sub TE should be flush with the
top and bottom of the ribs. Glue ribs R-1 and R-2 to the LE
and sub TE. Do not glue the sub TE to the center jig.
D 8. Sand the ends of the LE and sub TE flush with ribs R-2.
D 9. Use a 3/32" drill bit to drill the wing mounting dowel
hole through the LE. The best way to line up the drill with
the slot in ribs R-1 is to sight down the LE from the side.
Use a 1/4" drill to enlarge the hole while making
adjustments to the alignment.
D 10. Chamfer both ends of the 1/4" x 3-1/2" hardwood
wing dowel (DOWLS030). Test fit the dowel (without glue)
into the LE and ribs R-1. The fit should be snug, so don't
enlarge the slot any more than necessary. When satisfied
with the fit, remove the wing dowel and set it aside for
later use.
9