Great Planes Corsair 40 Kit - GPMA0177 User Manual
Page 10
D 11. Slide ribs R-5 onto the center spar so that the ply
doubler R-5B is toward rib R-2. Align rib R-5 over the plan.
Make sure that the TE of ribs R-2 are seated on the center
jig and the jig tabs on ribs R-5 are against the building
board. Use the rib gauge (5G) (F02) to check the angle of
R-5. Then, glue the ribs perpendicular to the center spar
with medium CA.
D 12. Fit ribs R-3 and the 3/32" die-cut ribs R-4 (W08) into
the center spar. The ply doubler R-3B on rib R-3 is toward
rib R-4. Do not glue the ribs to the center spar. Cut two 6"
long pieces, one from each LE and sub TE. Trim one end of
the LE so that it fits flush against the LE at rib R-2 and is
centered vertically on the front of rib R-5. Glue the LE in
place with medium CA. Trim one end of the sub TE so that
it fits flush against the sub TE at rib R-2 and is flush with
the top and bottom of rib R-5. Glue the sub TE to rib R-5
and the TE at rib R-2 with medium CA. Repeat this process
for the other side.
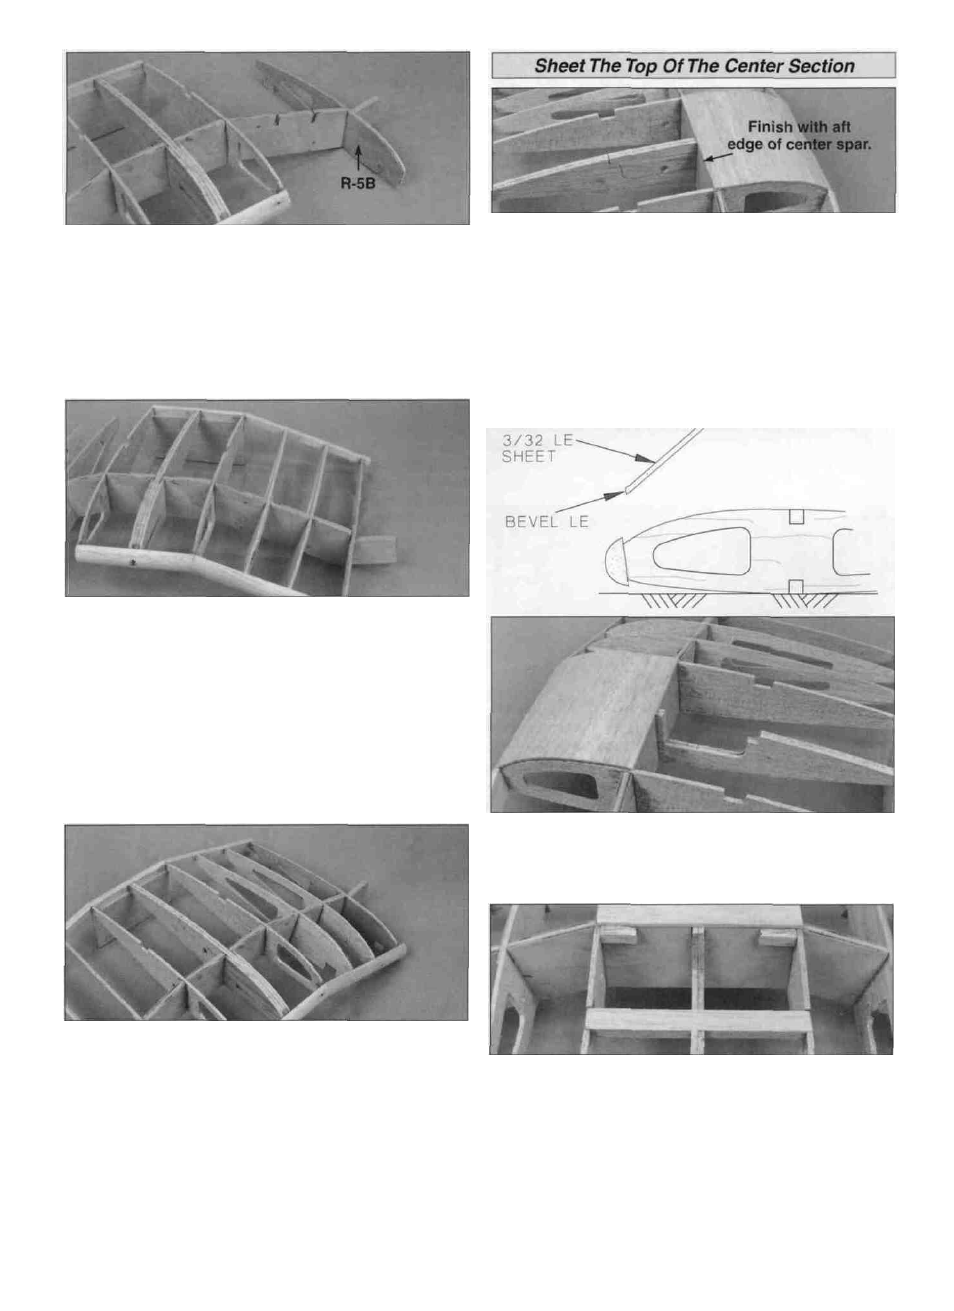
D 1. Lightly sand the top of the ribs flush with the center
spar. Cut a 4-1/2" long piece from a 3/32" x 4" x 30" balsa
LE sheet (W13) to fit between ribs R-2. Sand a bevel on
the front edge of the sheet. Test fit the LE sheet in position.
Trim the back edge flush with the back of the center spar.
When satisfied with the fit, press the forward edge of the
sheet tightly against the LE and the ribs, then wick thin CA
along the forward seam. Wipe off any excess CA before it
cures. Apply a bead of thick CA on the top of ribs R-1 and
R-2. Roll the sheet into contact with the ribs and the center
spar. Wick thin CA between the sheet and the center spar.
D 13. Locate the 1/8" die-cut ply dihedral gauge (F01). One
edge of the gauge is angled to set the dihedral of the wing.
The other edge is 90° to the bottom of the gauge. Use the
90° edge of the dihedral gauge to align ribs R-3 and R-4
perpendicular to the center spar. Check that the LE is
centered vertically on the ribs and the sub TE is flush with the
top and bottom of the ribs. Glue the ribs to the LE and sub TE
with thin CA and to the center spar with medium CA.
D 2. Refer to the photo above, then use a razor saw or
hobby knife to finish cutting the partially die-cut aileron
servo opening in ribs R-1.
D 3. Cut two 3/4" long pieces from the 1/4" x 1/2" x 6" balsa
hatch mounting block (W16). Glue the 1/4" edge of the
two pieces flush with the top of the center spar and ribs R-
2 with thin CA. Use medium CA to glue the remaining
1/4" x 1/2" mounting block in the slots die-cut in ribs. Trim
the mounting block flush with ribs R-2.
10