Great Planes Corsair 40 Kit - GPMA0177 User Manual
Page 12
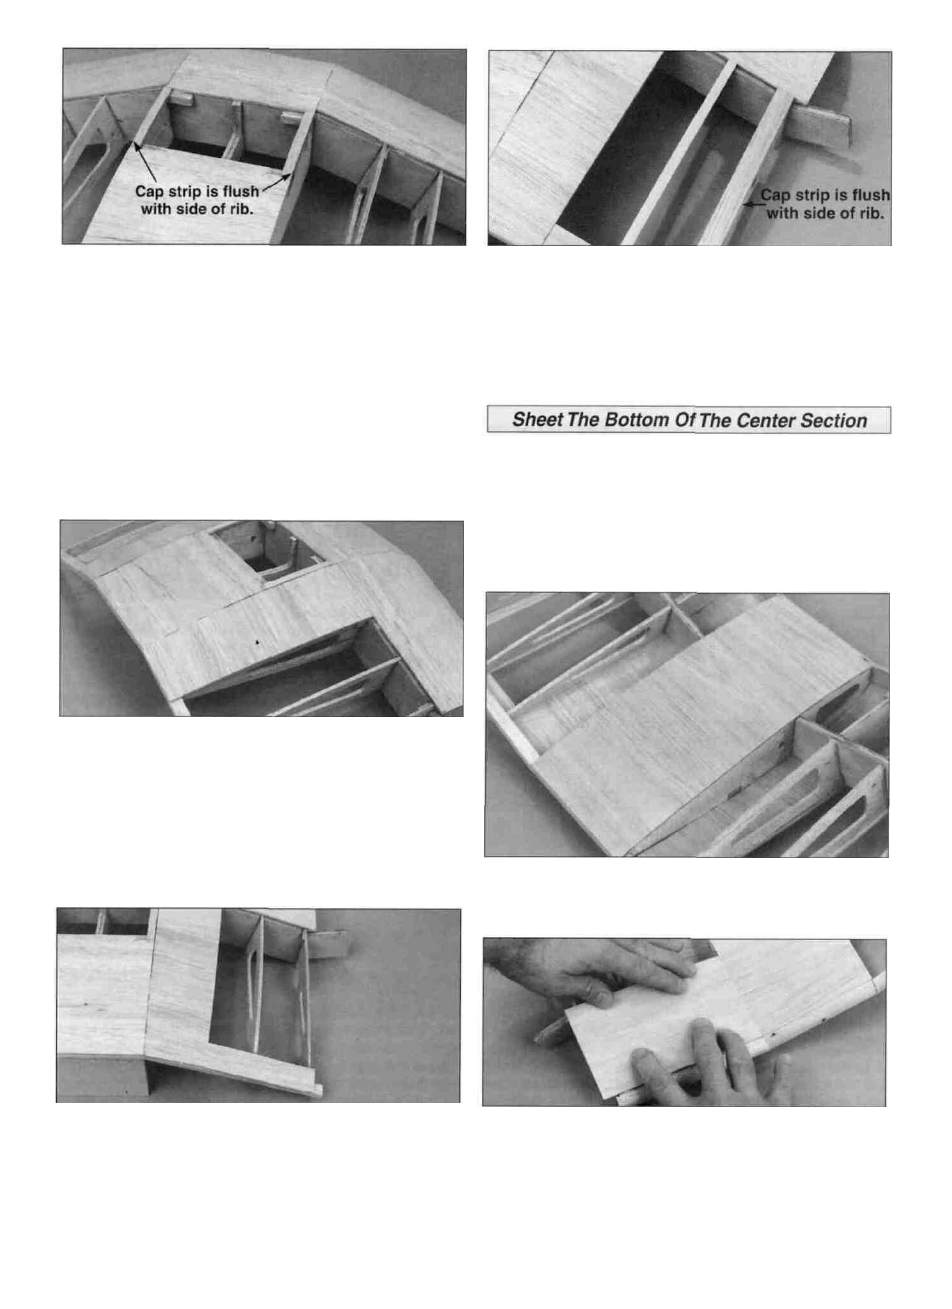
D 10. Fit a 3/32" x 1/4" balsa cap strip between the LE and
TE sheeting so that it's flush with rib R-2. Glue the cap strip
to rib R-2 and the sheeting with thin CA.
D 14. Use medium CA to glue the 3/32" x 1/4" balsa cap
strips (W19) to the top of ribs R-4. Glue 3/32" x 1/2" balsa
cap strips (W20) to the top of ribs R-5. The edge of the
cap strips on R-5 are flush with the outside edge of the ribs.
D 15. Remove the center section from the building board
and sand the LE, TE and the sheeting flush with both the
R-5 ribs.
D 11. Cut eight 2-3/8" long pieces of sheeting from the
remaining piece of 3/32" x 4" x 21" balsa LE sheet. Make
four center skins by edge gluing four pairs of the 2-3/8"
sheets together.
D 12. Trim a center skin to fit behind the center spar and on
top of the sub TE from rib R-2 to R-3. Important: Be sure
to get a good glue joint along rib R-2. Glue it in place with
medium CA. Repeat the process for the other side.
D 1. Remove the jig tabs from rib R-5. Sand the bottom of
the ribs flush with the center spar and the TE.
D 2. Cut a 4-1/2" long piece of sheeting from each of the
three 3/32" x 4" x 30" balsa sheets that are left. Lightly sand
off the edges of the 4-1/2" long pieces to remove any
balsa "fuzz." Make a center skin by edge gluing the
pieces together.
D 3. Trim the center skin to fit between the LE and sub TE
between the R-2 ribs. Be sure the skin is flush with the side
of R-2. Glue in place with medium CA.
D 13. Cut four 4" long piece from each of the four
3/32" x 7/8" x 24" piece of TE sheet (W14). Use medium
CA to glue the 4" TE between ribs R-3 and R-5.
LI 4. Hold a 3/32" x 4" x 6-1/2" balsa sheet (cut in step 9,
page 11) tightly against the LE. Press down on the sheet
with your fingers in the vicinity of the landing gear rail to
12