Great Planes Corsair 40 Kit - GPMA0177 User Manual
Page 17
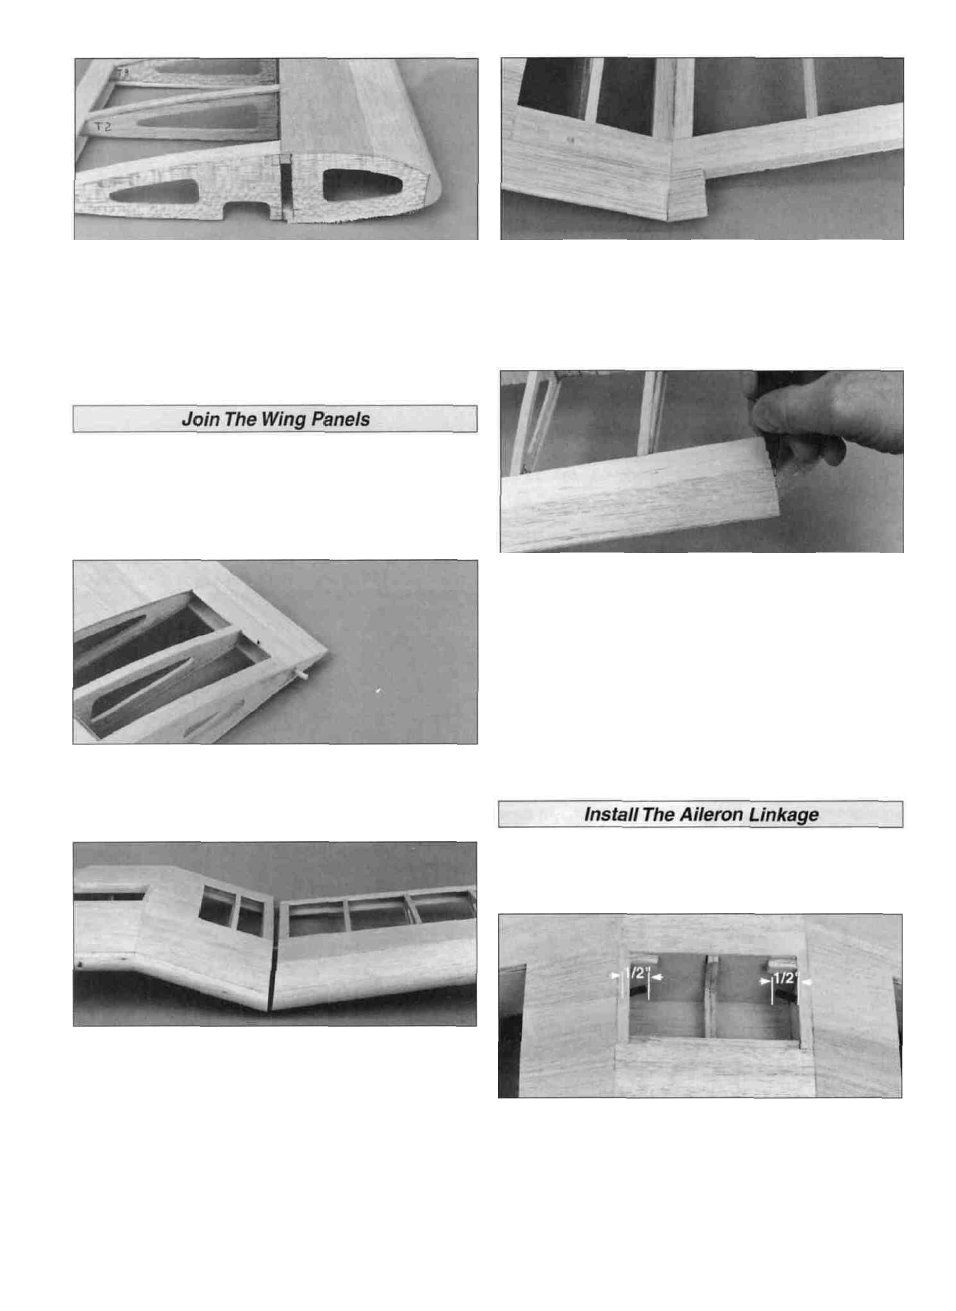
D D 9. Cut the access slot between the spars in T-1 for the
wing center spar.
D 3. Sand one end of the remaining 1-1/8" x 1" tapered TE
to match the angle of the wing center section. Use medium
CA to glue both 1" TE'S in position.
That's one wing panel down. Now, go back and build the
other one. Remember to build a right and left outer
wing panel.
NOTE: Before actually using any glue, test fit the entire
assembly together to make sure the wing panels fit
properly.
D 4. While holding an aileron against the inside edge of the
wing panel sub TE, draw a line on it that matches the inside
edge of the wing tip TE. Cut the aileron 1/8" shorter than
the TE opening to allow for covering material.
D 5. Draw a centerline on the forward edge of the aileron.
Sand the forward edge of the aileron to a "V". Refer to the
cross section of the wing on the plans for the desired angle.
D 1. Cut the 1/8" x 2" hardwood alignment dowel
(DOWEL049) in half. Insert 1/2" of the 1/8" x 1" alignment
dowel through the hole at the aft end of R-5. Glue it to the
inside of the TE perpendicular to R-5.
D 2. Assemble only one wing panel to the center section at
a time. Completely coat the spars and shear webs inside
the access slot with 30-minute epoxy. Use a stick or brush
to apply epoxy to rib T-1. Slide the wing panel on the wing
center spar. Glue the 1/8" alignment dowel to the inside TE
of the wing panel. Make sure the panel and center section
are aligned from the LE to TE, then clamp or tape them
together until the epoxy cures.
D 1. Cut two 5" long pieces from one of the 24" outer
pushrod tubes (PLTB011). Sand the outside of the tubes
with 80-grit sandpaper to roughen them for better glue
adhesion.
D 2. Slide the pushrod tubes through the holes in ribs R-2
through R-4. About 1/2" of the tubes should protrude into
the aileron servo bay. Glue the pushrod tubes to the ribs
with medium CA.
17