Great Planes Corsair 40 Kit - GPMA0177 User Manual
Page 14
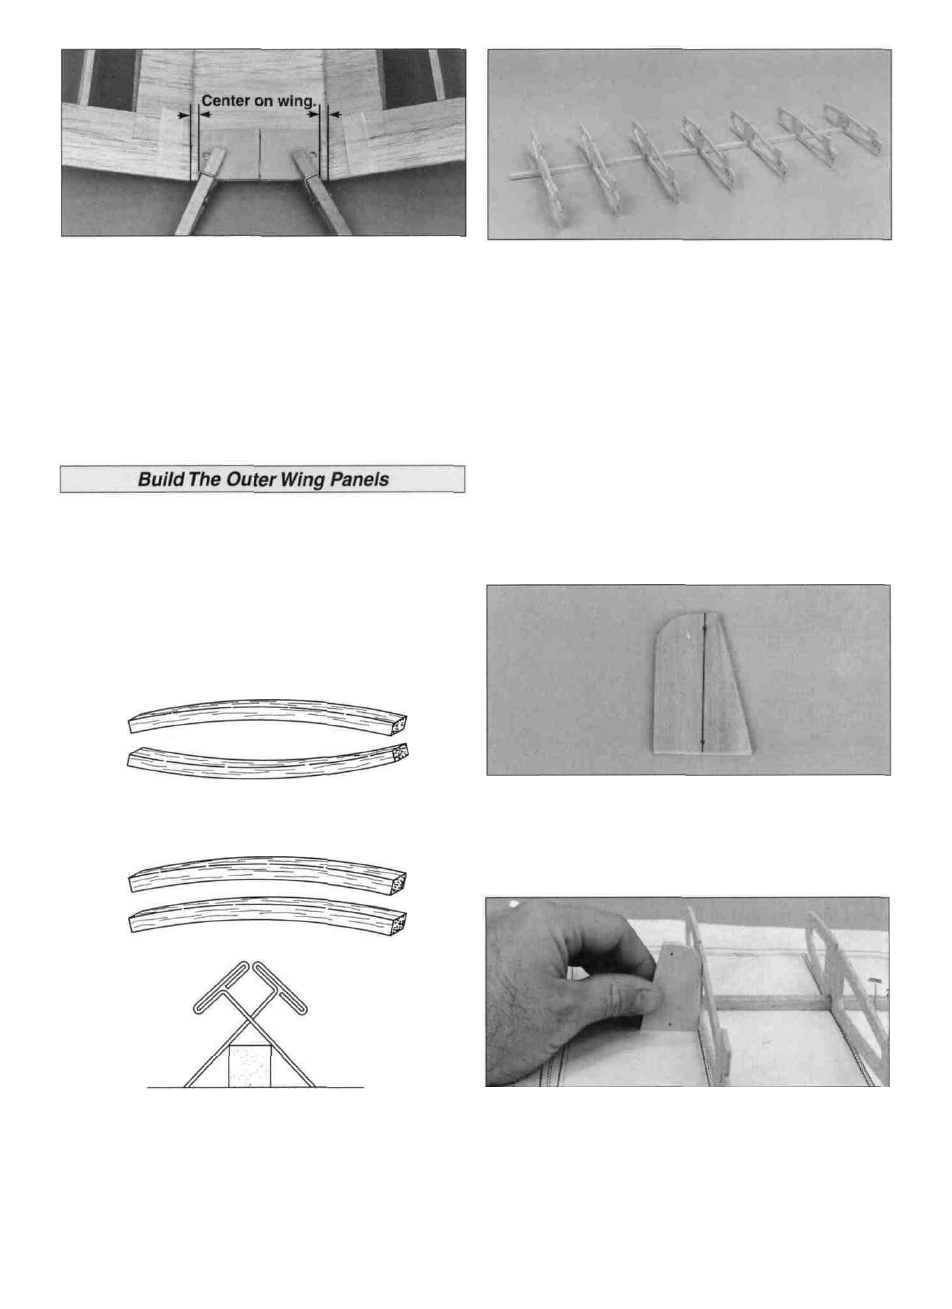
D 3. After the wing center section TE'S are completely
secure, use 6-minute epoxy to glue the 1/16" die-cut birch
ply wing plate (W01) in position on the bottom of the wing.
The aft edge of the wing plate must be centered and flush
with the aft edge of the TE. Clamp the wing plate in position
while the epoxy cures.
D 4. Sand the TE flush with the ribs R-5.
D 5. Use 220-grit sandpaper to thoroughly sand the entire
wing center section.
D D 2. Don't use any glue until instructed to do so. As
the wing panels are built upside-down, fit ribs T-1 through
T-7 over the spar. The jig tabs against the building
board should be closer to the TE than the jig tabs
facing upward.
D D 3. Sight down the length of the TE. Check that all ribs
are aligned and have the correct side up.
Note: The wing panels are built "UPSIDE-DOWN" on the
plans. Since it is the standard convention to show the Top
View of the wing, and the wing panels are built upside-
down, the Left wing panel is built over the Right Wing Top
View and vice-versa. This does not present any
problems; just be sure to build a left and a right wing.
TWO WARPED SPARS INSTALLED
THIS WAY WILL RESULT IN A
STRAIGHT WING
TWO WARPED SPARS INSTALLED
THIS WAY WILL RESULT IN A
WARPED WING
D D 4. Draw a line through the two index marks on the 1/8"
die-cut ply dihedral gauge (F01).
D D 1. Use the cross-pinning technique, (see sketch above),
to pin a 3/8" x 3/8" x 24" balsa spar (W15) over a wing plan.
Don't forget to cover the plans with waxed paper.
D D 5. Glue ribs T-2 and T-7 to the lower spar aligned over
the plan and perpendicular to the building board. Use the
90° back edge of the dihedral gauge to keep the ribs
perpendicular to the building board.
14