Philips VR727 User Manual
Page 31
Attention! The text in this document has been recognized automatically. To view the original document, you can use the "Original mode".
Variant 2:
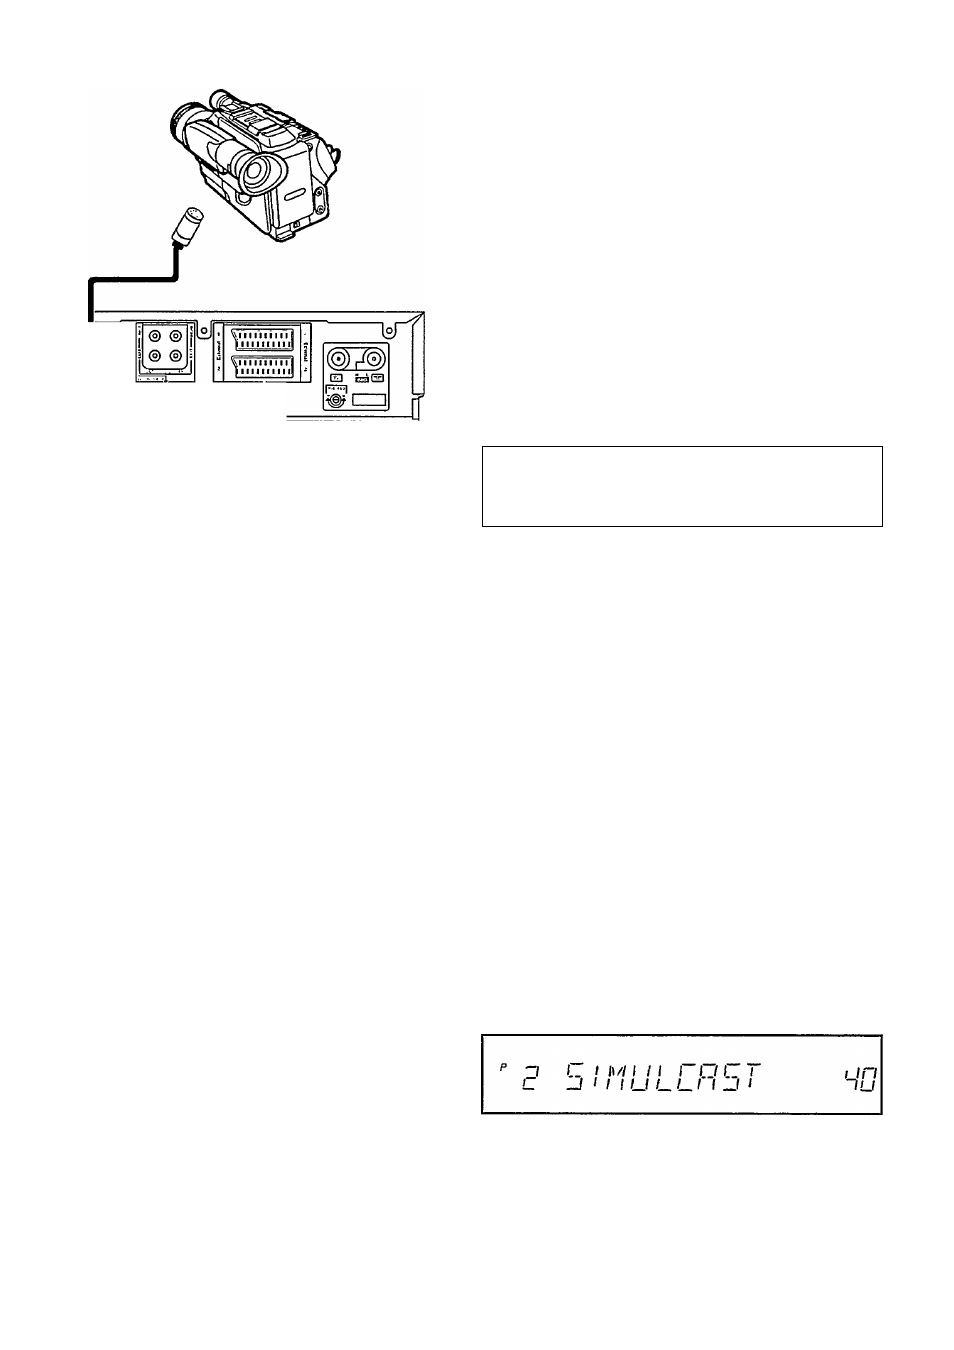
Pay attention to the operating instructions for your camcor
der. The videp/audio
the video recorder via
the socket
.
O Press button
several times until 'EDIT'
appears in the display.
O
Y.P.
li
can change the pre-roll time with the buttons ffiior
:i.The display will show, e.g. 'START 1:56' (seconds).
O Confirm your setting with button iSIQEil.
O
Locate the right tape position on the video recorder for
recording. Press button IJSJOPJI again.
O
Locate the right tape position on the camcorder.
O
Press button 'PAUSE' on the camcorder.
O
In accordance with the above cabling, there are two
ways to start editing.
Variant 1
O
Start the editj^
button
i.i.RECORD,../.„QTR.i.ion the video recorder. The camcor
der starts with
'PLAYBACK'
and the video recorder starts
synchronousiy with
'RECORD'.
O
Stop the recording with button iSTOPj.; on the video
recorder.
© Switch off the video recorder with button il.SfAN.DBYJI.
Variant 2
O
Start editing, e.g. with button 'EDIT' on the camcorder.
The camcorder starts with 'PLAYBACK' and the video
recorder starts synchronously with 'RECORD'.
O
Stop the recording with button 'PAUSE' on the
camcorder.
© Switch off the video recorder with button
.
Note: If the start of the scene to be edited is missing, then
the setting for the pre-roll time is too long. Simply set a
shorter time (e.g. 1:40) as described in step ©. If the re
cording starts before the scene to be edited, the setting for
the pre-roll time is too short. Then you must increase the set
time, e.g. to 2:10.
^Audlo only' recording
You can also make 'Audio only' recordings (audio record
ings) with this video recorder. To do thjs,„connect the video
recorder to an audio system (socket i(LAUP10J.W.Ii).
The recording is made at half-speed. This gives you twice
as much recording time as is indicated on the cassette.
'LP' will appear in the display.
O Insert a cassette.
O Press button isBEp/MQDEi.i until the display shows:
f
O 1 ITI 1 n
n l\ 1 1
1 in
/_
1 1 U ±1
1
u
U l\l U t
lU
O Press button iS.RECP.Rll„^„bjRis. The video recorder
starts to record the sound input. Any previous (video)
recording is, thereby, erased.
O Finish recording by pressing button iiLSJ.OPji.
Note: For a programmed 'AUDIO ONLY' recording, read the
note in Section 'Correcting/Cancelling a TIMER block'.
Simulcast recording
The stereo sound of some TV programmes is broadcast si
multaneously on FM radio. In order to get the best stereo
sound quality you can record the picture from the TV chan
nel and simultaneously record the stereo sound from the
radio.
To do this, connect the radio to the socket i.LAUPJbJ.N..i
using an audio cable.
O Tune your radio and the video recorder to the desired
programme.
O Press button iiLMQuMbPEi.: (remote control) until the
display on the video recorder shows:
O Press button n.R^EQQRb„./LbjBji.
The video recorder starts recording the sound from the
radio and the pictures from the TV channel.
O Finish the recording with button I'iSMPjJ.
29