Changing printer port configuration, Changing printer port assignment – Comtrol Multiport Modems Windows 98 User Manual
Page 31
Installing Modems and Adding Serial Printers
31
Changing Printer Port Configuration
10. Optionally, enter a custom name for this printer, and select whether this
printer is the Windows default printer. Click Next.
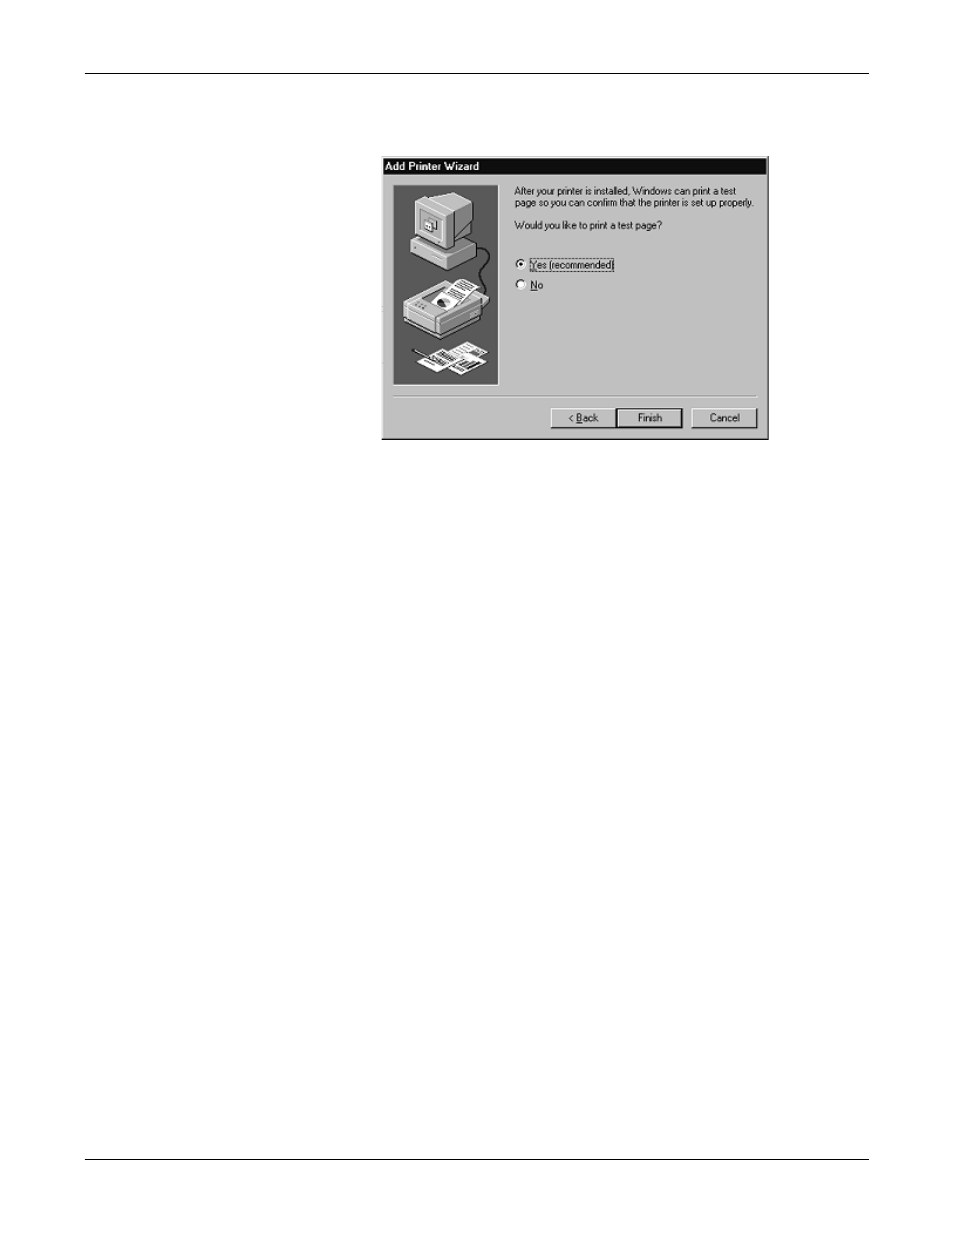
11. Select whether to print a test page and click Finish.
Note: You may be prompted to insert the Windows 98/SE or ME CD-ROM in
order to load drivers. Do so and follow the on-screen instructions.
12. If the test page prints successfully, you are now ready to begin using the
printer. No reboot is needed.
Changing Printer
Port Configuration
If the printer does not successfully print the test page, it may be necessary to
change the port baud rate, parity, and so on. If the Ports applet does not configure
the port properly, you may have to use the mode command from a DOS prompt.
Also, check the printer for DIP switches or other hardware configuration options.
Changing Printer
Port Assignment
To change the port assigned to a printer, follow these steps:
1.
Select Start > Settings > Control Panel and double-click on the Printers icon.
2.
Right-click on the icon for the printer you want to change.
3.
Select the Properties option from the menu. The Properties window is
displayed.
4.
Click the Details tab.
Note: The Properties window also gives you access to printer test and setup
options that can be very helpful when debugging a serial printer
installation.
5.
Use the droplist to select the port you want to switch to. Remember to change
your cabling accordingly.
6.
Click on the OK button. Any changes you make take effect immediately. No
reboot is needed.