Attaching, Charging confirmation marker on the battery pack, Caution – Panasonic NVG2E User Manual
Page 7: Video cassette, Inserting the video cassette, Removing a video cassette, Note, Turn the
Attention! The text in this document has been recognized automatically. To view the original document, you can use the "Original mode".
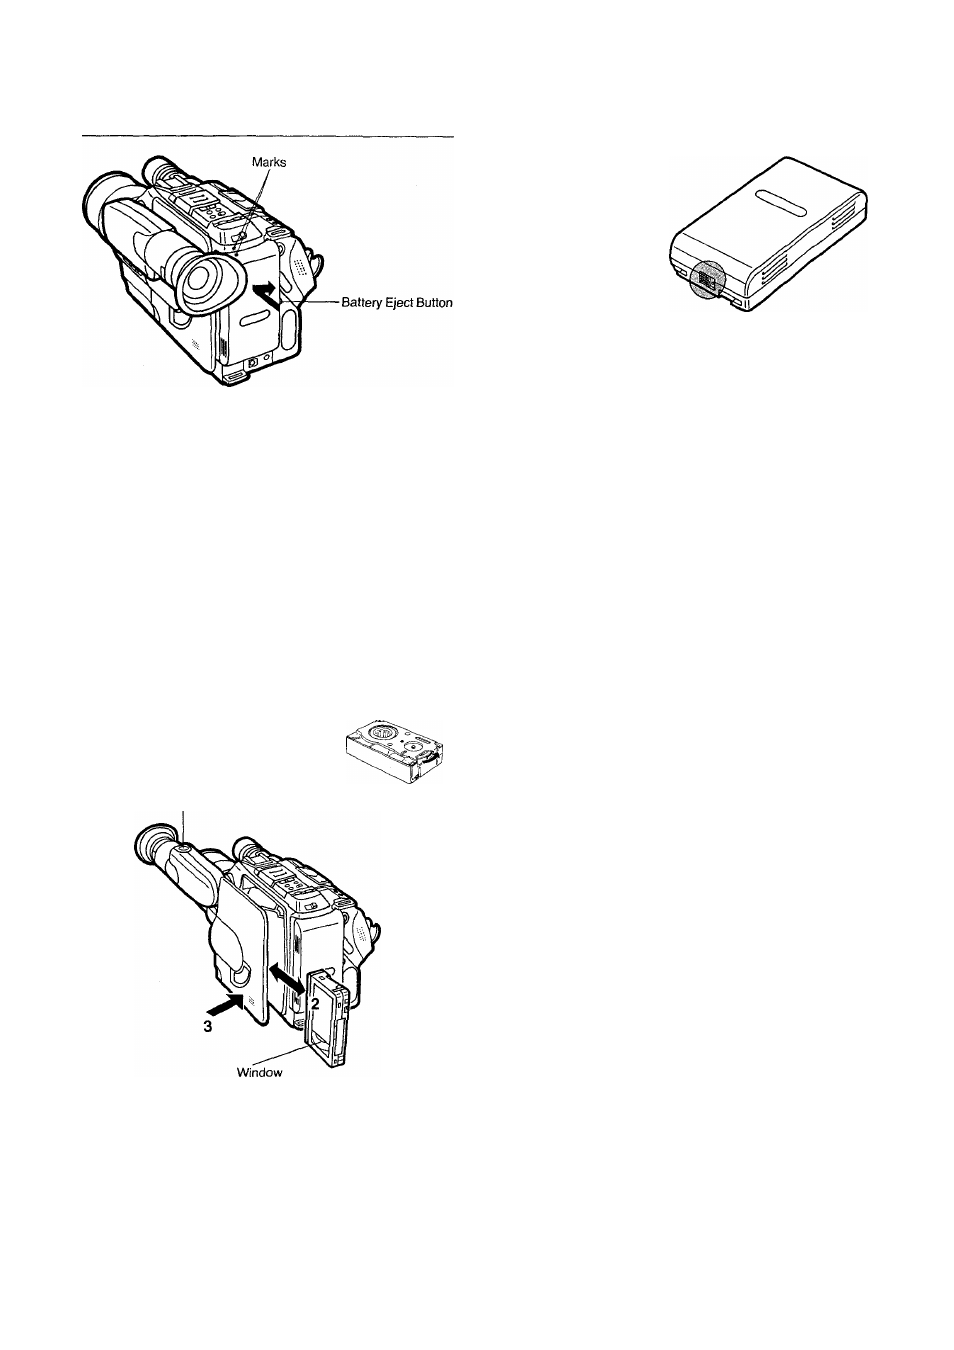
Attaching
Charging Confirmation Marker on the Battery Pack
Charging Confirmation Marker
1 Align the two marks of the Battery Pack and the Movie Camera,
then slide the Battery Pack to the right until it locks with a click.
•To remove the Battery Pack keep the Battery Eject Button
pressed and slide Battery to the left.
Caution;
•Wait about 10 seconds after turning the Movie Camera off, before
removing the Battery Pack.
• If the Battery Pack is removed during recording or playback, the
tape remains wound around the video head cylinder and could
become damaged.
This marker makes it convenient to distinguish between charged
and discharged Battery Packs. For example, visible dot means
charged Battery Pack, and no dot means discharged Battery Pack.
Video Cassette
Inserting the Video Cassette
Before Inserting the Cassette
Make sure that the tape is not loose. If it is loose, pull it in by turning
the cog wheel on the side of the cassette in the direction of the
arrow.
1
Turn the EVF by 180° towards the Lens, and press the Eject
Button.
• Do not move the EVF again before the cassette compartment
cover is in its fully extended position.
2
Insert the video cassette into the cassette compartment with its
window facing outside.
3
Push the cassette compartment cover inward until it locks with
a click and then turn the EVF back to its original position.
Removing a Video Cassette
1
Turn the
EVF by 180° towards the Lens, and press the Eject
Button.
2
Pull out the video cassette.
3
Push the cassette compartment cover inward until it locks with
a click and then turn the EVF back to its original position.
Note:
•Use VHS-C video cassettes only.
-7-