Installing the software, Required environment for the pc to be connected, Installing the iv-navigator (iv-h1) – KEYENCE IV-H1 User Manual
Page 3: Changing the pc settings (ip address settings), For windows 7, For windows xp
3
IV Series (IV Software) - IM_E
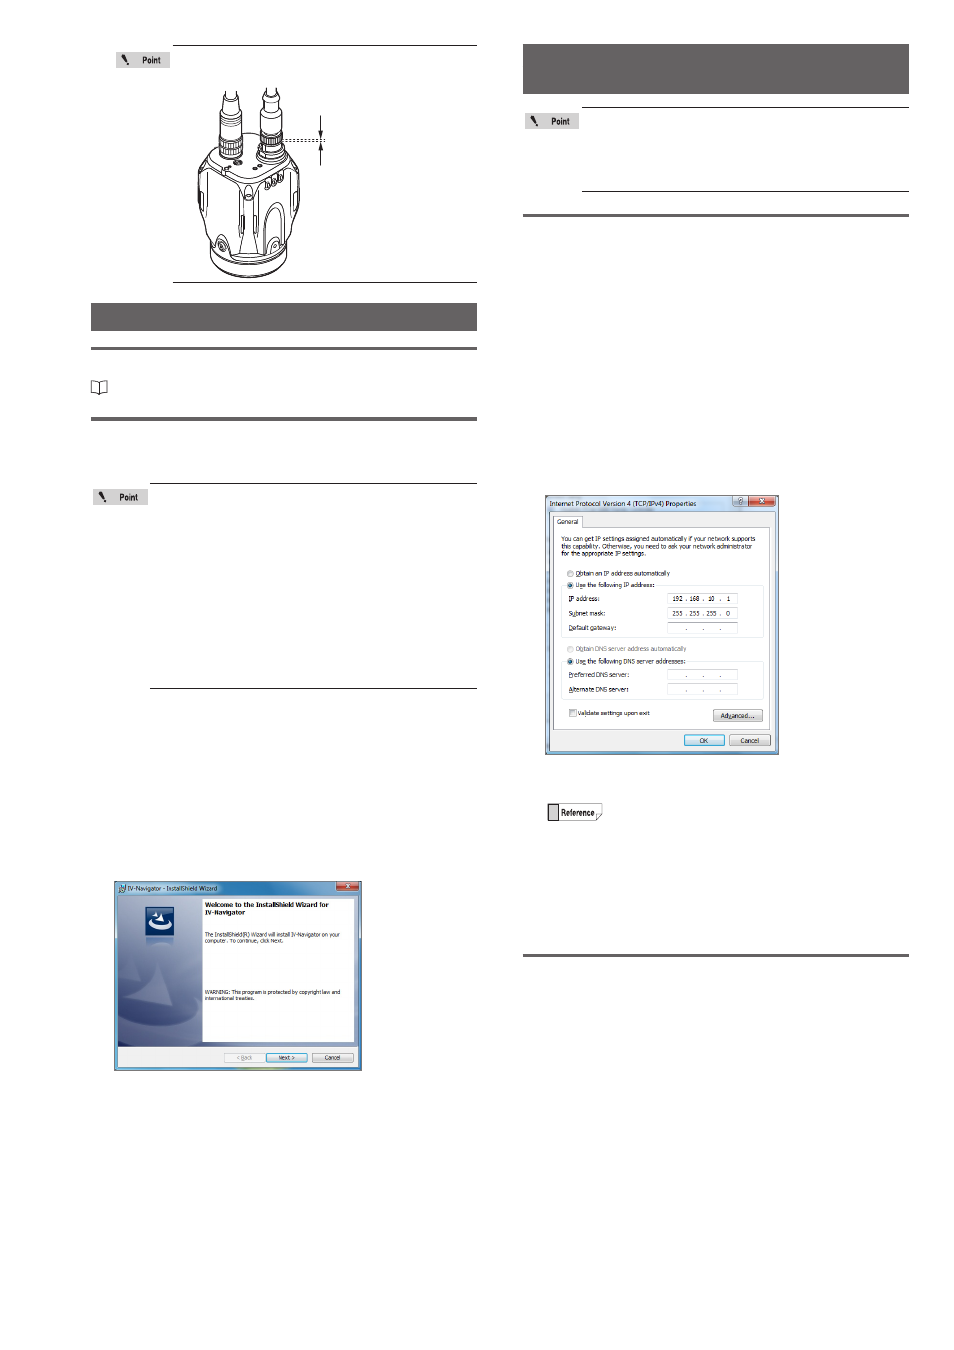
Check the spaces between the Ethernet
cable and the cable connector.
Spaces between
connectors
Installing the Software
Required environment for the PC to be connected
For system requirements, refer to “Specifications” (Page 4).
Installing the IV-Navigator (IV-H1)
This section describes the procedure for installing the IV-
Navigator (IV-H1) for IV Software on the PC.
y
This section describes the installation using
an installation example for Windows 7.
y
Exit or finish all other running software
before the installation.
y
Log on with a user who has administrative
privileges.
y
If the user account control window appears
during the installation, click the [Continue]
button.
y
If you have logged on with a user account
that does not have administrative privileges,
input a user account with administrative
privileges and the password.
1
Turn ON the power of the PC and start Windows.
2
Insert the IV-H1 disc into the media drive.
The installation program activates by the auto run
function of the PC, and the InstallShield Wizard window
opens.
If the installation program does not activate, open the
media drive from the My Computer and double-click
"setup.exe".
3
Follow the instructions in the window.
4
After the completion window for InstallShield
Wizard is displayed, click the [Finish] button.
5
Remove the installation CD.
Changing the PC Settings
(IP Address Settings)
y
Log on with a user who has administrative
privileges.
y
Auto aquisition of IP address (DHCP server)
cannot be used due to the inability to
connect with the sensor.
For Windows 7
1
Open the Control Panel.
2
Click ([Network and Internet]) - [Network and
Sharing Center].
3
Click [Change adapter settings] on the upper left
on the window.
4
Right-click the [Local Area Connection] icon and
select [Properties] from the displayed menu.
5
Select [Internet Protocol Version 4 (TCP/IPv4)] and
click the [Properties] button.
6
Select [Use the following IP address] and input
the IP address and subnet mask.
y
IP address
: 192.168.10.1
y
Subnet mask : 255.255.255.0
For direct connection, set an arbitrary IP
address (The above is an example).
To connect with the existing network, input the
IP address that was assigned by the network
administrator.
7
After the setting is completed, click the [OK]
button and close all windows.
For Windows XP
1
Open the Control Panel.
2
Click [Network and Internet Connections] and
double-click [Network Connections].
3
Right-click the [Local Area Connection] icon and
select [Properties] from the displayed menu.
4
Select [Internet Protocol (TCP/IP)] and click the
[Properties] button.