Connecting the sensor and pc, Connecting directly, Connecting via network – KEYENCE IV-H1 User Manual
Page 2: Connecting the ethernet cable
2
IV Series (IV Software) - IM_E
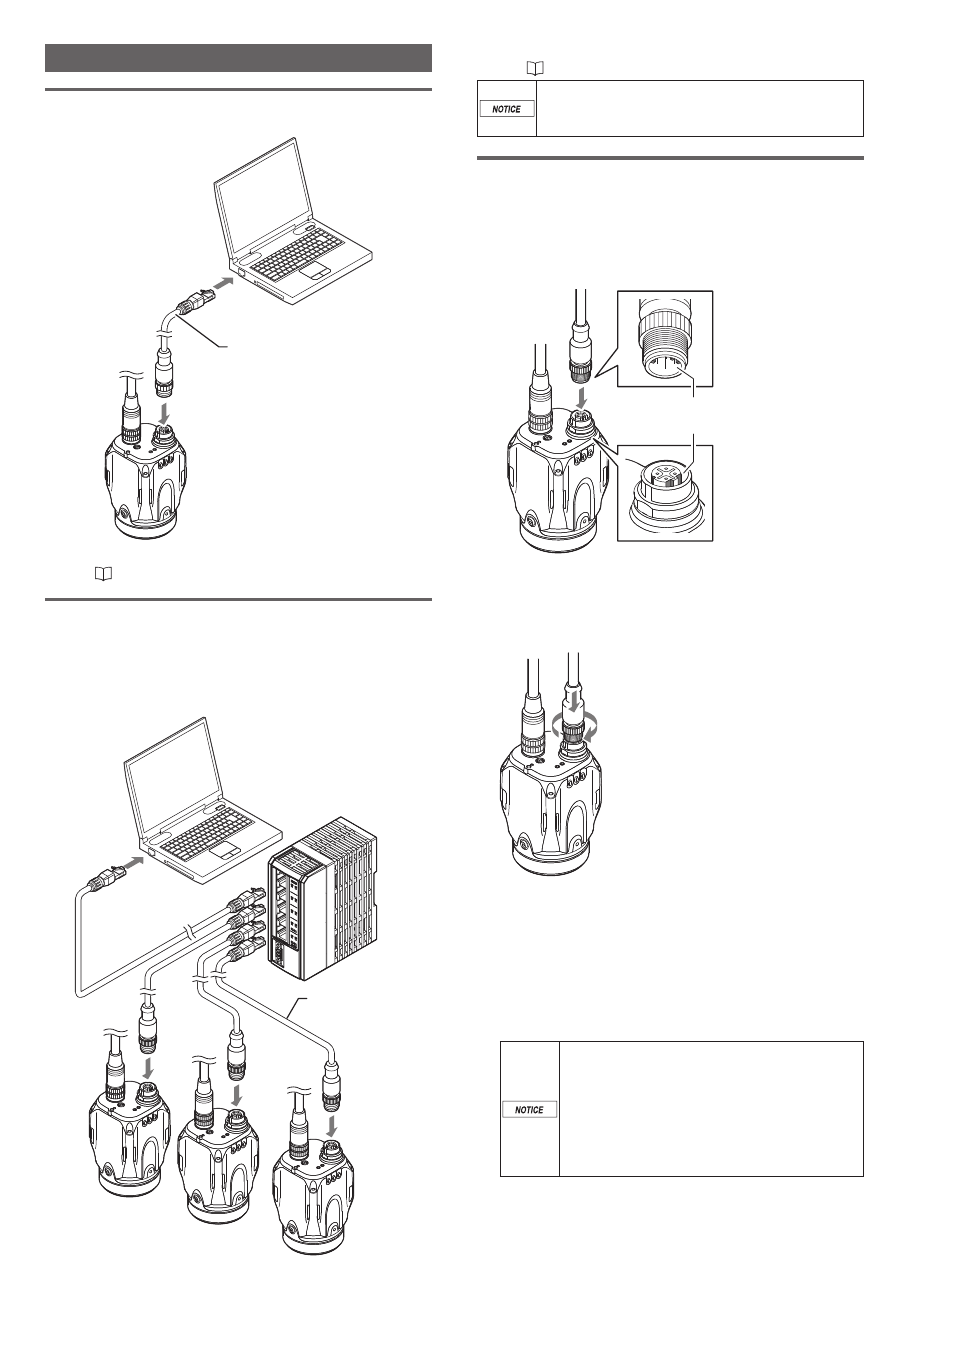
Connecting the Sensor and PC
Connecting directly
Connect the sensor and PC using the Ethernet cable.
Ethernet cable
(2m/5m/10m)
For details on connecting the Ethernet cable,
refer to “Connecting the Ethernet cable” (Page 2).
Connecting via network
Connect the Ethernet cable to the sensor.
Connect the other side of the Ethernet cable to the Ethernet
switch.
Connect the PC and Ethernet switch with a commercially
available network cable.
Ethernet cable
(2m/5m/10m)
Ethernet switch
For details on connecting the Ethernet cable,
refer to “Connecting the Ethernet cable” (Page 2).
The sensor and monitor do not support PoE
(Power over Ethernet). Supply power using
the power I/O cable.
Connecting the Ethernet cable
This section describes the connection method for the
Ethernet cable.
1
Align the pin connection parts of the Ethernet
cable connector with three pins of the cable
connector, and connect the cable to the sensor.
Align the pins and the pin
connection to connect
2
Tighten the connector by turning the screw-
on connector in the clockwise direction. When
connecting the connector, insert it without
inclination while pushing in and tighten it well.
(1)
Tighten the screw.
(2)
When the screw stops rotating by the locking
mechanism, further tighten it while pushing.
Repeat the steps (1) and (2) and when you cannot
tighten the screw by hand any more, use a tool such as
pliers for further tightening. Tightening torque, retorque
degree, and acceptable spaces between connectors are
shown below.
y
Ethernet cable (OP-87457/OP-87458/OP-87459)
Tightening torque
: 0.8 to 10 N·m
Retightening degree
: 5 to 10°
Spaces between connectors : 0 mm (reference value)
If the connector cable tightening is weak,
vibration may loosen the connector
and cause bad connections or cable
disconnections. Also, the enclosure
rating may not be maintained with loose
connection.
Properly follow the procedures above and
tighten the connector completely.