5 replacement of check valves – BUCHI SpeedExtractor E-916 User Manual
Page 82
8 Troubleshooting
82
SpeedExtractor E-916/E-914 Operation Manual, Version D
8.1.5
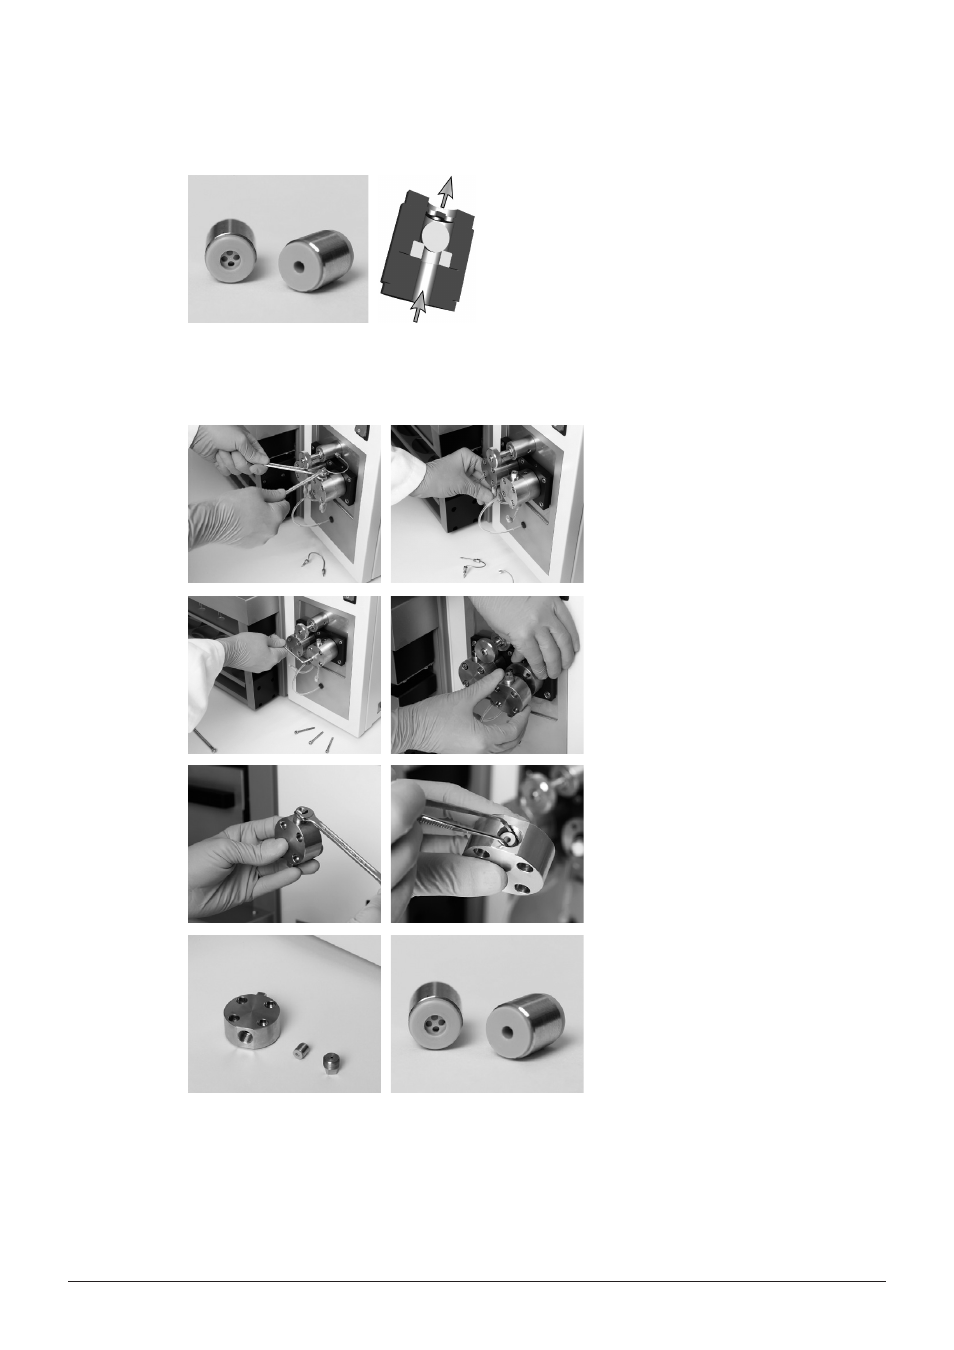
Replacement of check valves
The principle of a check valve is a precise ball and seat
located in a casing of PEEK material with stainless steel
reinforcement. By a stream of liquid the ball is pressed
down to the seat, thus creating a seal. With respect to
high pressures in the pump, any minute impurity stuck
on the surface of the ball or the seat causes pressure
fluctuation, or the pump fails to start at all. If you do
not succeed in correcting these problems by repeated
purging, it is necessary to replace or clean the valves.
Replacement of the outlet and inlet check valve
• Screw out the nut on the valve
holder using a 1/4” and 8 mm
spanner wrench, and take off the
capillary.
• Unscrew the fittings of the pump
inlet lines.
• Unscrew the four nuts from the
head using a 3 mm allen wrench.
• Carefully remove the pumping head.
• Unscrew the valve holder using a
8 mm spanner wrench.
• Remove the valve from the pumping
head using tweezers.
• Insert the new valve in the same
direction, i.e. with the four holes
upwards.
• Proceed similarly with the inlet
check valve at the bottom side of
the pump head. The four holes on
the valve should always point in the
direction of the pumping head, so
that the inserted valve has a visible
part with one hole.
• Proceed in reverse order to reas-
semble the pump. Tighten all nuts
and, when starting the pump, check
whether any connection is leaking.
• Attempt to clean the valves in
acetone using ultrasound (or in
another solvent), which dissolves
the buffers you have been using.