Vernier Data Pro User Manual
Page 23
Data Pro
21
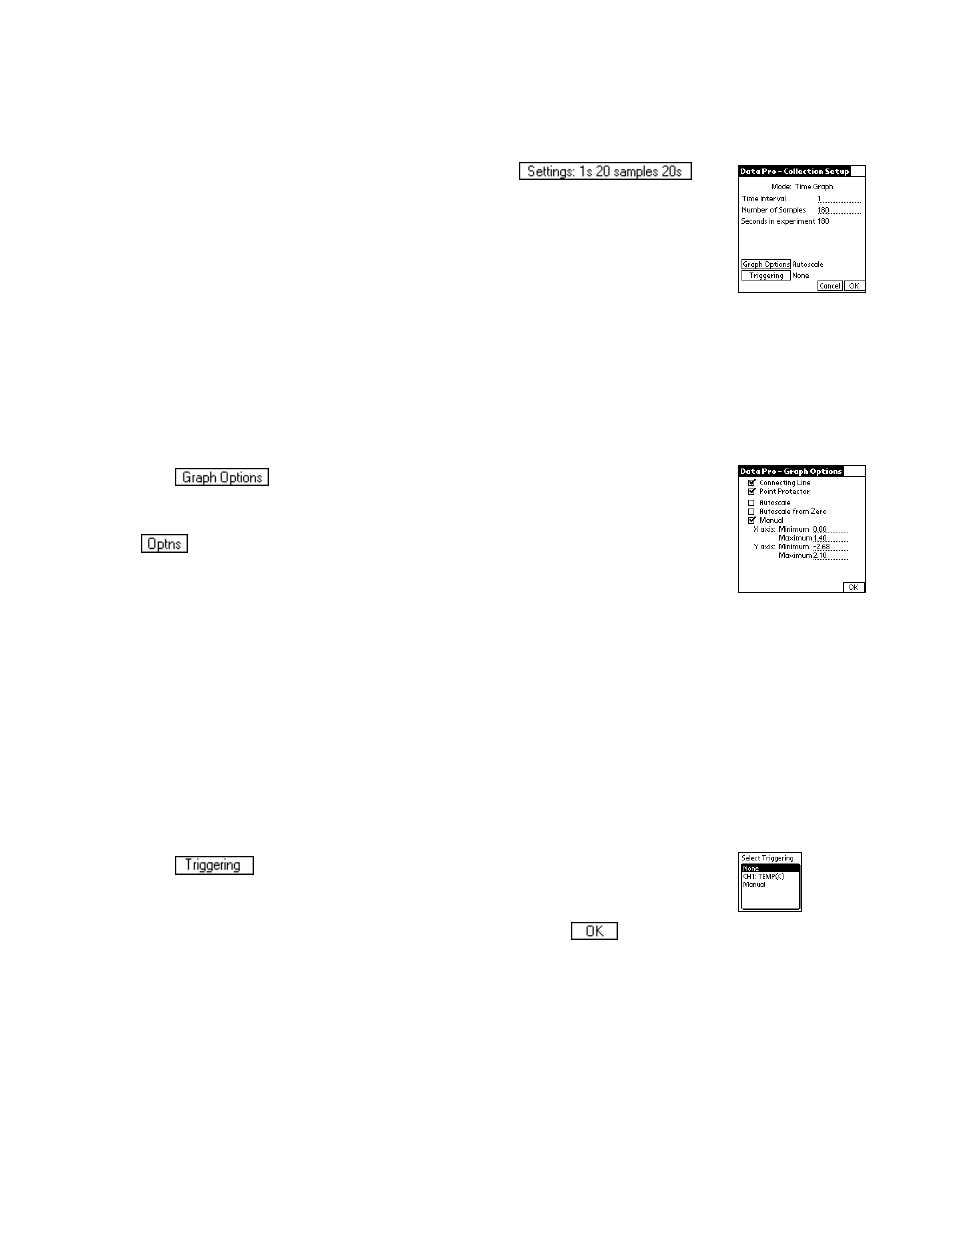
The Time Graph option is used to set the sample interval and number of
data points for a timed data collection. It can also be used to alter advanced
features like live graphs and triggering.
The Collection Setup screen appears when you tap
under the Mode button. The default time interval between samples depends
on the sensor you are using. Use the onscreen keyboard (tap “123”) to enter a
new time interval or number of samples. A maximum of 500 points can be
collected into Data Pro. If it is necessary to collect more points, up to 12 000
points can be collected using remote mode, but the data must be downloaded
into Graphical Analysis or Logger Pro for graphing.
Important: A time graph will be displayed live unless you are sampling at a rate faster than 10
samples per second (time collection interval less than 0.1 seconds/sample). If you are using
multiple sensors and they are identical, all of the data will be displayed live in one graph with the
same axis label. If they are not identical, all sensors will be live, and they will share an axis label
named
ALL DATA
.
Tap
to modify features of your graph. Graph Options allows you
to control how your data are plotted. You can set Graph Options either before
data collection has begun, as shown here, or after data collection, by tapping
on the Graph screen.
•
Connecting Line: connect data points with lines to create a continuous
plotted line.
•
Point Protectors: mark data points with a point protector.
•
The Autoscale option quickly resets the axes of the currently
selected graph based on the data. It is an easy way to automatically scale both axes.
Autoscale is the default scaling setting, and will select the axis scales so that all the data
just fits on the graph while still following standard scientific graphing rules.
•
The y axis will not necessarily include the origin, so you may want to perform a more
limited autoscale by choosing Autoscale from Zero.
•
By choosing Manual, you can choose both endpoints of the axis. Enter the minimum and
maximum values to plot in the text boxes under this option.
Tap
for the Triggering Options screen.
Tap the triggering you want. If you select
NONE
and then
, you will
return to the Collection Setup screen.