Vernier Data Pro User Manual
Page 12
10
Data Pro
5.
Whether or not you are using a non-auto-ID sensor, you now need to
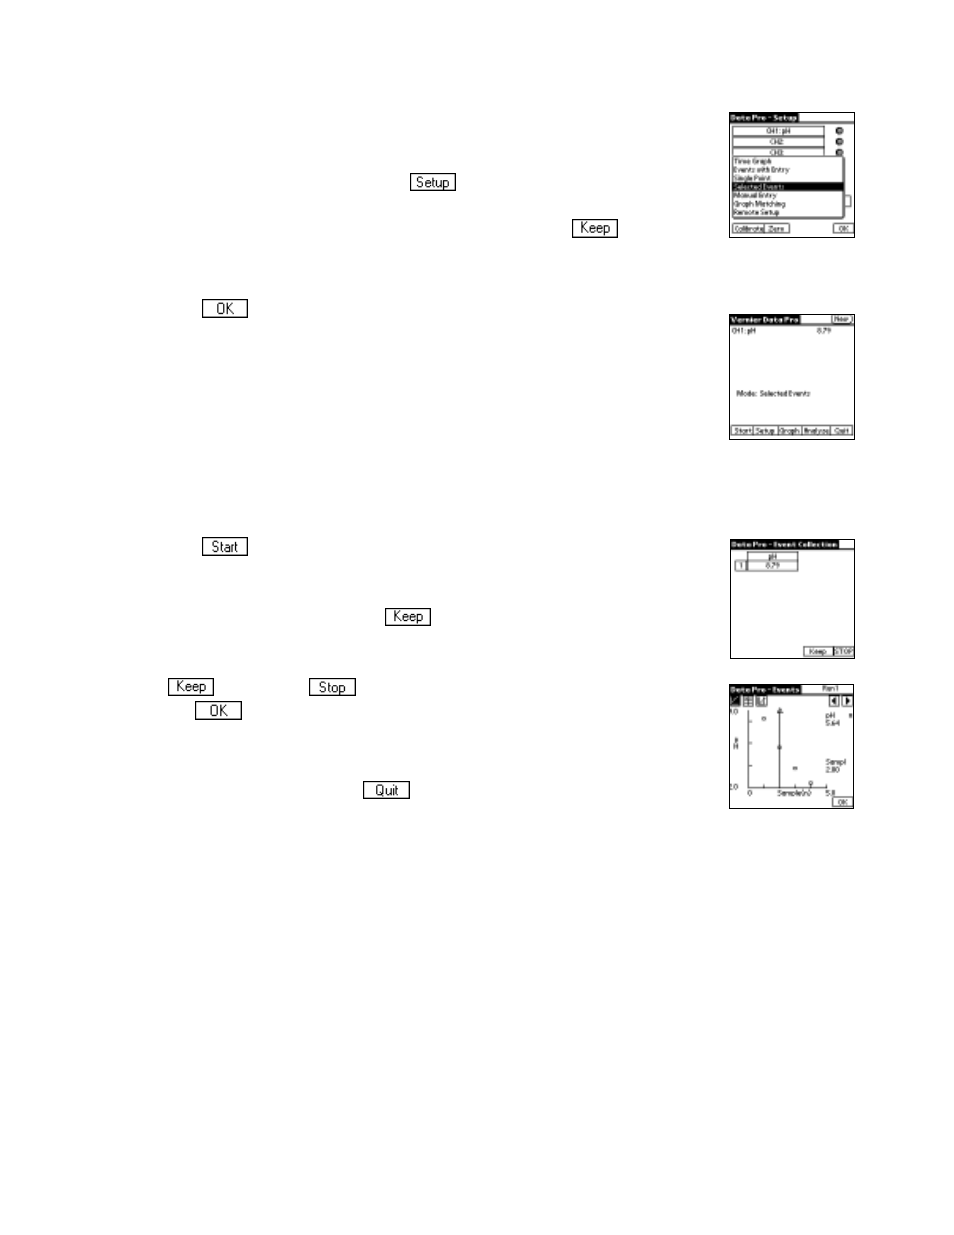
change the data collection mode. While you are on the Setup screen,
let’s change the data collection mode to Selected Events. (If you’re
using an auto-ID pH sensor, tap
to reach this screen.) Tap the
Mode: Time Graph button, and choose Selected Events from the list.
This allows you to collect individual readings using a
button,
instead of taking time-graph data. It also assigns a sample number (1, 2, 3…) to each pH
reading.
6.
Tap
to return to the Main screen.
7.
The pH Sensor should now be displayed on the Main screen. The pH
value is displayed in the upper right-hand corner, as shown here. Data
Pro acts as a meter on the Main screen, and the screen updates about
once every second. The new data-collection mode is also indicated on
this screen.
8.
Remove the pH Sensor from the sensor storage solution bottle by unscrewing the lid.
Carefully remove the bottle, leaving the cap on the sensor body. Rinse the tip of the
sensor with distilled water and place the sensor tip into a beaker containing tap water.
9.
Tap
to begin collecting data. Take the pH measurement of your
different liquids. Place the tip of the pH Sensor into a liquid to be
sampled. Watch the live reading in the first cell of the displayed data
table. When it stabilizes, tap
. This will save the pH value along
with a sample number, 1. Between measurements, rinse the sensor with
distilled water. Switch liquids. Continue to take readings using the
button. Tap
when you have finished collecting data, then
tap
to view a graph of pH vs. sample (n).
10.
When you are done, rinse the sensor with distilled water and
return it to the sensor soaking solution. Stay on the Main screen to
do another tutorial, or tap
to exit Data Pro program.