WEATHER GUARD Model 236-3-01 Quick Clamp Rack, Full-Size, Curb Side User Manual
Page 6
6
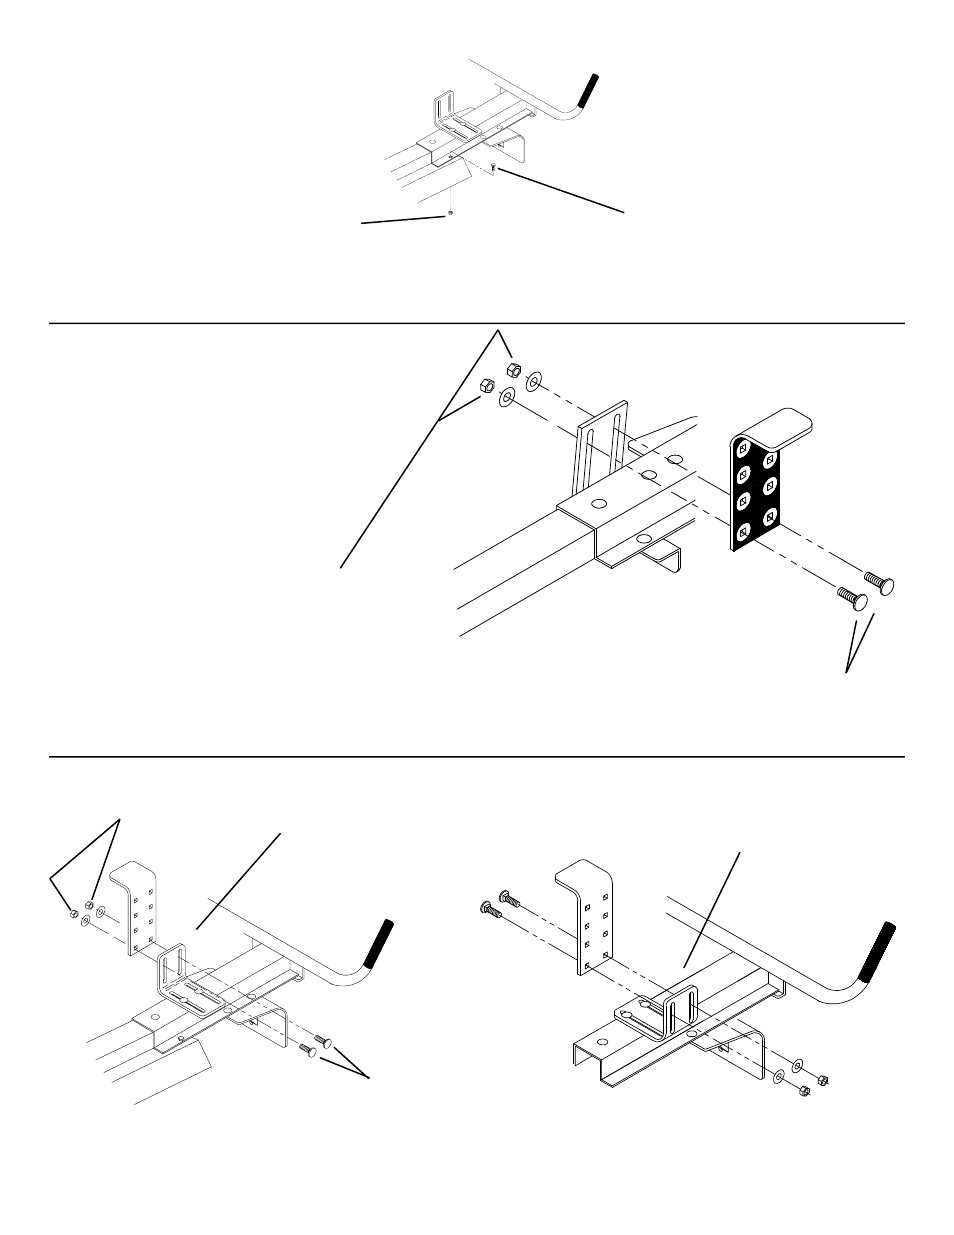
Figure 11. Rear DS Clamp
Figure 12. Front DS Clamp
6. Loosely fasten the Top Adj. Clamp
to the Front and Rear Assemblies. To
adjust Clamps, place the ladder on
the rack (Figure 13.), and adjust the
clamps forward or back / up or down
to capture the nearest ladder rung.
Tighten the bolts.
5/16-18 x 7/8" Carriage Bolt
5/16" Flat Washer and
5/16"-18 Nylon Lock Nut
5/16-18 x 7/8"
Carriage Bolt
5/16" Flat Washer and
5/16"-18 Nylon Lock Nut
This application will be needed
for Dead-head ladders and
some Step ladders.
This application is used for
standard Extension ladders.
5. Airfoil to Socket Drilling and Fastening
Figure 10. Airfoil/Socket
1/4-20 x 3/4"
Hex Hd. Bolt
1/4 -20 Nylon Lock Nut
Drill 5/16" holes in Airfoil using
holes in socket flange as a
guide.
NOTE: Be careful not to thrust the
drill into the vehicle roof. A block of
wood held under the Crossmember
will help avoid this.