Installing the wine guardian remote sensor, Mounting the remote sensor – Vintage Cellars Wine Guardian Split System Manual User Manual
Page 47
42
Installing the Wine Guardian Remote Sensor
The remote sensor is a combination temperature and humidity
sensor only. It is designed to be mounted within the wine cellar
and can be used in combination with the remote interface
controller or up to three additional remote sensors to read and
control multiple areas within the wine cellar. (Fig. 1 )
Fig. 1
Mounting the Remote Sensor
Fig.2
1. Disconnect the communication cable from the side of
the Wine Guardian unit and the remote sensor. Install
the communication cable within the wall and/or ceiling
structure of the wine cellar to the desired controller
mounting location. (Fig. 1)
2. Mount the remote sensor on a solid surface away from
doors, corners, air outlets, drafts or heat generating
equipment. Do not mount the remote sensor directly on
an outside wall or wall adjacent to a boiler room. Use a
piece of foam insulation behind the sensor to insulate it
from a hot or cold surface. The recommended height is
4 to 5 feet above the finished floor.
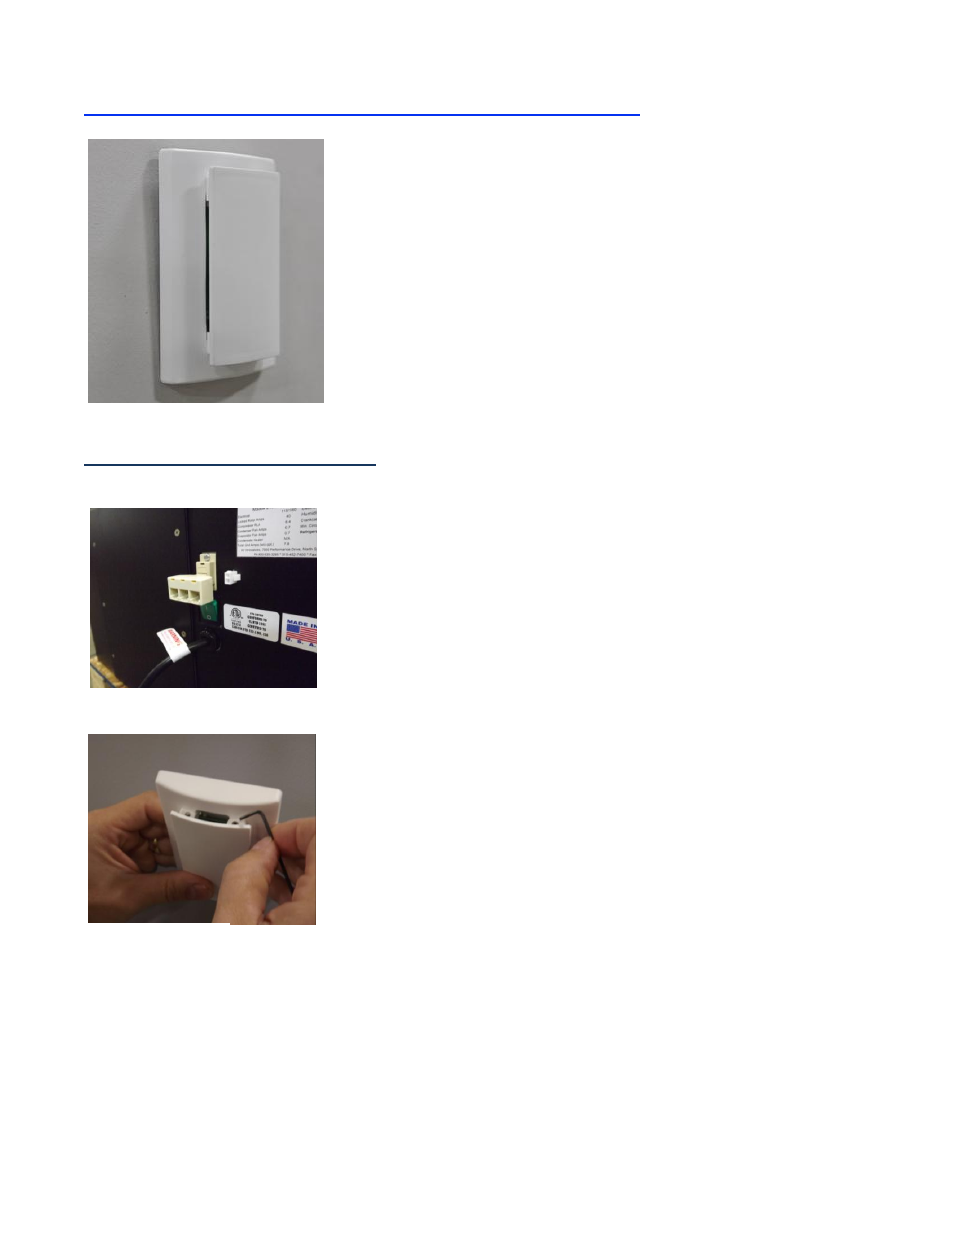
3. Remove the sensor cover plate by removing the two
Allen head screws at the top of the cover using the
Allen head wrench provided in the kit. (Fig.2) Mark the
mounting points at the desired location within the wine
cellar. Also mark the location of the communication
cable connection as this area will require sufficient
clearance, for instance, 1½” hole in the wall for flush
mounting of the sensor plate.
Fig.2
Fig.2
IMPORTANT
A splitter device has been supplied in the remote
sensor kit. The splitter device must be mounted at the
Wine Guardian unit as shown. DO NOT mount the
splitter device at the back of the remote interface
controller or to the back of the remote sensor as this
WILL cause component or system damage.