Vintage Cellars Mini Ceiling Mount User Manual
Page 27
www.whisperkool.com | Page 25
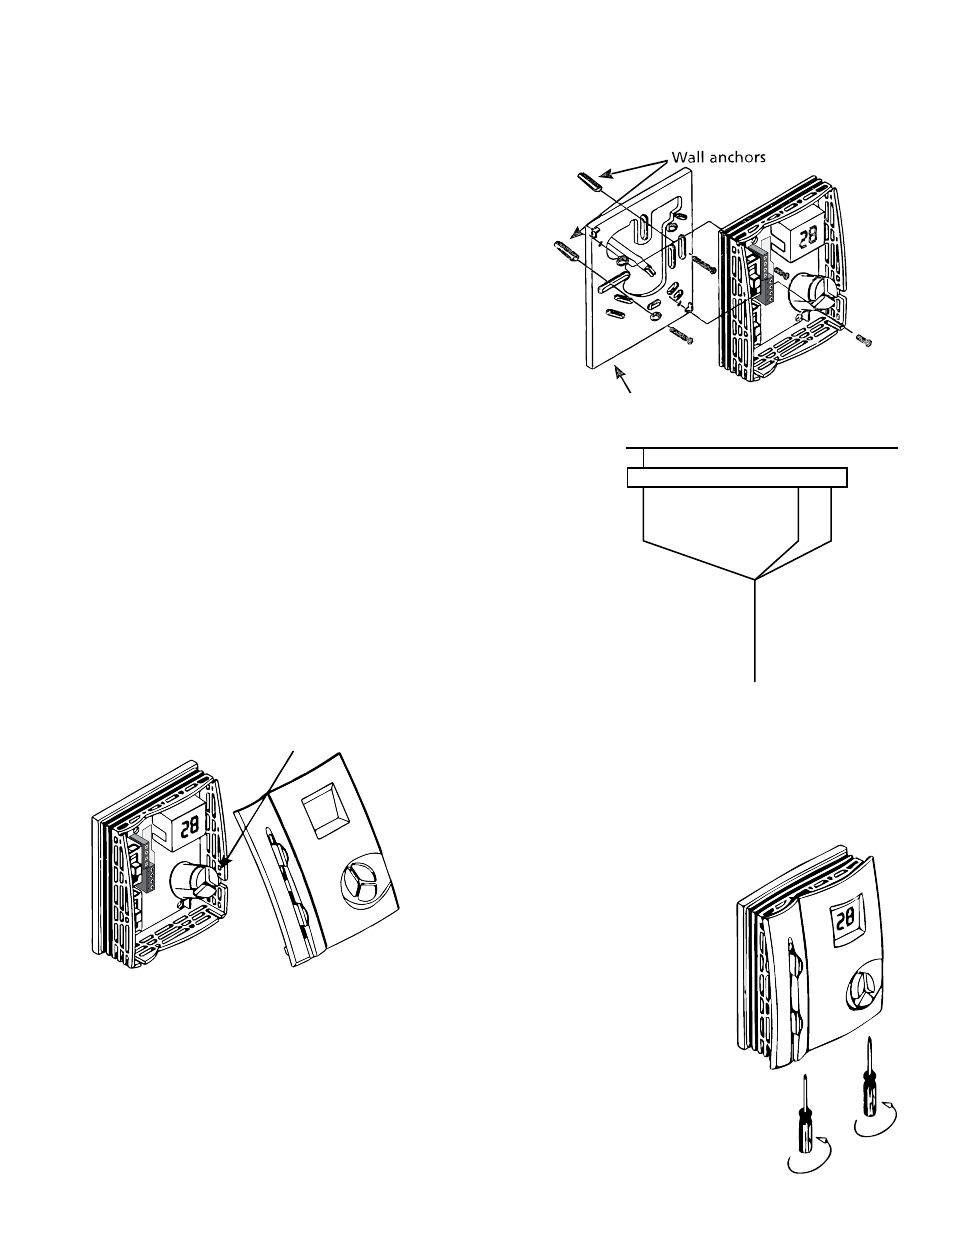
Mounting With a Wall Mount Plate
1. Make sure the humidistat is unplugged before installing
the unit.
2. Position the wall mount plate on the wall or junction box
to ensure the plate is level and covers the junction box
completely.
3. Pull the electrical wires through the hole in the wall mount
plate.
4. Drill holes in the wall through the two mounting holes in
the back of the wall plate as shown in Figure 5 and insert
anchors into the holes.
5. Pull the electrical wires through the hole at the terminal block.
6. Fasten the wall plate with two screws through the mounting holes.
7. Fasten the humidistat to the wall plate with screws through the
mounting holes.
Electrical Connection
1. Connect the electrical wires to the corresponding terminals on the
terminal block following the circuit diagram inside the top cover of the
unit, see Figure 6.
2. Connect the white wire to the N terminal, the red wire to the 4
terminal, and the black wire to the L terminal on the humidistat.
Reattaching the Cover
1. Move both slide controls to the bottom position.
2. Align the humidistat rubber buttons with the holes in the cover as
shown in Figure 7.
Note: If the controls are not lined up when the faceplate is being reattached, then
the controls may become stuck. In order to reattach the faceplate correctly
move the slide controls to the bottom position.
3. Carefully attach the top cover.
Ensure the cover locks in place by
pushing down on the top of the
faceplate and then pushing inward
toward the wall.
4. Attach the screws at the bottom of
the cover and tighten into place as
shown in Figure 8.
Correct Humidistat Settings
1. Use the UP or DOWN arrow to reach the desired humidity level
on the display and press ENTER.
2. Set the top selector switch to the HUMID setting.
3. Set the bottom selector switch to the OFF setting.
Figure 5
L
1
2
3
4
N
RED
BL
AC
K
HUMIDISTAT
CO
O
LI
N
G UN
IT
WHI
TE
Figure 6
Figure 8
Make sure the rubber buttons
align with the holes in the cover.
Humidistat
Rubber Buttons
Figure 7