Installing the evaporator unit – Vintage Cellars Mini Ceiling Mount User Manual
Page 18
Page 16 | 1-800-343-9463
MCM
082814
INSTALLING THE EVAPORATOR UNIT
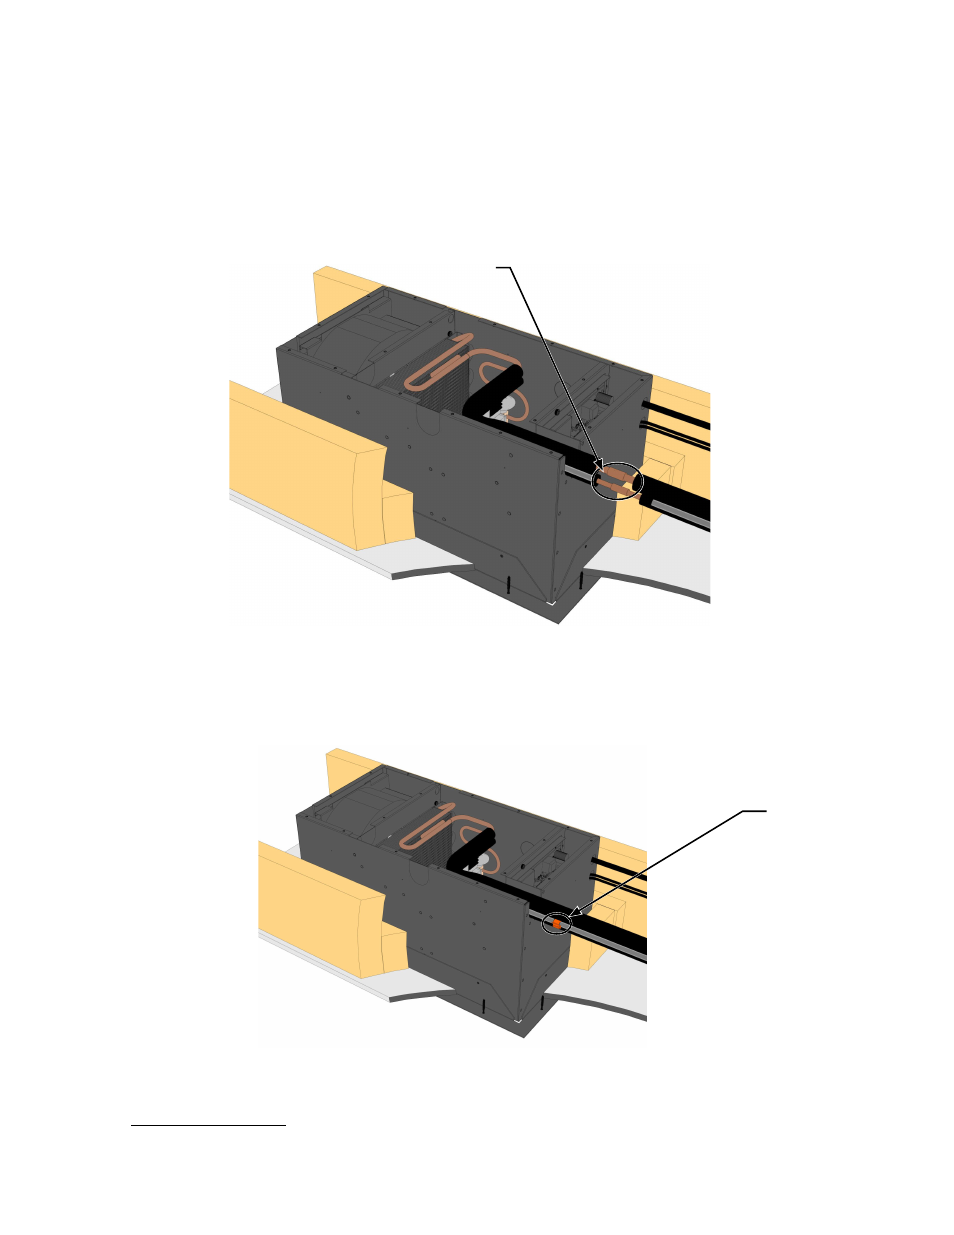
14.
Using 1/4” and 1/2” copper tubing, route the liquid and suction lines through the knockouts in the wrapper. Note:
1/2” copper tubing will slip over the 3/8” suction line on the evaporator for an easy connection.
15.
Place a wet rag around the suction and liquid lines approximately 4” from the braze joints. This will prevent excess
heat from damaging components.
16.
To prevent oxidation, purge nitrogen through the system.
17.
Braze the copper tubing to the connections on the evaporator unit.
18.
Insulate the suction line using Armaflex or similar insulation.
19.
Connect the drain line using the Anti-Siphon Device following the directions on page 20.
20.
If you have purchased the Active Humidity Option, route the 1/4” water line out of the evaporator unit with the
drain line.
21.
Reinstall the Top Access Panel and fasten the 16 screws into place.
22.
Seal all gaps around the unit using expanding foam.
23.
Using fiberglass insulation, wrap any part of the wrapper that is not inside the cellar. This will prevent
condensation from forming on the wrapper.
24.
If desired, paint the mounting bracket and Front Access Panel to match the color of the ceiling.
BRAZE LINE SET USING
COUPLING
CONNECT THE
DRAIN LINE
TUBING