EFCO 8800 Series Assembly Instructions Vol.3 User Manual
Page 8
EFCO 2009
Page 8
Series 8700 / 8800 Unitized Curtain Wall Installation Instructions - Volume 3
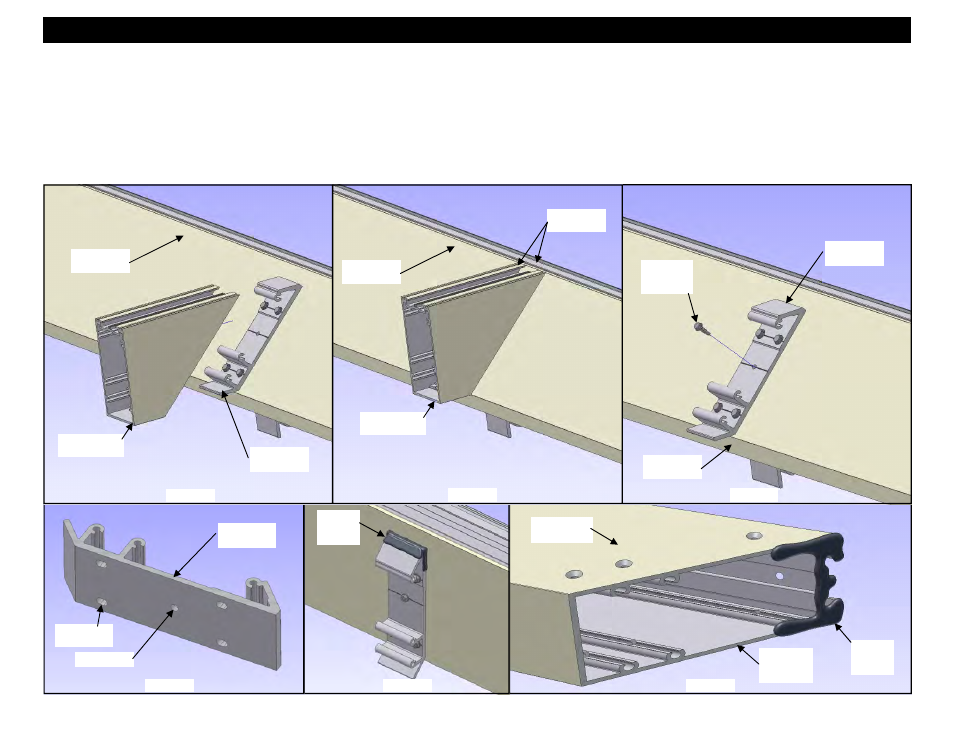
8. Once the shear blocks have been attached with SM00 fasteners, adjust the shear blocks so that the face of the horizontal aligns with the face of the corner
mullion. Using a mitered, short piece of horizontal as shown in Figure 7 will aid with alignment. The shear blocks have (4) adjustment slots and (1) fixing
hole for adjustment and to lock them into position (see Figure 10).
9. Lock the shear block in place with (1) STK3 alignment screw (#12-14 X 3/4” HW-SMS 410 TEK 3) at each intermediate horizontal location (see Figure 9).
10. Using an approved solvent or cleaner, clean the sealant contact surfaces of the mullions and shear blocks of all oils and other contaminants.
11. Apply a generous amount of silicone sealant around the front part of the shear block as shown in Figure 11. Apply a generous bead of silicone sealant
around the front part of the intermediate horizontals as shown in Figure 12. Apply sealant to the mitered end only.
Section 7 - Outside 90° Corner Unit Frame Assembly : A. Mullion Subassembly
KV11 Shear
Block
Unit Corner
Mullion
Figure 7
Align face
of mullions.
Scrap Piece
of Horizontal
Intermediate
Horizontal
Figure 8
Figure 9
Figure 10
Figure 12
Figure 11
Unit Corner
Mullion
Scrap Piece
of Horizontal
KV11 Shear
Block
KV11 Shear
Block
Adjustment
Slots
STK3
Alignment
Screw
Unit Corner
Mullion
Fixing Hole
Apply
silicone
sealant.
Apply
silicone
sealant.
Mitered
end of
horizontal.