EFCO 8800 Series Assembly Instructions Vol.3 User Manual
Page 26
EFCO 2009
Page 26
Series 8700 / 8800 Unitized Curtain Wall Installation Instructions - Volume 3
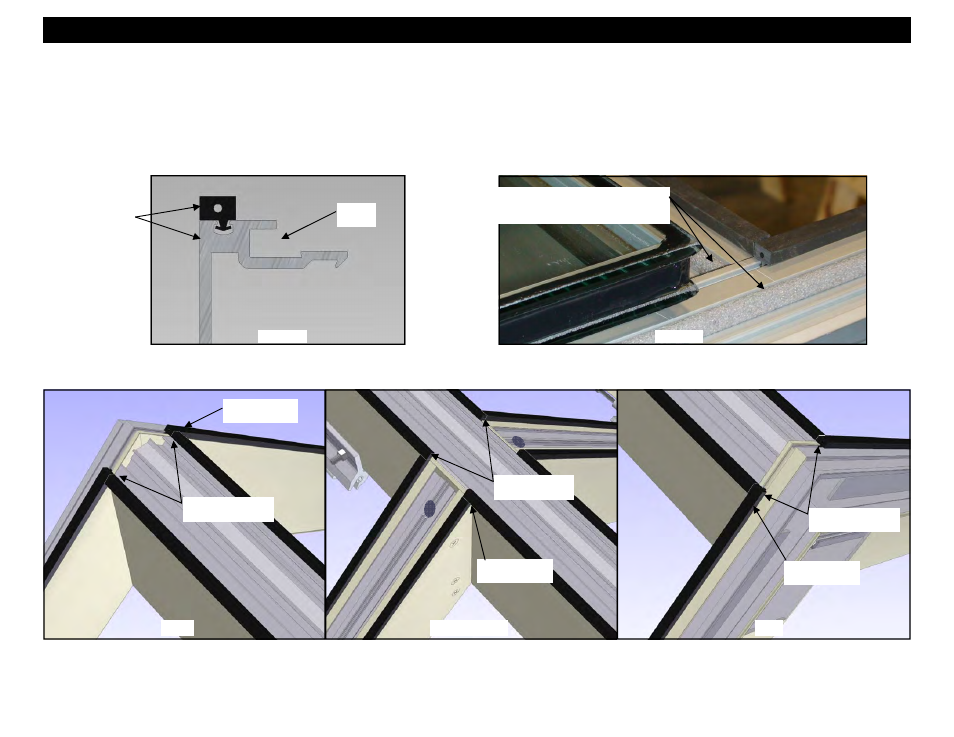
Section 9 - Outside 90° Corner Unit Glazing Preparation : SSG and Captured
Figure 65
5. Apply the WC18 spacer gasket to the mullions as shown below and on the previous page. The gaskets will run through as shown below. Butt the gaskets
together at the corners (see Figures 68, 69 and 70). “Crowd” in extra gasket, (approximately 4% to 5% extra) where it runs between the gaskets to ensure a
snug butt joint at the corners. It is important that there are no gaps in the gaskets where they meet in the corners. Note that the gasket is not symmetrical,
and must be installed so that it is flush with the side of the mullions (see Figure 66).
6. A 3/8” backer rod should be applied into the isolator reglet to prevent sealant from getting into the reglet. Remove the backer rod immediately after the
sealant is applied, and before the sealant begins to cure and skin over (See Figure 67).
Apply gaskets
flush with the side
of the mullions.
Isolator
Reglet
Insert a 3/8” backer rod into isolator reglets to
keep free of sealant. Remove the backer rod
immediately, before sealant begins to skin over.
Figure 66
Butt gaskets at
D.L.O. corners.
SILL
INTERMEDIATE
HEAD
Horizontal gaskets
run through.
Butt gaskets at
D.L.O. corners.
Vertical gaskets
run through.
Figure 67
Figure 68
Figure 69
Figure 70
Butt gaskets at
D.L.O. corners.
Horizontal gaskets
run through.
Refer to Volume 2, page 7 for spacer
gasket configuration at the jamb mullions.