EFCO 8800 Series Assembly Instructions Vol.3 User Manual
Page 12
EFCO 2009
Page 12
Series 8700 / 8800 Unitized Curtain Wall Installation Instructions - Volume 3
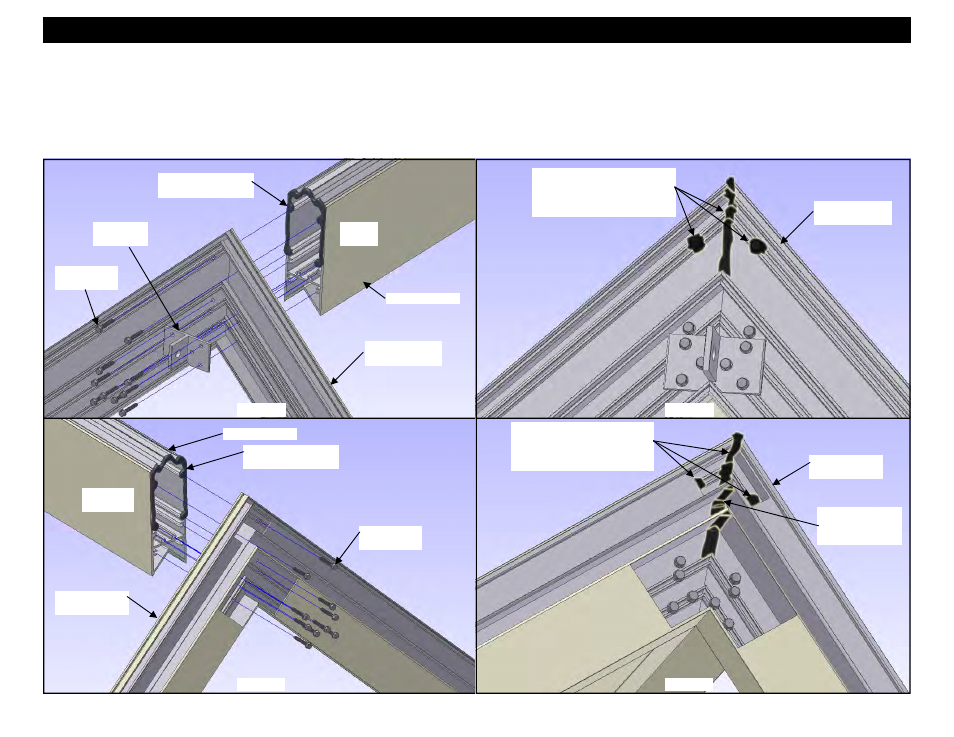
Section 7 - B. Outside 90° Corner Unit Frame Assembly
25. Once the stack head and sill assemblies have been attached, remove all excess sealant from areas that will be exposed to the interior.
26. Remove excess sealant from gasket reglets and areas where the isolator clips and adapters will later be inserted.
27. Using an approved solvent or cleaner, clean the sealant contact surfaces of the mitered areas of the stack head and sill assemblies.
28. Apply a generous bead of silicone sealant along the miter and at the fastener heads of the stack head and sill assemblies as shown in Figures 25 and 27.
29. Tool the sealant into all voids and reglets to make water tight. Avoid excessive sealant build-up in the stack sill where the units stack together.
Figure 24
17H1 Stack
Head Assembly
Figure 25
FM21 Unit
Lifting Lug
17H0 Stack Sill
Assembly
SFQ5 Frame
Screws
Corner Mullion
SFQ5 Frame
Screws
Corner Mullion
Butt seal the end of
the corner mullion.
Butt seal the end of
the corner mullion.
17H1 Stack
Head Assembly
Apply a generous bead of
sealant and tool into voids
and reglets. Cap seal fastener
heads where indicated.
17H0 Stack Sill
Assembly
Apply a generous bead of
sealant and tool into voids
and reglets. Cap seal fastener
heads where indicated.
Avoid excessive
sealant build-up
in this area.
Figure 27
Figure 26
Top of
Mullion
Bottom
of Mullion