AVer MXR6008 User Manual
Page 47
41
(1)
(2)
(3)
(4)
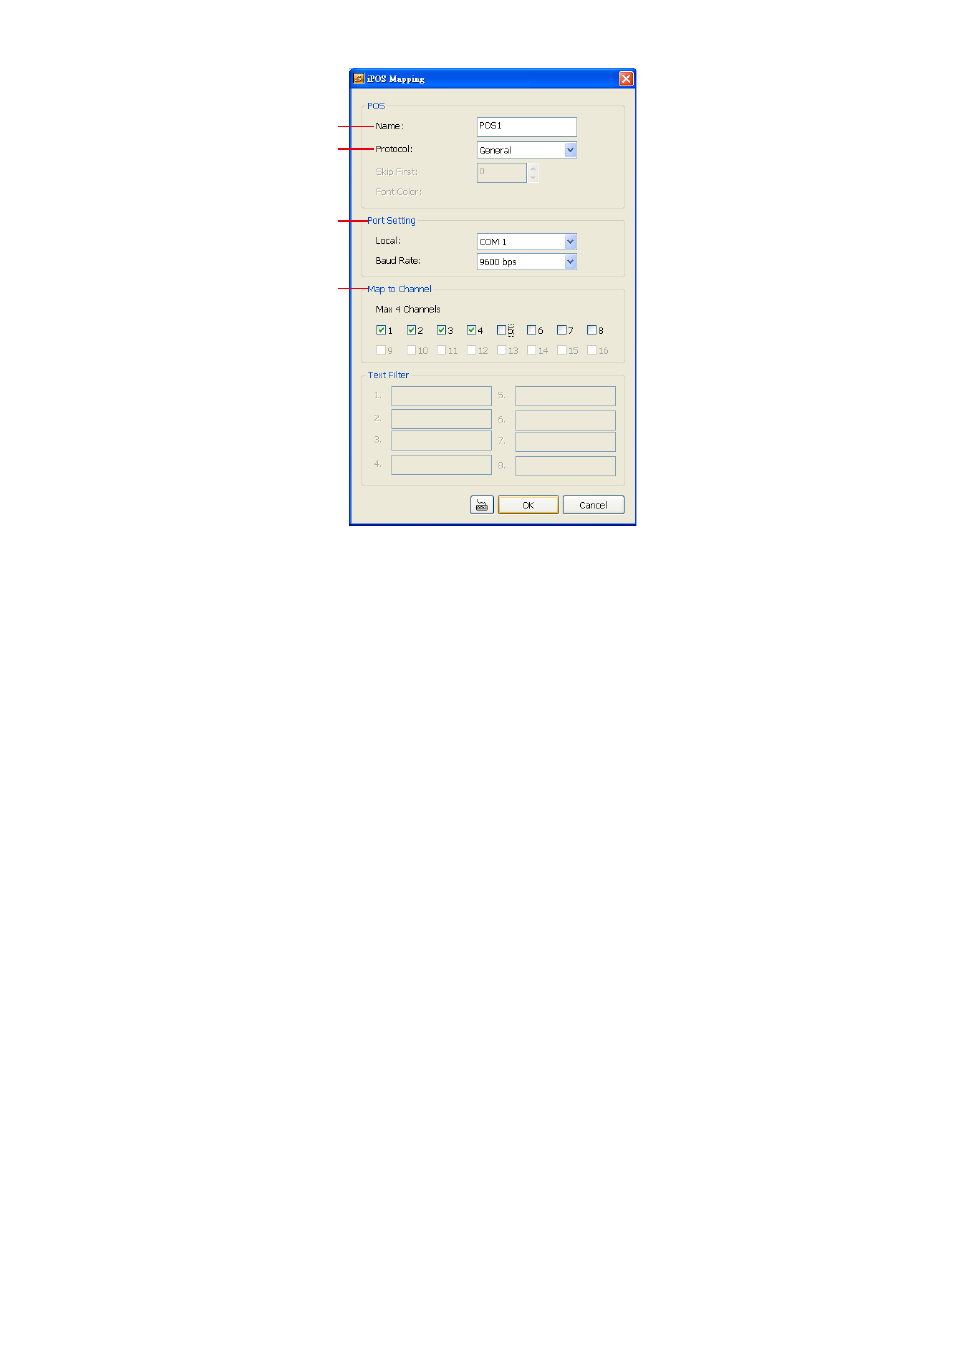
(1) Name: Enter a name to identify the POS.
(2) Protocol: Select the protocol that depends on the connected of POS system.
(3) Port Setting : Select the Local(Com port) where it is connected and Baud Rate.
(4) Map to Channel: Select to which camera number to display the transaction text.
(5) Miscellaneous
Enable the conditions in Miscellaneous section you want the system to perform.
- Playback Mode
Select the mode of playback the video.
Select date and time: Select the date and time which user wants to playback.
Play the last file: Automatically playback the video from the last hour.
Instant Playback: Automatically playback the video which has just recorded. To set the
instant playback time period, fill in the time in second at Set Instant Playback
’s Play Time
column.
- Date Format
Select the date format which wants to display in Select date and time playback mode
- Auto Scan Period
Set the time gap of the Auto Scan function from 3 to 10 seconds. This automatically switches
to the next video in cycle depending on the set time gap.
(6) Login
Enable the conditions in Login section you want the system to automatically carry out.
- Auto Record after system boot up
Automatically start video recording when the DVR system is executed.
(7) Date and Time Setting
Adjust the DVR system time and date. Click Setting to select the month, date, hour, and minute.
(8) Firmware
Product Version Update: Upgrading the firmware of DVR system.
1. Save the firmware under the local hard disk direction.
2. Click Update button, the ISP Setting window will show up.