Installing hard drives – Dell PowerVault 221S (SCSI) User Manual
Page 19
Removing and Installing Hard Drives: Dell PowerVault 220S and 221S Systems Installation and Troubleshooting Guide
file:///C|/Users/rishi_sood/Desktop/220s/en/it/6f704c3a.htm[3/7/2013 12:07:20 PM]
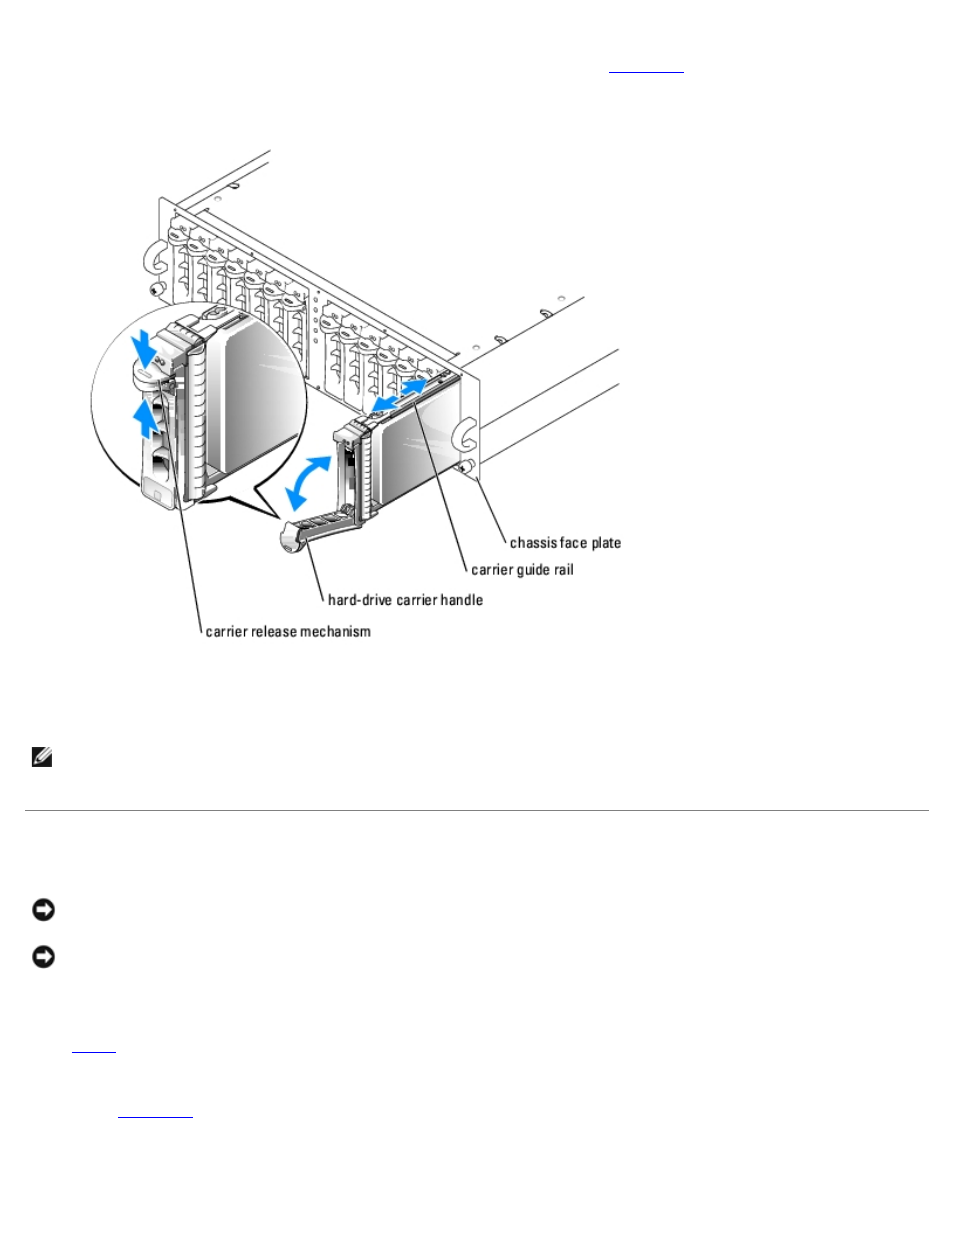
3. Squeeze the release mechanism on the front of the hard-drive carrier (see
).
Figure 3-1. Installing and Removing Hard Drives
4. Open the hard-drive carrier handle.
5. Gently but firmly pull the hard-drive carrier from its slot.
NOTE:
If the wrong drive is inadvertently removed, your array management software issues a message that a logical
disk has failed after I/O has started. For more information about what to do if the wrong drive is removed, see your
array management documentation.
Installing Hard Drives
NOTICE:
To ensure proper airflow for system cooling, each slot should contain either an active drive and drive carrier
or a carrier blank.
NOTICE:
Always wear a wrist grounding strap when handling equipment with static-sensitive components.
1. If applicable, configure your drive carrier for SCSI drive installation by setting the access pins inside the slide rail along
the right side of the drive carrier (or bottom side for rackmount systems). When in place, the access pins prevent the
carrier from being inserted into a non- SCSI hard-drive slot. If your drive carrier did not include access pins, skip to
. Otherwise, perform the following steps to set the access pins:
a. Using a standard screwdriver, detach the slide rail on the right (or hinge) side of the carrier from the metal
carrier shield by bending away the metal tab located beneath the rail that fastens the rail to the shield (see
).
Figure 3-2. Detaching the Carrier Slide Rail