Figure 3-4 – Dell PowerVault 221S (SCSI) User Manual
Page 21
Removing and Installing Hard Drives: Dell PowerVault 220S and 221S Systems Installation and Troubleshooting Guide
file:///C|/Users/rishi_sood/Desktop/220s/en/it/6f704c3a.htm[3/7/2013 12:07:20 PM]
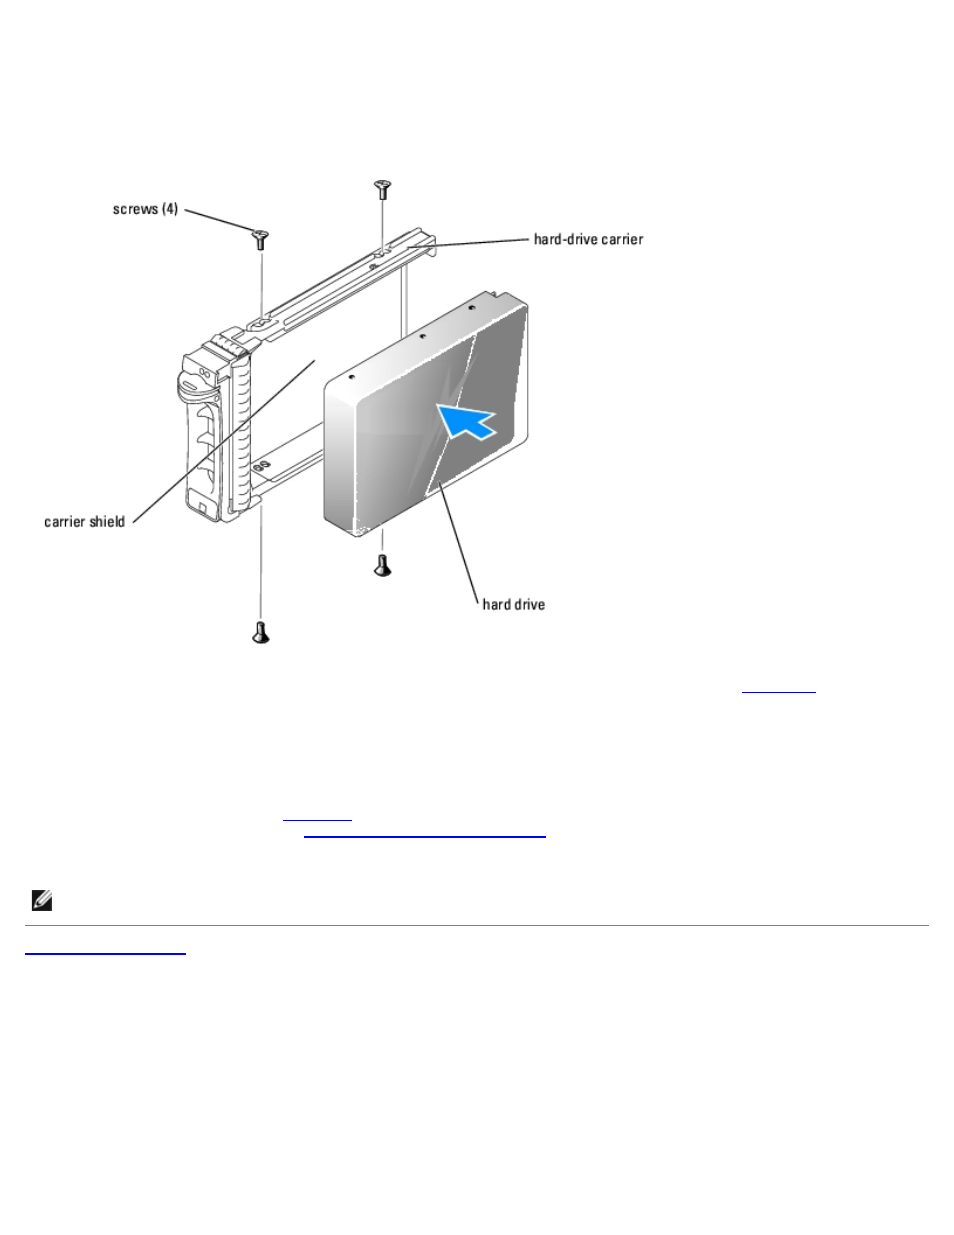
c. Align the hard drive with the carrier by sliding the hard drive against the stop at the back of the carrier.
d. Secure the hard drive to the carrier using the four screws removed earlier.
Figure 3-4. Installing the Hard Drive in the Carrier
3. With the hard-drive carrier handle open, carefully align the channel on the hard-drive carrier guide rail with the
appropriate drive slot keying feature on the chassis face plate, and insert the hard drive (see
4. Push the hard-drive carrier into the slot until the bottom of the open carrier handle makes contact with the chassis face
plate.
5. Rotate the carrier handle to the closed position while continuing to push the carrier into the slot.
The status LED indicator (see
for description) is a steady green if the hard drive is inserted properly. If the
indicator is not illuminated, see "
Troubleshooting SCSI Hard Drives
."
As the drive rebuilds, the hard-drive carrier LED flashes green twice per second at unequal intervals.
NOTE:
For information on adding a hard drive to a storage array, see your array management software documentation