Figure 4 – Dell PowerEdge 2600 User Manual
Page 52
8.
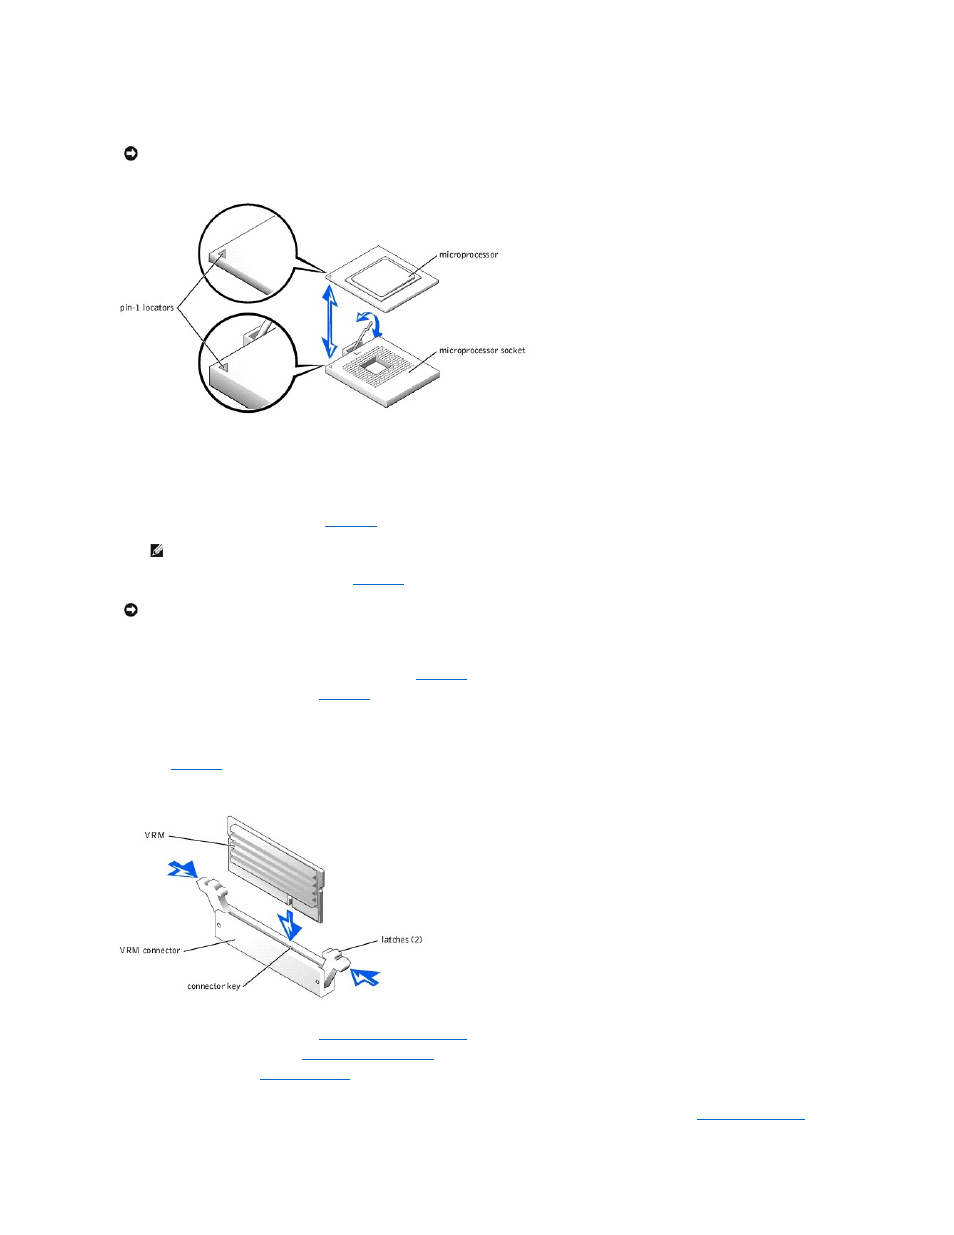
Lift the microprocessor out of the socket and leave the release lever up so that the socket is ready for the new microprocessor.
Figure 4-32. Removing and Replacing a Microprocessor
9.
Unpack the new microprocessor.
If any of the pins on the microprocessor appear bent, contact the system manufacturer.
10.
Ensure that the release lever on the microprocessor socket is in the upright position.
11.
Align pin 1 on the microprocessor (see
) with pin 1 on the microprocessor socket.
12.
Install the microprocessor in the socket (see
).
13.
When the microprocessor is fully seated in the socket, rotate the socket release lever back down until it snaps into place, securing the microprocessor.
14.
Place the new heat sink on top of the microprocessor (see
).
15.
Orient the securing clips as shown in
.
16.
Hook the end of the clips without the latch to the tab on the edge of the socket.
17.
Push down and pivot the securing clip latch until the hole on the clip latches onto the ZIF socket tab.
18.
If you are adding a second microprocessor, you must install a VRM in the VRM 2 connector, pushing down firmly to make sure that the latches engage
(see
Figure 4-33. Installing the VRM
19.
Replace the back fan assembly (see "
Replacing the Back Fan Assembly
").
20.
Replace the cooling shroud (see "
21.
").
22.
Reconnect the system to its electrical outlet and turn the system on, including any attached peripherals.
23.
Enter the System Setup program, and ensure that the microprocessor options match the new system configuration (see "
Using the System Setup
NOTICE:
Be careful not to bend any of the pins when removing the microprocessor. Bending the pins can permanently damage the microprocessor.
NOTE:
Force is not needed to install the microprocessor in the socket. When the microprocessor is aligned correctly, it should drop into the socket.
NOTICE:
Positioning the microprocessor incorrectly can permanently damage the microprocessor and the system when you turn on the system. When
placing the microprocessor in the socket, be sure that all of the pins on the microprocessor go into the corresponding holes. Be careful not to bend the
pins.