Peripheral bay, Control panel, Removing the peripheral bay – Dell PowerEdge 2600 User Manual
Page 29: Replacing the peripheral bay
Peripheral Bay
Removing the Peripheral Bay
1.
").
2.
Remove the system cover (see "
3.
Disconnect the CD/diskette drive cable from the back of the CD/diskette drive (see Figure 4-5).
The other end of this cable connects to the system board.
4.
Disconnect any cables from any devices already installed in the peripheral bay.
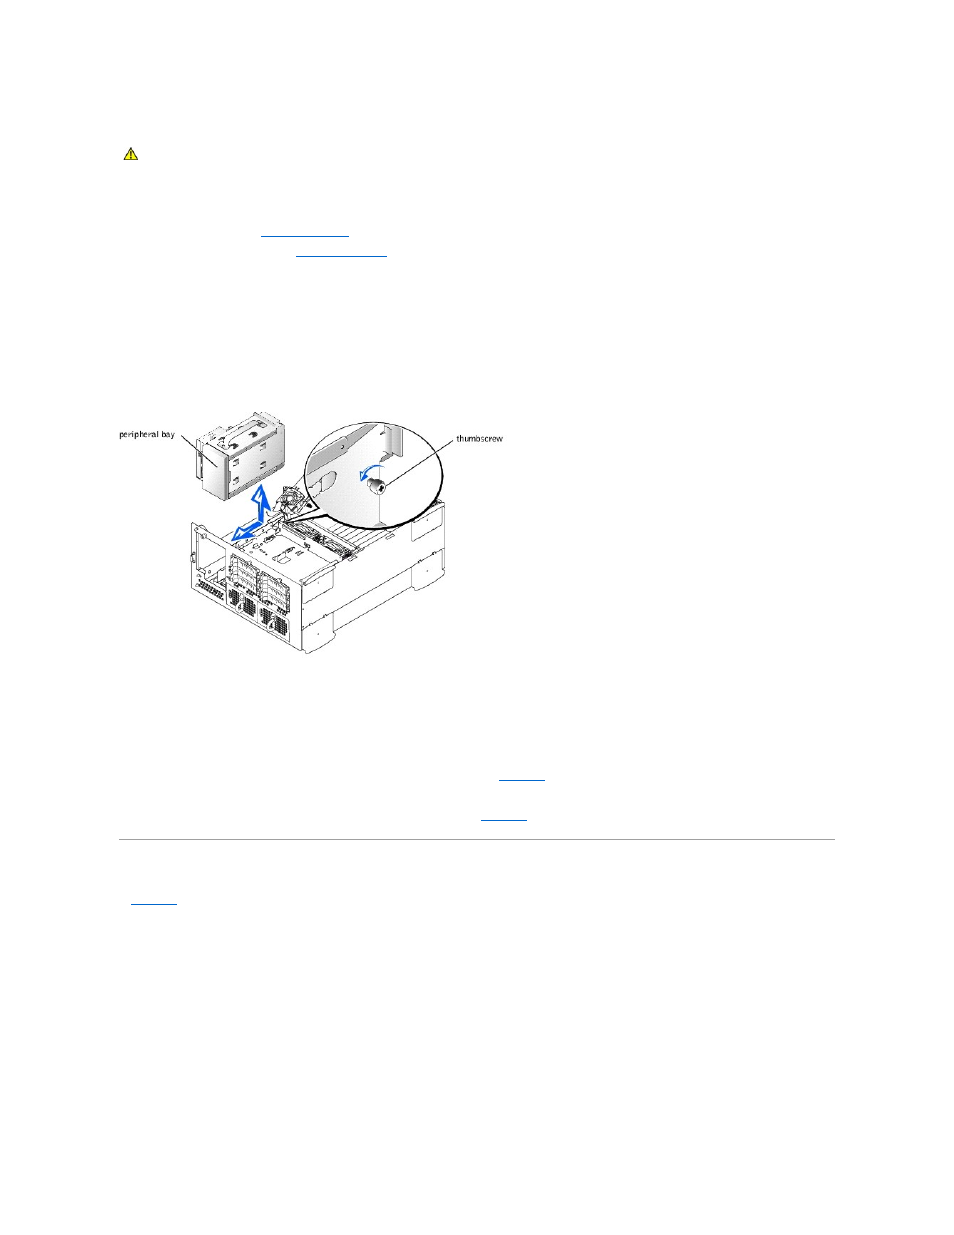
5.
Loosen the thumbscrew securing the back of the peripheral bay to the chassis.
6.
Grasping the peripheral bay by its top handle with one hand and pressing the front of the peripheral bay, slide the peripheral bay backward
approximately 0.5-inch and lift up to remove the peripheral bay from the chassis.
Figure 4-5. Peripheral Bay Replacement
Replacing the Peripheral Bay
1.
Holding the peripheral bay by its top handle, lower it into place and slide it forward approximately 0.5-inch (see Figure 4-5).
The front panel of the peripheral bay, with its attached CD/diskette drive, must be flush with the front panel.
2.
Connect the CD/diskette drive cable to the back of the interposer board (see
3.
Connect any cables you removed from any devices already installed in the peripheral bay.
4.
Tighten the thumbscrew to secure the peripheral bay to the chassis (see
Control Panel
, the control panel is shown removed from the system chassis.
Figure 4-6. Control-Panel Removal
CAUTION:
Only trained service technicians are authorized to remove the system cover and access any of the components inside the system. See
your System Information Guide for complete information about safety precautions, working inside the computer, and protecting against
electrostatic discharge.