Removing the front fan assembly, Replacing the front fan assembly, Removing the back fan assembly – Dell PowerEdge 2600 User Manual
Page 32
back of the chassis.
l
One cooling fan located on the cooling shroud.
Removing the Front Fan Assembly
1.
Open the bezel (see "
").
2.
Turn off the system, including any attached peripherals, and disconnect the system from the electrical outlet.
3.
4.
Disconnect the front fan assembly power cable from the front fan connector on the SCSI backplane board (see
Figure 5
-4
).
5.
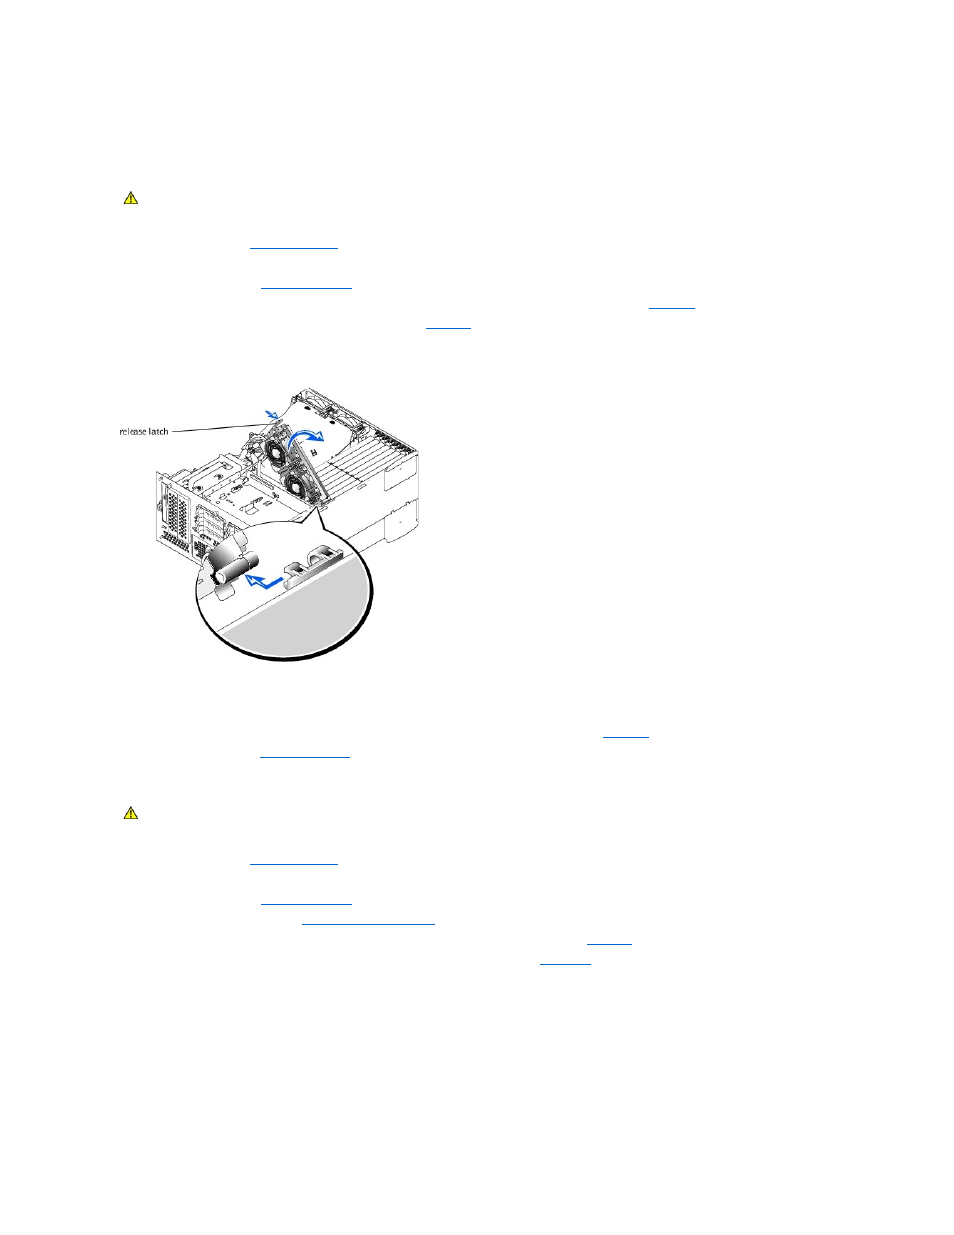
Release the fan assembly by pressing the release lever (see
).
6.
Swing the fan assembly up and out of the way.
Figure 4-9. Removing and Replacing the Front-Fan Assembly
Replacing the Front Fan Assembly
1.
Place the fan assembly in the hinge bracket and swing the fan assembly down until the release lever snaps into place.
2.
Connect the fan assembly power cable to the front fan connector on the SCSI backplane board (see
Figure 5
-4
).
3.
").
Removing the Back Fan Assembly
1.
Open the bezel (see "
").
2.
Turn off the system, including any attached peripherals, and disconnect the system from the electrical outlet.
3.
4.
Remove the cooling shroud (see "
5.
Disconnect the fan assembly power cable from the back fan connector on the system board (see
Figure 5
-3
).
6.
Pull on the release latch and lift the fan assembly straight up to clear the chassis (see
Figure 4-10. Removing and Replacing the Back Fan Assembly
CAUTION:
Only trained service technicians are authorized to remove the system cover and access any of the components inside the system. See
your System Information Guide for complete information about safety precautions, working inside the computer, and protecting against
electrostatic discharge.
CAUTION:
Only trained service technicians are authorized to remove the system cover and access any of the components inside the system. See
your System Information Guide for complete information about safety precautions, working inside the computer, and protecting against
electrostatic discharge.