Replacing the back fan assembly, Removing and replacing individual fans, Removing and replacing the cooling shroud fan – Dell PowerEdge 2600 User Manual
Page 33
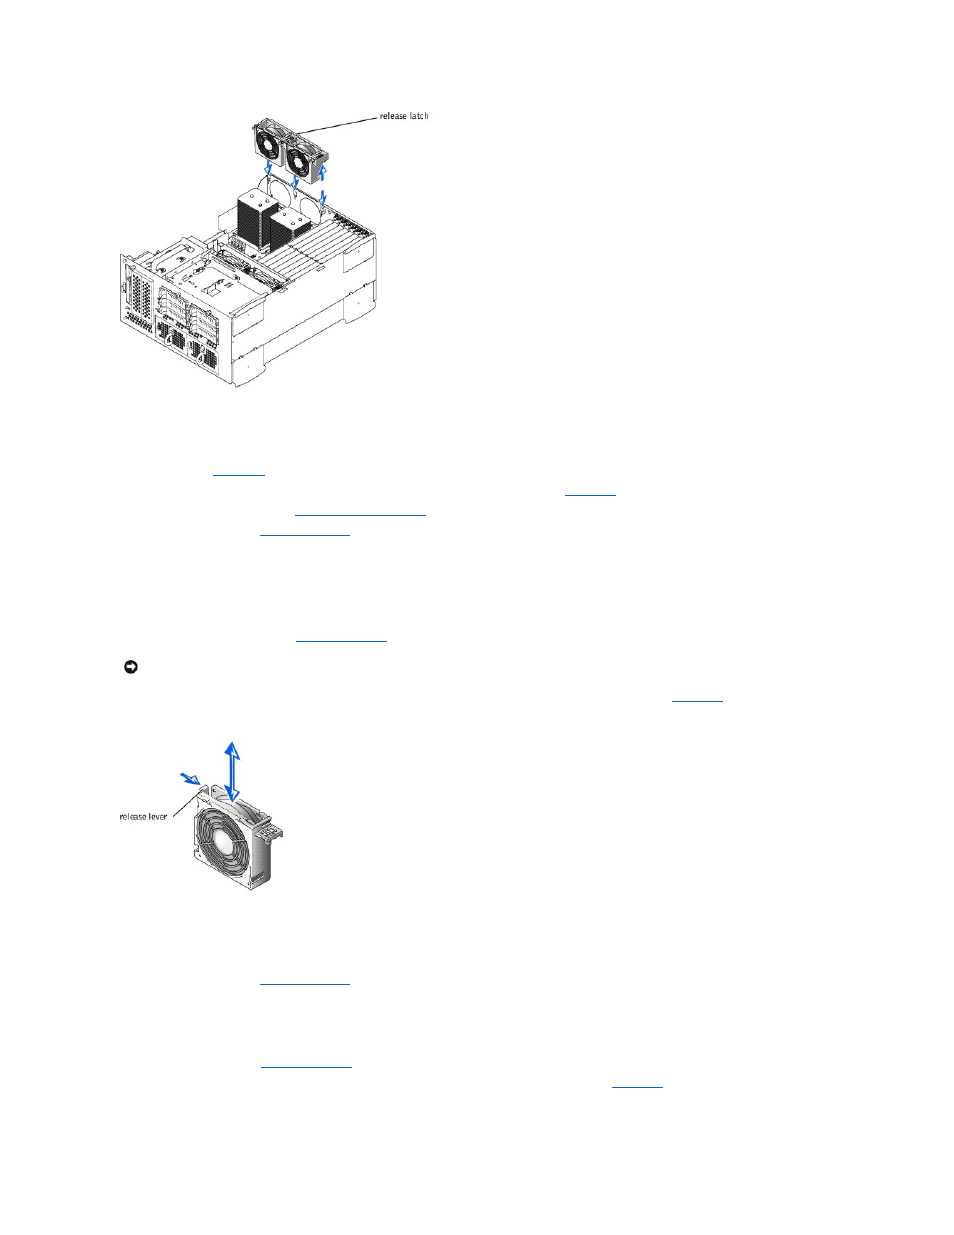
Replacing the Back Fan Assembly
1.
Align the fan assembly with the fan assembly guide on the back of the chassis, and push down until the fan assembly is firmly seated and the latch is
2.
Connect the fan assembly power cable to the back fan connector on the system board (see
3.
Install the cooling shroud (see "
").
4.
").
Removing and Replacing Individual Fans
Each fan assembly contains two fans. The procedure for removing and replacing the four individual fans are the same.
Removing a Fan
1.
Remove the system cover (see "
2.
).
Figure 4-11. Removing and Replacing Individual Fans
Replacing a Fan
1.
Lower the fan into the fan assembly until the fan snaps into position.
2.
").
Removing and Replacing the Cooling Shroud Fan
Removing the Cooling Shroud Fan
1.
2.
Push down on the two release latches and slide the fan out of the bracket on the cooling shroud (see
Figure 4-12. Removing and Replacing the Cooling Shroud Fan
NOTICE:
The cooling fans are hot-pluggable. To maintain proper cooling while the system is on, only replace one fan at a time.