Wiring the trims (floor or wall) – Edge Lighting Sun 3 LED Components User Manual
Page 6
GROUND
O
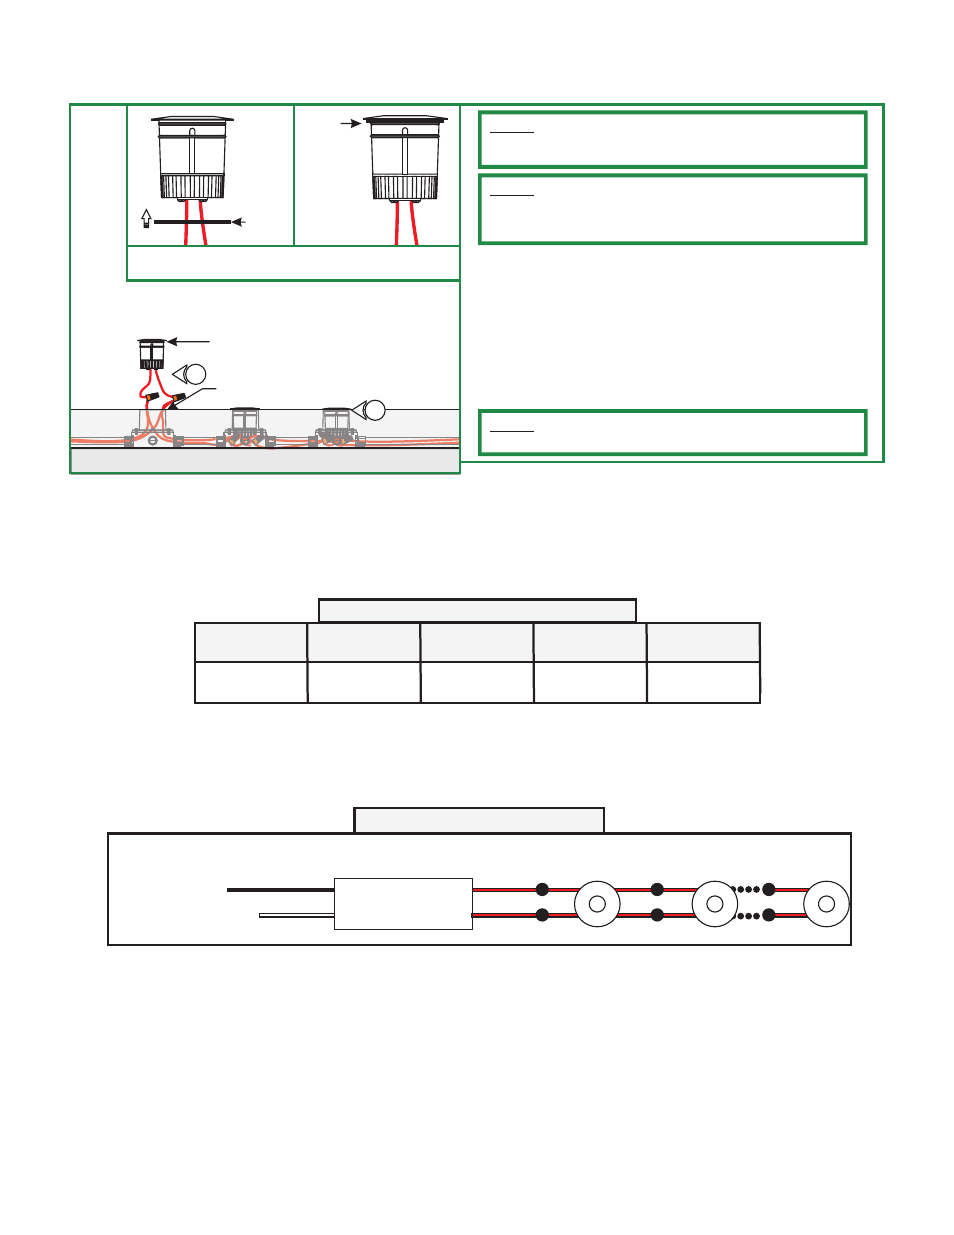
1: Remove the plastic caps.
2: Connect each trim wire to one power wire in the electrical
box with a wire nut.
3: Place all wire connections inside the electrical box and push
the trim completely into the trim housing opening.
4: Repeat steps 2 and 3 for other trims
NOTE:
(provided) onto the trim to prevent water leaking inside the
electrical box. Use water proof outdoor wire nuts for power
connection.
For outdoor installation, place the water proof gasket
TRIM
2
NOTE:
consumes 10 watts.
Each fixture contains an integrated LED lamp. Each Sun 3
Wiring the Trims (Floor or Wall)
LOW VOLTAGE WIRE SIZE CHART
TRANSFORMER
WATTAGE
WIRE SIZE
FOR UP TO 13 FT
WIRE SIZE
FOR 14-20 FT
WIRE SIZE
FOR 21-34 FT
WIRE SIZE
FOR 34-52 FT
12V 60W
TE-60L-12
#14 AWG
#12 AWG
#10 AWG
#8 AWG
Overall Wiring Diagram
SUN 3
12V AC (RED)
120V NEUTRAL (WHITE)
120V HOT (BLACK)
12 VAC
POWER SUPPLY
TRIM HOUSING
3
GASKET
GASKET INSTALLATION
FOR OUTDOOR
GASKET
NOTE:
provided with the SUN3-LL to install the beam control accessories
in each trim prior to wiring the trims.
If using the SUN3-LL accessory, refer to the instruction
6