Edge Lighting Sun 3 LED Components User Manual
Page 2
2
5: Align the set screw on the lens holder with the groove on the
trim. Make sure that the spring clip side of the lens is in the
opposite direction of the trim.
6: Insert the lens holder inside the trim making sure that the
set screw on the lens holder fits inside the groove.
D
6
TRIM
LENS HOLDER
E
TRIM
7
7: Place the optional glass lens (if using any) against the lens
holder. Replace and tighten the retainer ring to secure the
lens holder and glass lens in place.
LENS HOLDER
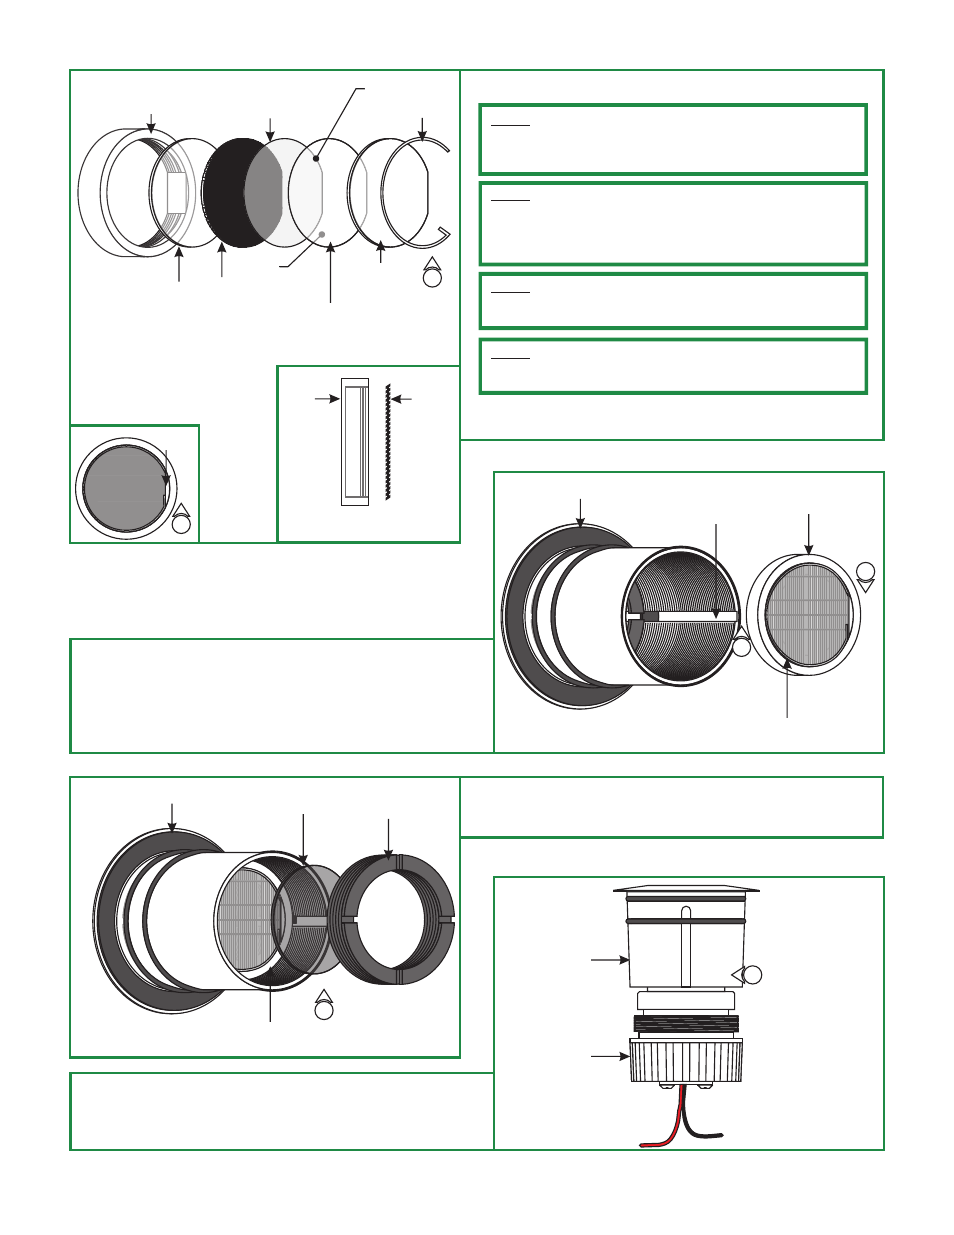
3: Carefully remove the spring clip and one of the glass lenses.
C
SPRING CLIP
LENS HOLDER
GROOVE
3
NOTE:
installed in SUN-LL & PORT-LL, if removing them please make sure
to align the cut out portion of the louver and the film with the lens
holder tab. Use one of the three optional films.
The micro louver and the 20 degree film are already
GLASS
LENS
MICRO
LOUVER
LENS
NEUTRAL DENSITY
20 DEGREE
TILT LENS FILM
TAB
GLASS
LENS
4: Replace the spring clip making sure that it sits properly in
the lens holder groove.
NOTE:
lenses. Make sure any lenses or films used with these accessories
are placed between the two glass lenses.
SUN3-LLH & PORT-LLH do not come with any films or
NOTE:
accessories. Use the second glass lens if eliminating the micro
louver and using the films only.
The second glass lens can be eliminated if using a few
MICRO
LOUVER
LENS
LENS
HOLDER
MICRO LOUVER LENS BLADES
MUST BE ORIENTED IN THIS
MANNER TO WORK PROPERLY
TRIM GROOVE
SPRING CLIP
5
LED BODY
F
TRIM
8
8: Replace and tighten the LED body completely into the trim.
9: Refer to the installation instructions provided with the Sun3
or Port to complete the installation.
4
RETAINER RING
OPTIONAL
GLASS LENS
NOTE:
green plastic) and the other side is textured (protected with a
clear plastic). The smooth side of the lens should face against the
trim glass lens. Remove protective plastics before applying the
film.
One side of the 20° film is smooth (protected with a
SMOOTH
SIDE
TEXTURED
SIDE