Edge Lighting Cirrus Channel, Direct 1" Lens User Manual
Page 2
2
D
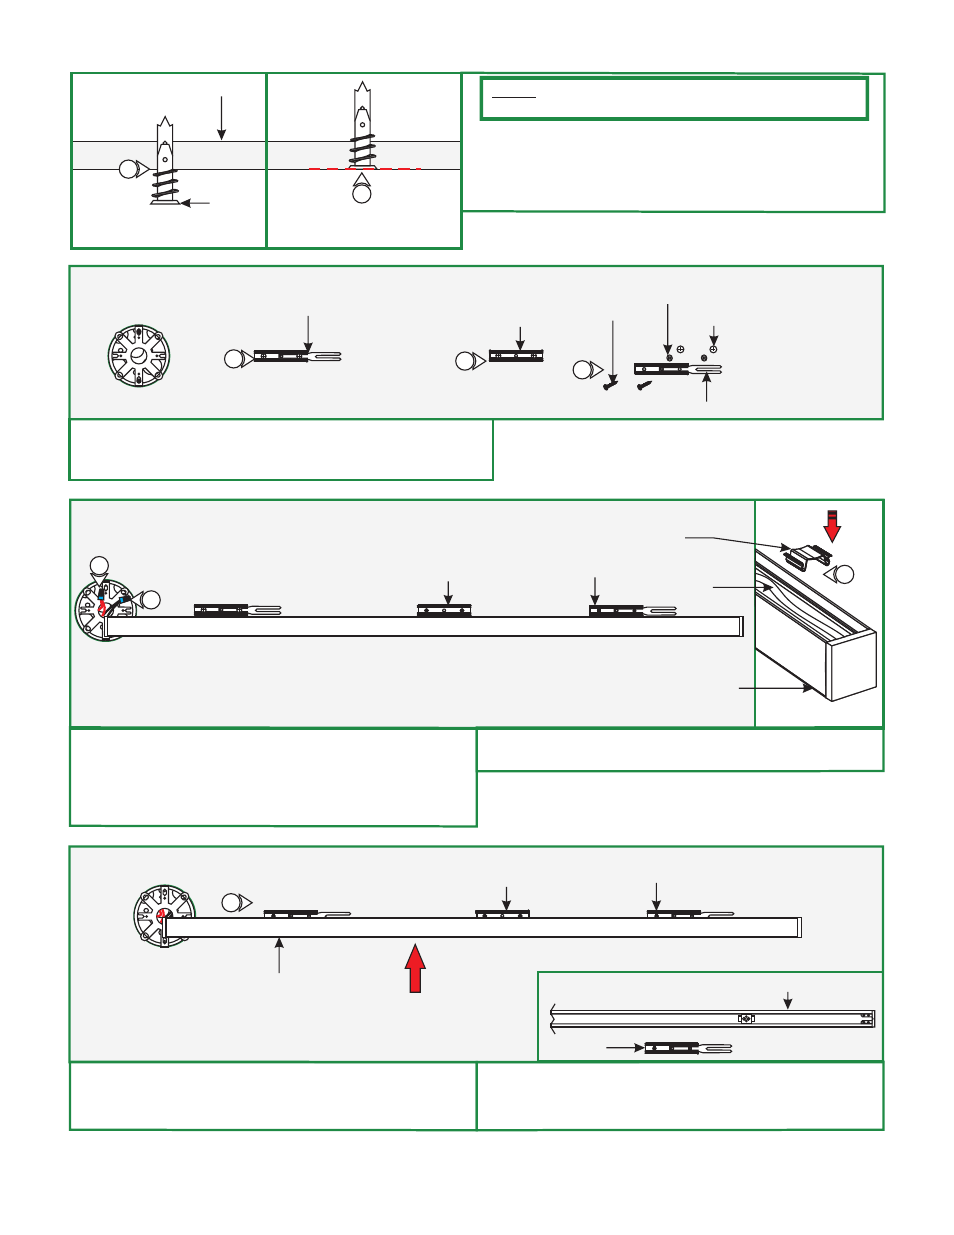
SURFACE
NOTE:
if mounting the clips to a wood surface directly.
Steps 3 and 4 are for drywall mounting. Omit these steps
4: Tap the anchors onto the marked points up to the threaded
portion with a hammer.
5: Screw in the threaded portion of the anchors with a Phillips
screwdriver.
4
5
ANCHOR
ANCHOR MUST
BE FLUSH TO WALL
E
MOUNTING
CLIP (C-MCL)
LOCKING CLIP
6
6: Line up the locking clips & mounting clips to anchor holes
and secure them by tightening the two #6 screws through
the clip holes followed by the washers into the anchors.
WASHER
(OPTIONAL)
6
F
MOUNTING
CLIP (C-MCL)
LOCKING CLIP
6
WIRE
MANAGEMENT
CLIP
CORD
CHANNEL
9
7
8
7: Connect the red power supply (24VDC+) wire to red strip
wire with a wire nut inside the Junction box.
8: Connect the black power supply (24VDC+) wire to black
strip wire with a wire nut inside the Junction box.
9: Snap the wire management clip to hold the cable in place if
necessary.
#6 SCREW
G
MOUNTING
CLIP (C-MCL)
LOCKING CLIP
10
CHANNEL
10: Carefully snap channel onto the locking/mounting clips
then slide 2" into receiving bracket to lock in place. Make
sure not to nick the wires.
11: If applicable, connect the remaining channels by following
"Connecting the Channel" on page 1. Then secure by
repeating step 10 (above).
ANCHOR
BACK OF CHANNEL
RECEIVING BRACKET
LOCKING
CLIP
LOCKING CLIP