Install the lamp – Edge Lighting 4 x 4 User Manual
Page 2
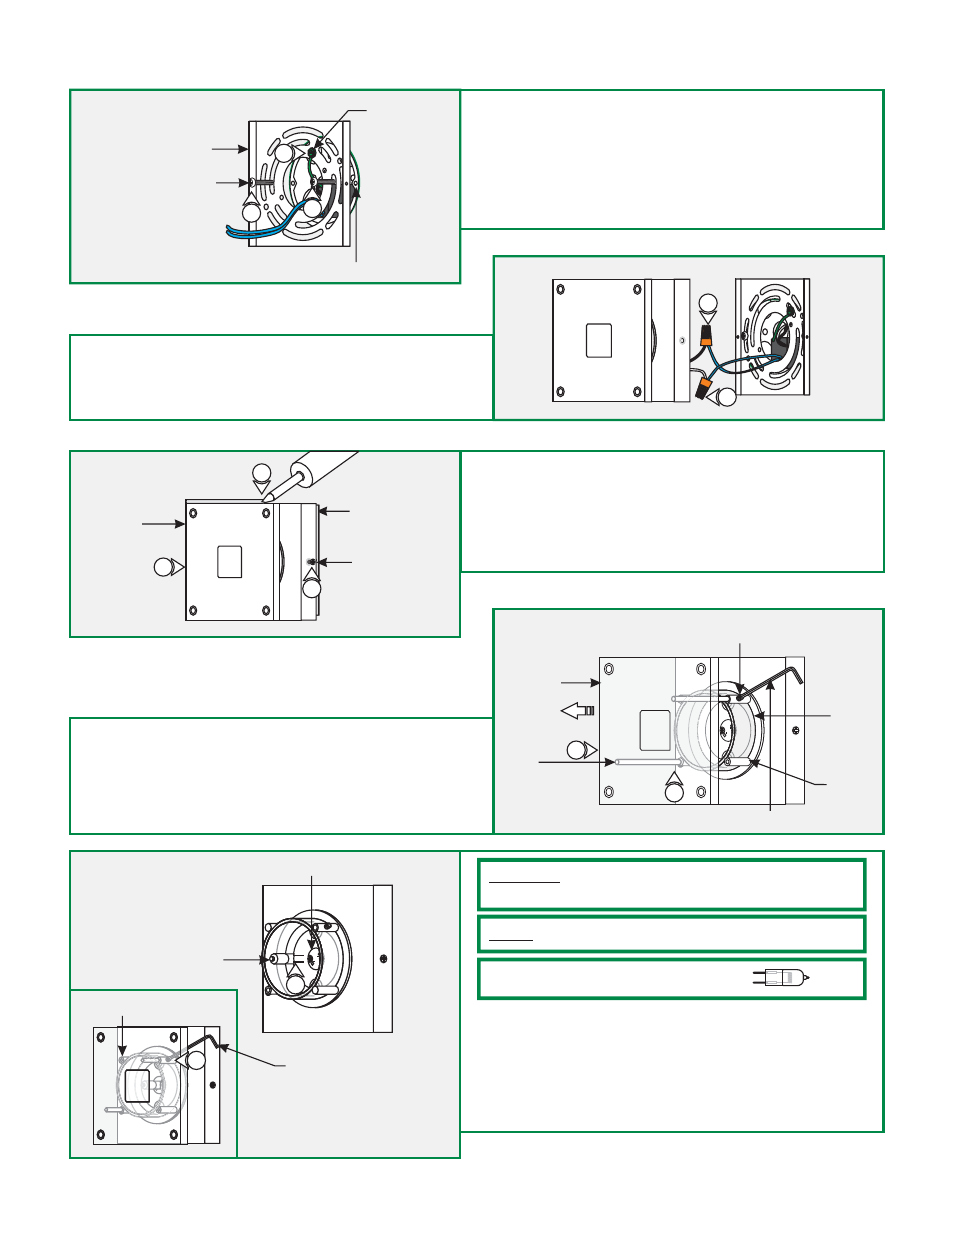
MOUNTING PLATE
ELECTRICAL BOX HOLE
C
6: Line up the mounting plate with the electrical box holes, and
secure it in place by tightening the two #8-32 screws
provided.
7: Connect the transformer green wire to the mounting plate
ground screw. Make sure that the mounting plate is grounded
in accordance with local electrical codes.
D
8: Connect each transformer low voltage (blue wire) to one
fixture wire with a wire nut
9: Place all wires and wire connections inside the electrical box.
6
6
7
8
8
E
10: Place the fixture canopy onto the mounting plate, make
sure the gasket is in place and secure it by tightening the
two Phillips screws.
11: For installation in wet location, caulk around the fixture
fixture canopy with waterproof construction sealant.
10
#8-32 SCREW
Install the Lamp
F
1: While holding the fixture face plate, loosen the two
M3 set screws on the support posts (Do Not Remove) with
the provided 1.5mm Allen wrench.
2: While holding the glass ring in place, carefully remove the
face plate.
M3 SET SCREW
1.5MM ALLEN WRENCH
1
SUPPORT
POST
G
LAMP
STUD
CAUTION:
To reduce risk of a burn or electrical shock during
lamping, disconnect the power to the fixture.
3: Remove the old lamp.
4: Push the new lamp pins completely into the socket holes.
5: Align the face plate studs with the support posts. Push the
face plate studs completely into the support posts and
tighten the two M3 set screws with the 1.5mm Allen wrench.
Use
MAX
20
Watt Bi-Pin Halogen Lamp.
NOTE: Use only fingers and a soft cloth to install the lamp
.
SOCKET
1.5MM ALLEN WRENCH
3
4
2
1
GROUND
SCREW
GLASS
RING
STUD
FIXTURE
CANOPY
2
FACE
PLATE
FACE
PLATE
PHILLIPS
SCREW
11
10