Install the lamp – Edge Lighting Rocky Ceiling User Manual
Page 2
D
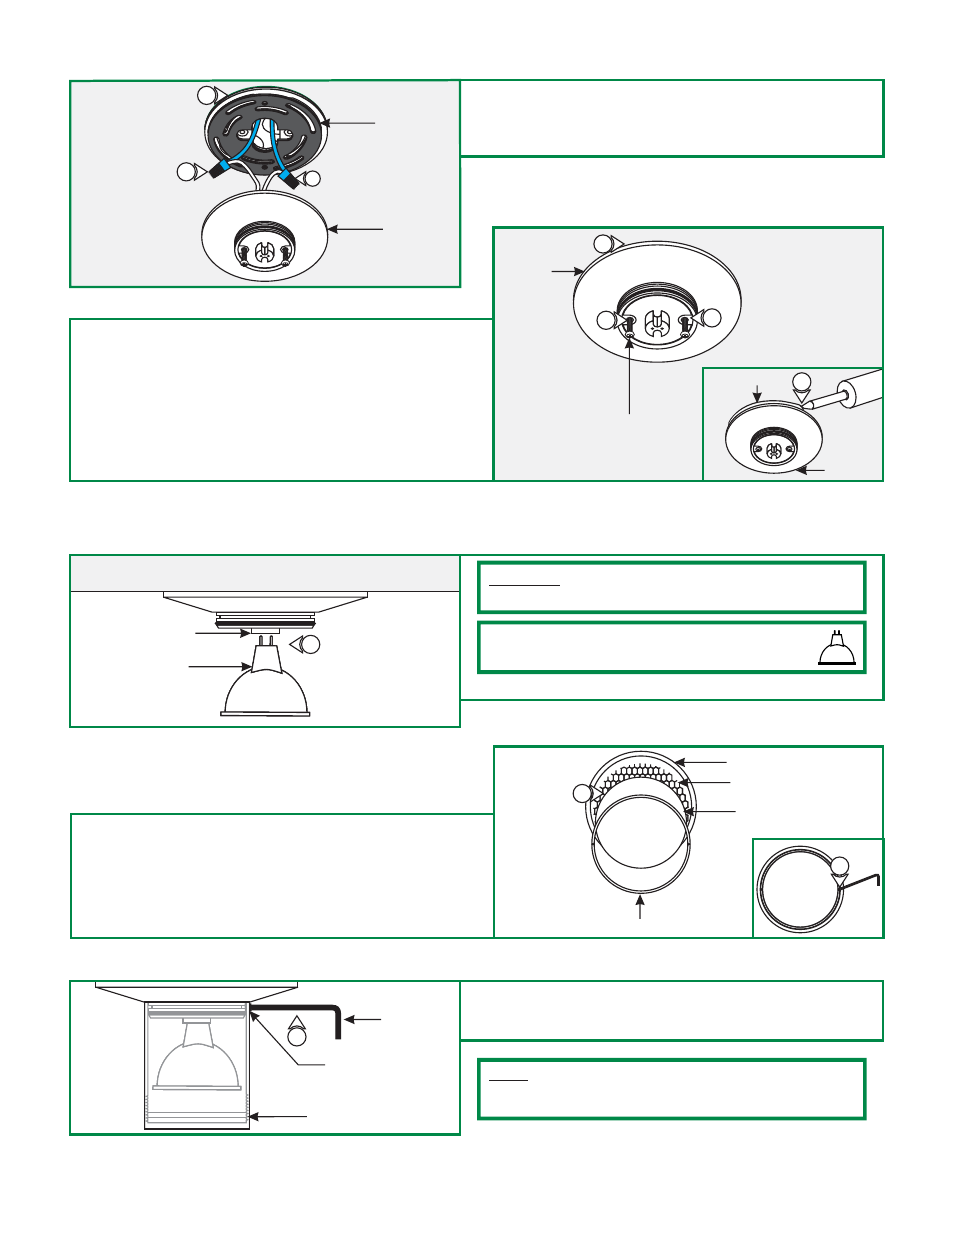
9: Place all wires and wire connections inside the electrical
box.
10: Align the fixture canopy holes with the gasket and crossbar
holes, and secure the canopy to the electrical box by
tightening the two #10-32 Phillips screws.
11: For installation in wet location, caulk around the fixture
canopy with waterproof construction sealant.
7: Slide the gasket against the crossbar.
8: Connect each transformer low voltage wire (blue wire) to one
fixture wire with a wire nut.
8
7
8
GASKET
E
10
10
CANOPY
CANOPY
#10-32 PHILLIPS SCREW
CANOPY
SEALANT
9
11
F
1: Push the lamp pins completely into the socket holes.
CAUTION:
To reduce risk of a burn or electrical shock during
lamping, disconnect the power to the fixture.
Use
MAX
20 Watt, Type MR16 Front Glass Cover
Halogen Lamp.
SOCKET
LAMP
1
Install the Lamp
G
2: Optional: To add a additional lens(es) (sold separately), use
a small Allen wrench to loosen and remove the lens holder
ring from inside the metal shade.
3: Place the lens(es), or a combination of lens(es) and a hexcell
louver into the shade (maximum 3). Replace and tighten the
lens holder ring to secure the lenses in place.
SHADE
LENS HOLDER RING
HEXCELL LOUVER
LENS
4: Push the metal shade completely onto the canopy and secure
it in place by tightening the M4 set screw with the 2mm Allen
wrench.
H
METAL SHADE
M4 SET
SCREW
2MM ALLEN
WRENCH
4
3
2
Note:
To preserve the original factory performance and stainless
steel finish, we recommend to lubricate and clean with a stainless
steel polish (MAAS Products) as needed.