Circuit #1, Circuit #2 – Edge Lighting Vase User Manual
Page 2
2
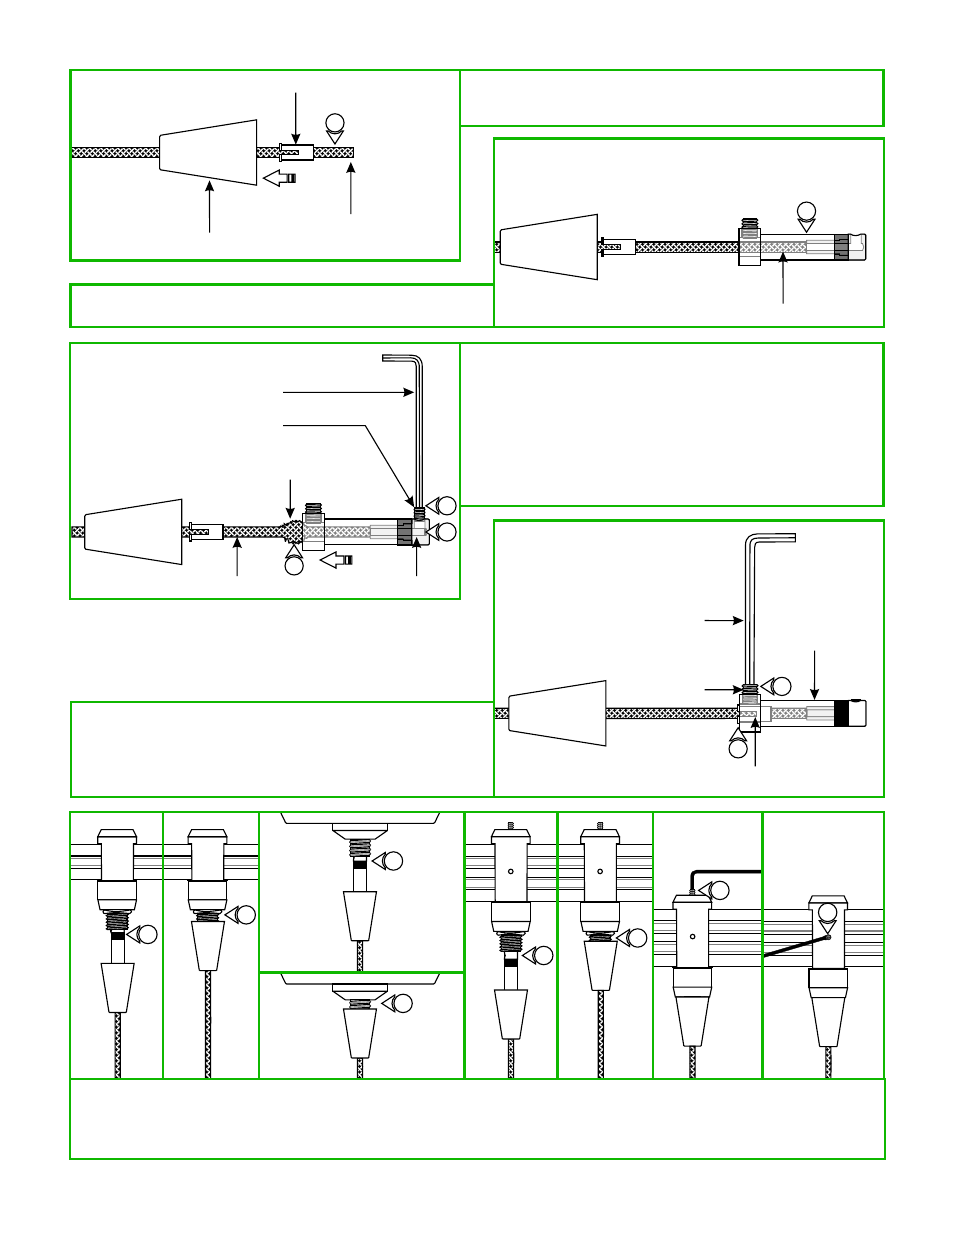
4: Feed the coaxial cable through the conical nipple and flared
side of the strain relief tube. Slide the conical nipple and
strain relief tube down the coaxial cable.
D
CONICAL NIPPLE
STRAIN RELIEF TUBE
COAXIAL CABLE
4
E
COAXIAL CABLE
5
5: Feed the coaxial cable into the coaxial fixture connector. The
coaxial cable will come to a stop point.
F
1.5MM ALLEN WRENCH
M3 SET SCREW
WRINKLE
OUTER METAL JACK
INNER WIRE
6
7
8
6: Keep feeding the coaxial cable in until the inner wire is
visible in the screw hole of the fixture connector tip. The
outer metal jacket will start to wrinkle.
7: Hold the fixture connector in place. Replace and tighten the
M3 set screw on fixture connector tip with the 1.5mm Allen
wrench.
8: Pull down the outer metal jacket to smooth the wrinkles.
9: Push the strain relief tube completely into the coaxial
fixture connector. Make sure the slot on the strain relief
tube is not inline with the M4 set screw.
10: Tighten the M4 set screw with the 2mm Allen wrench.
G
9
10
2MM ALLEN WRENCH
M4 SET SCREW
STRAIN RELIEF TUBE
COAXIAL FIXTURE
CONNECTOR
H
11
11
11
11
CIRCUIT
#1
1
2
N
12
CIRCUIT
#2
1
2
N
12
11
11
11: Use fingers to tighten the Fast Jack fixture connector into the Fast Jack system connector (Monorail, Monorail 2 Circuit, or
canopy connector - Refer to the instructions provided with the system connector or canopy).
12: Refer to the instructions provided with the Monorail 2 Circuit fixture connector to choose Circuit #1 or Circuit #2.