Install the lamp – Edge Lighting Crystal Galaxy User Manual
Page 4
4
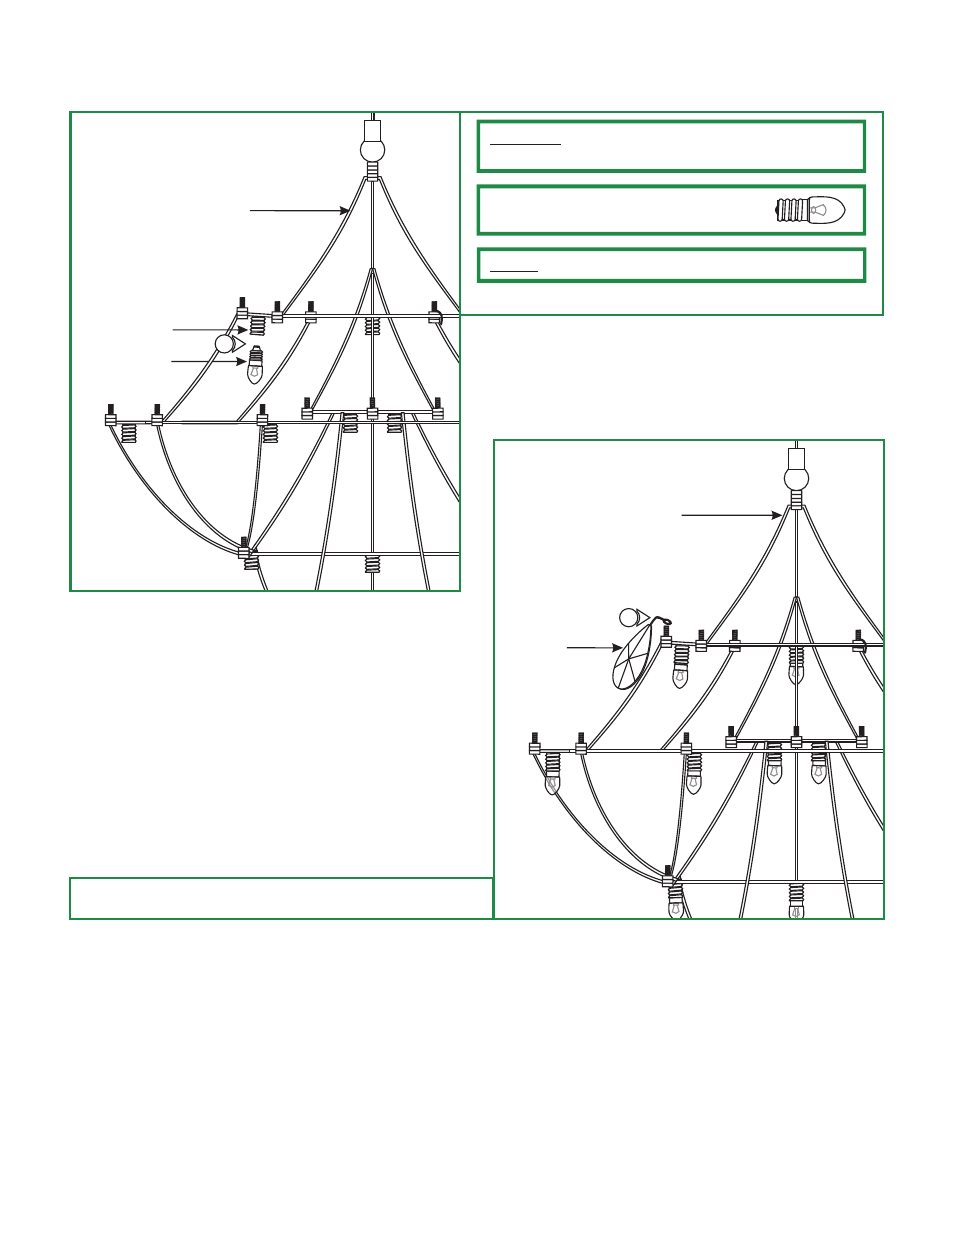
Install the Lamp
H
CAUTION:
To reduce risk of a burn or electrical shock during
lamping, disconnect the power to the fixture.
LAMP
1: Screw each lamp completely into the sockets.
NOTE: Use a soft cloth and fingers to install the lamp.
Use
MAX
2
Watt, Type E10 Miniature Lamp,
for each Socket.
Use
MAX
2
Watt, Type E10 Miniature Lamp,
for each Socket.
METAL FRAME
1
SOCKET
I
CRYSTAL
METAL FRAME
2
2: Secure each crystal Loop to a threaded post on the metal
frame.
See also other documents in the category Edge Lighting Lighting:
- Chopper (2 pages)
- Form Round & Square MR16 (2 pages)
- Form Round & Square 2-Head MR16 (2 pages)
- Function Round & Square MR16 (2 pages)
- Harley (2 pages)
- Harley with Gobo (4 pages)
- Low Rider (3 pages)
- Low Rider Spinner (2 pages)
- Rebel (2 pages)
- Spirit (3 pages)
- Triumph (3 pages)
- Vespa (1 page)
- S1 - S3 Shade Accessories (2 pages)
- S5 - S7 Shade Accessories (1 page)
- Adam Pro Aim MR16 (4 pages)
- Box Pro Aim MR16 (4 pages)
- Neo Pro Aim MR16 (4 pages)
- Phi Pro Aim MR16 (4 pages)
- Alps (4 pages)
- Bloom (3 pages)
- Bubble Ball (4 pages)
- Crossroads (3 pages)
- Crystal Galaxy with Downlight (5 pages)
- Crystal Spirit (4 pages)
- Drop 2 Pendant (2 pages)
- Everest (3 pages)
- Ice (3 pages)
- Izar (4 pages)
- Jelly (2 pages)
- K2 LED (2 pages)
- King's Crossing (4 pages)
- LED Pipe (2 pages)
- M&M LED (2 pages)
- Mata Hari 3 (3 pages)
- Outlaw (4 pages)
- Quattro LED (2 pages)
- Scope LED Pendant (3 pages)
- Tower of Crystal Love (4 pages)
- Tower of Love Shattered (4 pages)
- Vase (2 pages)
- Vessel 4 (3 pages)
- Vessel 6 (2 pages)
- White Night & Dark Night (3 pages)
- Zzz Lamp (4 pages)