Exporting log files, Importing log files – Baseline Systems BaseStation 3200 User Manual
Page 80
BaseStation 3200 Advanced Irrigation Controller Manual
2. Turn the dial to the AUX position.
3. Press the NEXT button to move to the USB Data option, and then press the ENTR button.
4. Press the NEXT button to move to the Restore option, and then press the ENTR button. The controller
replaces the current programming with the copy from the USB drive.
5. When the controller finishes copying the data from the USB drive, unplug the drive from the port, and then
turn the dial back to the Auto Run position.
Exporting Log Files
The BaseStation 3200 saves up to two years of log files. The controller records all programming changes, run times,
moisture levels, and other internal information in these files. The daily files are saved in folders by month. When
you perform an export, all of the files are copied to the USB drive in the controller serial number folder, and in a
subfolder called Export.
Note: These files may be requested by Baseline Support.
1. Plug a USB drive into the USB port on the faceplate of the controller.
WARNING! To avoid damaging the connector pins, gently push the drive into the port.
2. Turn the dial to the AUX position.
3. Press the NEXT button to move to the USB Data option, and then press the ENTR button.
4. Press the NEXT button to move to the Export option, and then press the ENTR button. The controller copies all
the internal log files to the USB drive.
5. After the controller has finished copying the log files to the USB drive, unplug the drive from the port, and
then turn the dial back to the Auto Run position.
Importing Log Files
If you upgrade to a new controller, you can import the log files from your old controller so your new controller has
access to your historical data.
IMPORTANT NOTE! Make sure that you perform the Exporting Log Files procedure on your old controller before
you decommission it.
1. On the new controller, plug the USB drive that has the exported log files on it into the USB port on the
faceplate of the controller.
WARNING! To avoid damaging the connector pins, gently push the drive into the port.
2. Turn the dial to the AUX position.
3. Press the NEXT button to move to the USB Data option, and then press
the ENTR button.
4. Press the NEXT button to move to the Import option.
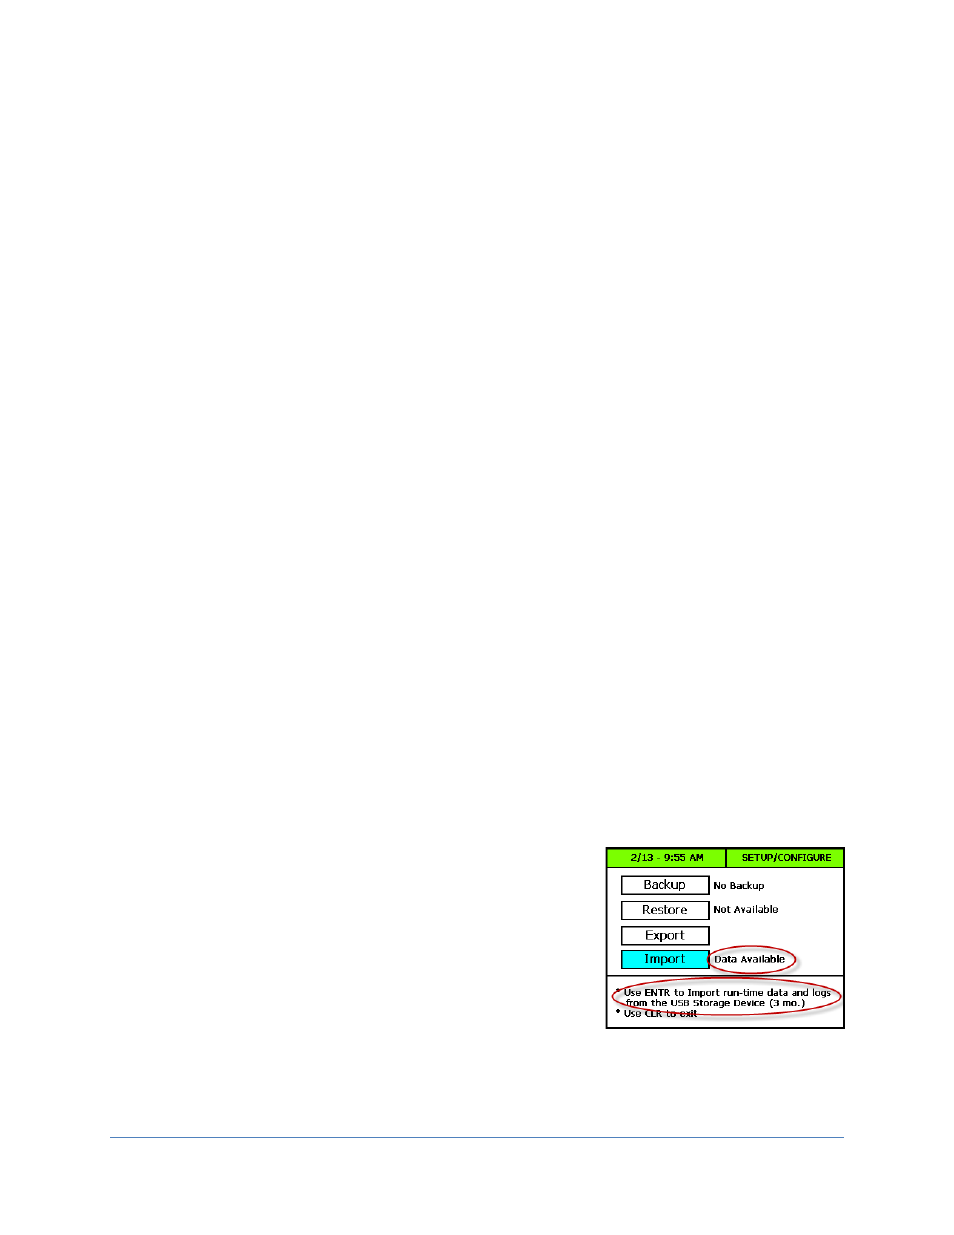
Note: The reads the data on the USB drive and indicates that it is
available to be imported. The controller also indicates the range of
data that will be imported. In the example, the controller will import 3
months of data.
5. Press the ENTR button. The controller copies all the data from the USB drive and then it restarts.
6. After the controller has restarted, unplug the USB drive from the port, and then turn the dial back to the Auto
Run position.
Page
72