Mcal m – Great Plains 3N-4025P Operator Manual User Manual
Page 47
Great Plains Manufacturing, Inc.
Hydraulic Drive Operation
43
2014-01-29
196-538M
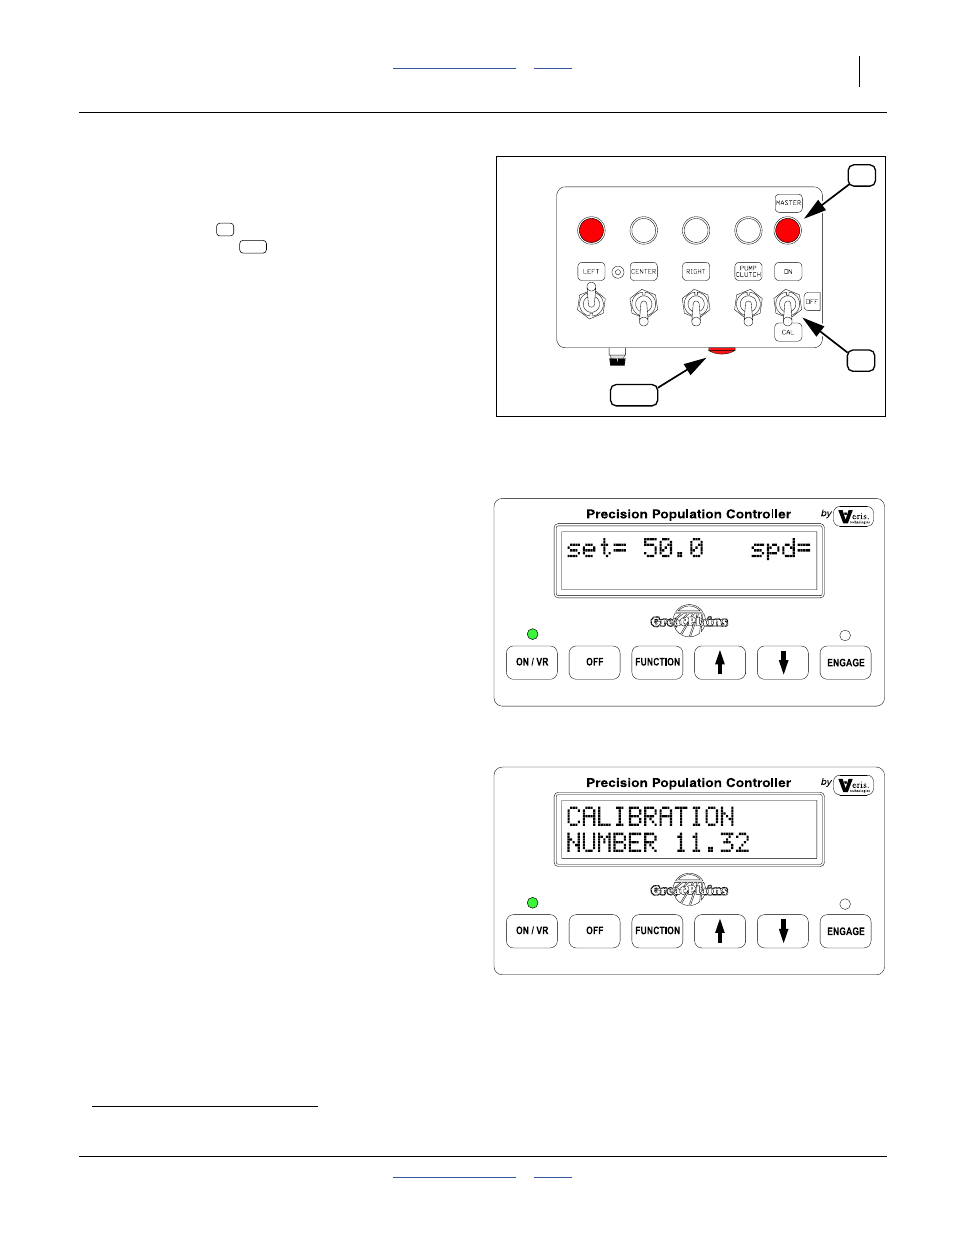
Refer to Figure 42
4.
Set the Point Row switch box for Calibration mode:
• LEFT section switch on.
• CENTER and RIGHT section switches off.
• Master switch
to “CAL”
Confirm CAL lamp
illuminated.
5.
Take steps to capture and measure seed from the
three outside rows of the left wing.
If seed is loaded at more rows, take steps to recover
seed from non-sampled rows on the left section.
6.
Set the seed rate handles all sections to the chart
value (page 43). See page 79 for handle operation.
Refer to Figure 43
7.
Turn on Controller Console by pressing ON/VR
button. Green light above ON/VR button illuminates.
8.
Use
⇑/⇓ arrow buttons to set desired planting rate,
the example, 50.0 pounds/acre
a
.
Note: Set the desired rate before performing a
calibration, as this value is used by the controller to
calculate sample run time. If the rate is not set, the
sample run time will be incorrect, or you may get
“TIME TOO LOW/HIGH” errors that cannot be
cleared by adjusting the expected sample size.
Press FUNCTION button until CALIBRATION
NUMBER window appears.
10. Select drive calibration number based on row
spacing and seed, from “Seed Rate Calibration
Steps” on page 42. You may also use an initial value
developed from a previous calibration of similar
seed.
11. Use
⇑/⇓ arrow keys to set Calibration number.
If no sample-based calibration is desired, press
FUNCTION to cycle to initial screen.
Figure 42
Point Row in Calibration
28329
M
CAL
m
M
CAL
a. The controller ignores units of measure at step 8. If you change units at step 14, the numeric value entered at step 8 is unchanged.
Figure 43
Controller Button Functions
28249
Figure 44
Calibration Number
28250