Collection chute operation, Using the collection chute, Ud b f – Great Plains NTA3007 Operator Manual User Manual
Page 72
68
NTA907 or NTA3007
Great Plains Manufacturing, Inc.
166-371M
2012-07-02
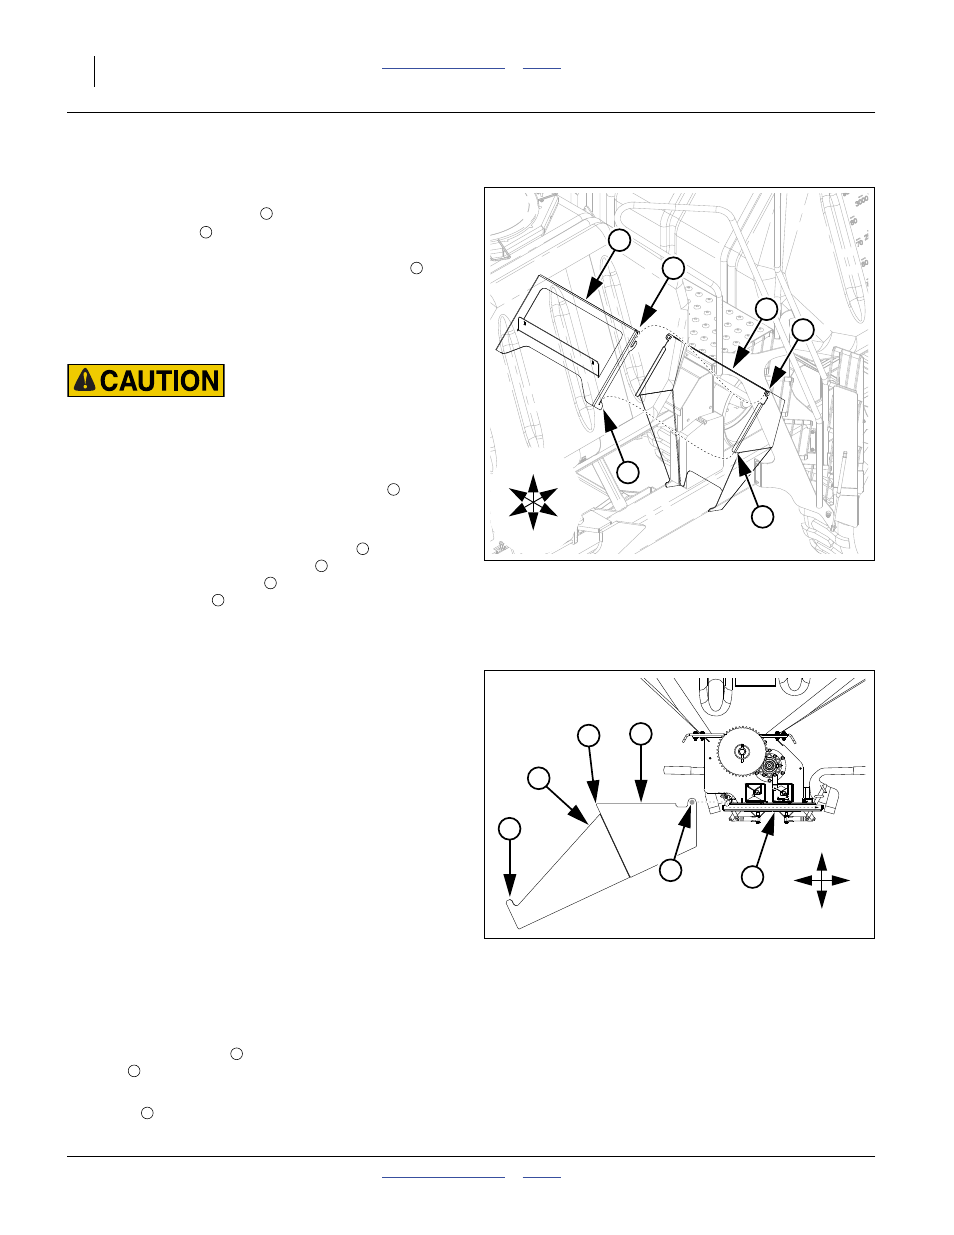
Collection Chute Operation
Refer to Figure 69 and Figure 70 (Figure 69 shows the
location of the storage bracket
under the front hopper (light
gray), and the chute
after removal or before storage)
Because the front meter has only modest clearance
below it to the centre row units, a collection chute
provided for calibration and clean-out.
The chute may be used with the front or rear meter, and
may be installed to deliver material ahead or behind the
meter.
Overhead Object Hazard:
Employ two persons to remove and store the chute. It weighs
17 kg (42 pounds) and can fall suddenly if improperly
removed.
The chute is stored on four hooks of a bracket
rear of the front hopper.
To remove the chute, have each person support the top
with one hand, and lift the mid-point edge
the narrow lower bracket hook slots
. Then raise the
chute until the top pivot pins
upper bracket hooks
To store the chute, lift the pivot pins into the upper
bracket hooks. Swing the bottom of the chute toward the
lower bracket hook slots. Raise the bottom of the chute
just enough to engage the mid-point edge in the lower
hook slots.
Using the Collection Chute
1.
Move the drill to a surface suitable for lowering the
row units. The chute cannot be used with the centre
openers raised. The drill does not need to be
unfolded (and calibration or clean-out may be more
convenient with the drill partially or fully folded).
2.
Lower the row units (page 42).
3.
If the task is calibration:
Open the calibration door on the meter, and wipe
seed off the door and flanges before installing the
collection chute. See manual 167-085B for complete
details of calibration.
Close the door. The chute cannot be installed with a
door open.
4.
Choose a desired orientation for the chute.
5.
Slide the chute lips
fully onto the meter side
rails
.
6.
For calibration, attach the calibration bag to the
hooks
at the outlet end of the chute.
7.
Open the appropriate meter door for calibration or
clean-out.
For calibration, at the end of sample generation, it is
likely to be necessary to wipe residual seed out of
the chute and into the bag.
Figure 69
Collection Chute Remove/Store
32453
U
D
F
B
L
R
1
2
4
3
6
5
2
1
3
4
5
6
Figure 70
Chute Installed on Front Meter
32452
U
D
B
F
7
9
8