Seed flap replacement, Beacon maintenance (nta907 only) – Great Plains NTA3007 Operator Manual User Manual
Page 151
Great Plains Manufacturing, Inc.
Maintenance and Lubrication
147
2012-07-02
166-371M
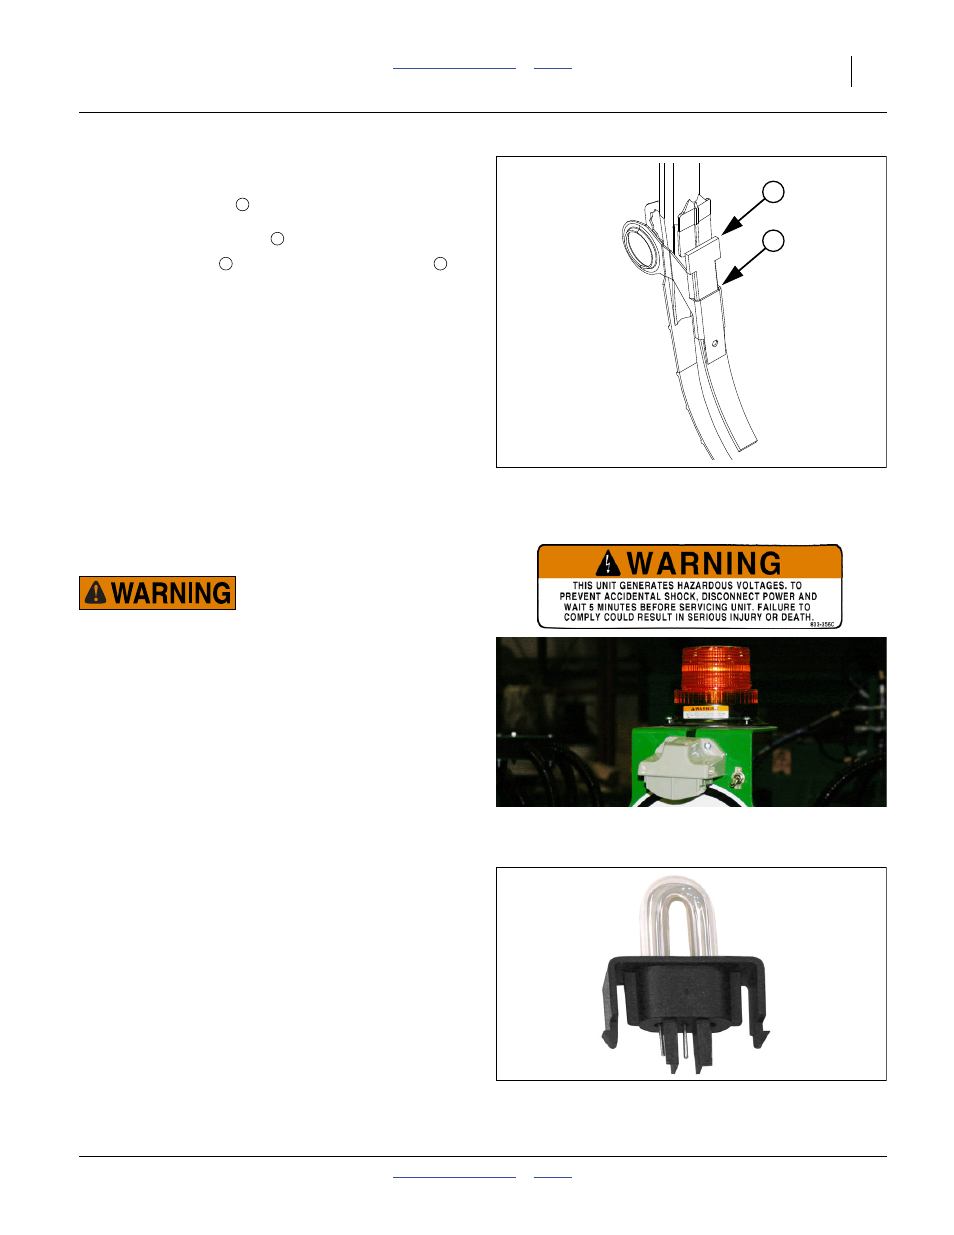
Seed Flap Replacement
Refer to Figure 159
To replace a seed flap
, use a needle nose pliers or
similar tool to grasp “T” top of flap. Pull upward to pull
flap up out of metal bracket
.
Push new seed flap
down through metal bracket
until flap snaps into place with “T” top resting on top of
bracket.
If an optional Keeton
®
or Seed-Lok™ seed firmer is
installed, you may need to shorten the exposed end of
the flap to maintain clearance from the firmer.
Beacon Maintenance (NTA907 only)
Shock Hazard:
Remove power by disconnection and wait five minutes before
touching anything under the beacon lens. The strobe circuit
internally generates a high voltage that could incapacitate a
healthy person or cause death in a susceptible individual.
The lens and flash tube of the beacon are available as
replacement parts from Grote Industries, Inc. Verify that
the 833-563C luminaire is a Grote 7710 or 77103 before
ordering either of the parts below from Grote:
1.
Disconnect a power lead at the beacon or at the
hitch. Do not rely solely on the switch.
2.
Wait five minutes. Any residual high voltage in the
disconnected flash tube circuit bleeds down to
harmless levels during this time.
3.
Unscrew the lens.
4.
If replacing the flash tube, squeeze the side tabs and
remove the old tube assembly.
5.
Be careful not to touch the glass tube of the new
flash tube. Contamination can reduce tube life. Plug
the new tube into the socket.
6.
Screw on the existing or replacement lens.
7.
Reconnect power.
Figure 159
Seed Tube Flap
32401
2
1
1
2
1
2
92033
Yellow Lens
92980
Flash Tube
Figure 160
Beacon and Tail Lamp
32472
Figure 161
Replacement Flash Tube
32473