Marker adjustments, Marker disk adjustment, 21 n w t – Great Plains YP4025A Operator Manual User Manual
Page 66
62
YP4025A
Great Plains Manufacturing, Inc.
401-627M
2013-04-24
Marker Adjustments
There are three adjustments and two maintenance items
for markers:
• Disk Angle (following)
Even if your row spacing rarely changes, you may
need to adjust disk angle for soil conditions and plant-
ing speed.
• Shear Bolt Replacement (Maintenance, page 110)
If a marker hangs up on an obstruction, a bolt at the
fold is designed to fail.
• Marker Cylinder Bleed (Maintenance, page 110)
If marker operation is irregular, check that system is
not contaminated with air.
• Marker Extension (Initial Setup, page 167)
Once set for a specific row spacing, this only needs
periodic checking to ensure the clamp is secure.
• Marker Speed (Initial Setup, page 166)
Once initially set by your dealer, this rarely needs
modification.
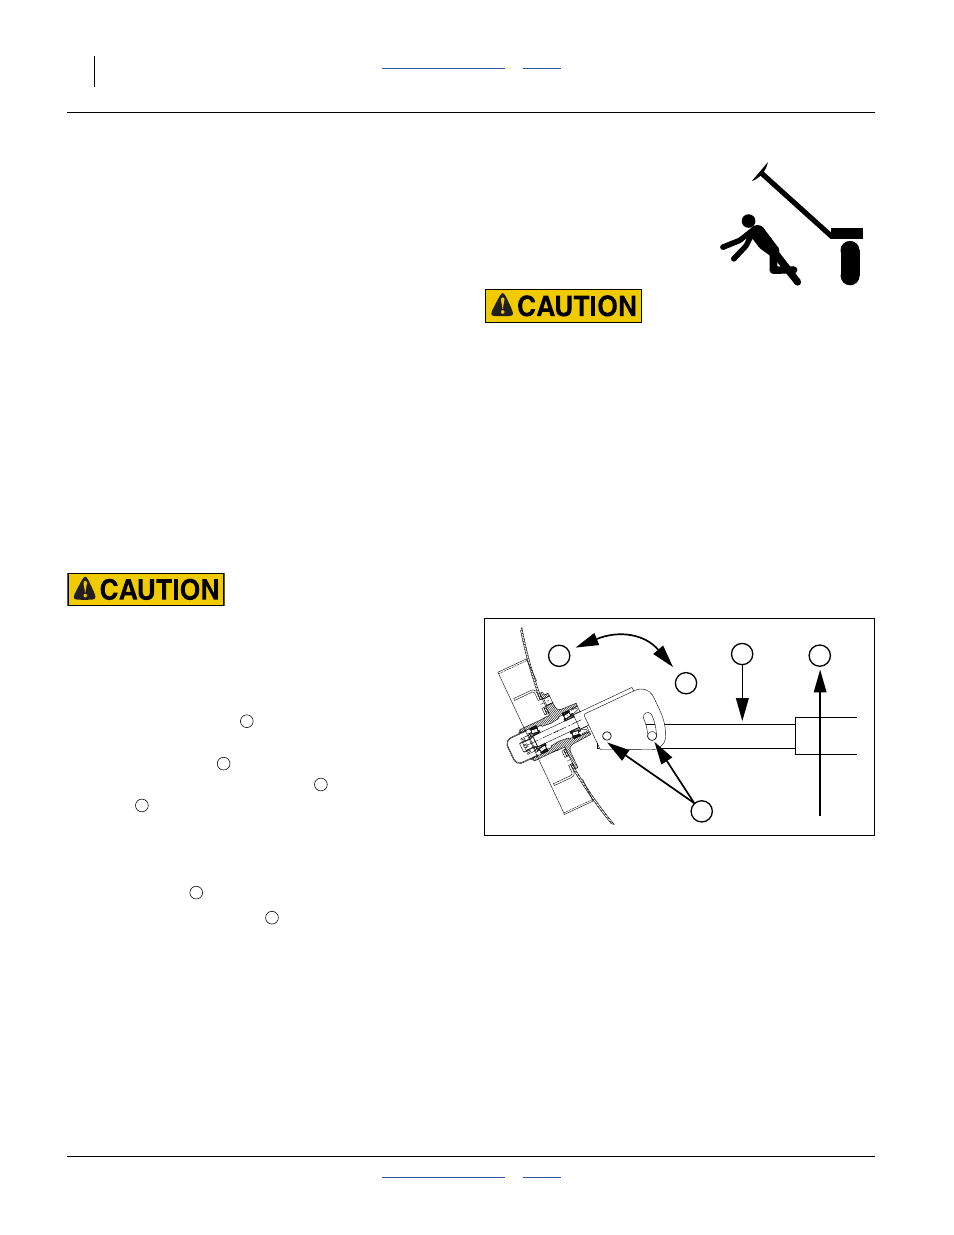
Marker Disk Adjustment
Sharp Object Hazard:
Use caution when making adjustments in this area. Marker
disks may be sharp.
Refer to Figure 68
1.
To change angle of cut, and the width of the mark,
loosen
1
⁄
2
inch bolts
holding the disk assembly.
For a wider mark
, increase the angle of the
marker with respect to the tube
. For a narrower
mark
, reduce the angle.
Note: Do not set a marker angle wider than need to make
a useful mark. Excess angle increases wear on all
marker components.
2.
Tighten bolts
.
Note: The direction of travel
tends to drive the disk
angle to Wide. If bolts are not tight enough, or
loosen over time, the disk will slip into the Wide
mark configuration.
Overhead Sudden Marker Movement Hazard:
You may be injured if hit by a folding or unfolding marker.
Markers may fall quickly and unexpectedly if the hydraulics
fail. Never allow anyone near the planter when folding or
unfolding the markers.
Figure 68
Marker Disk Angle
11757
T
2
1
N
W
T
2
W
1
N
2
T